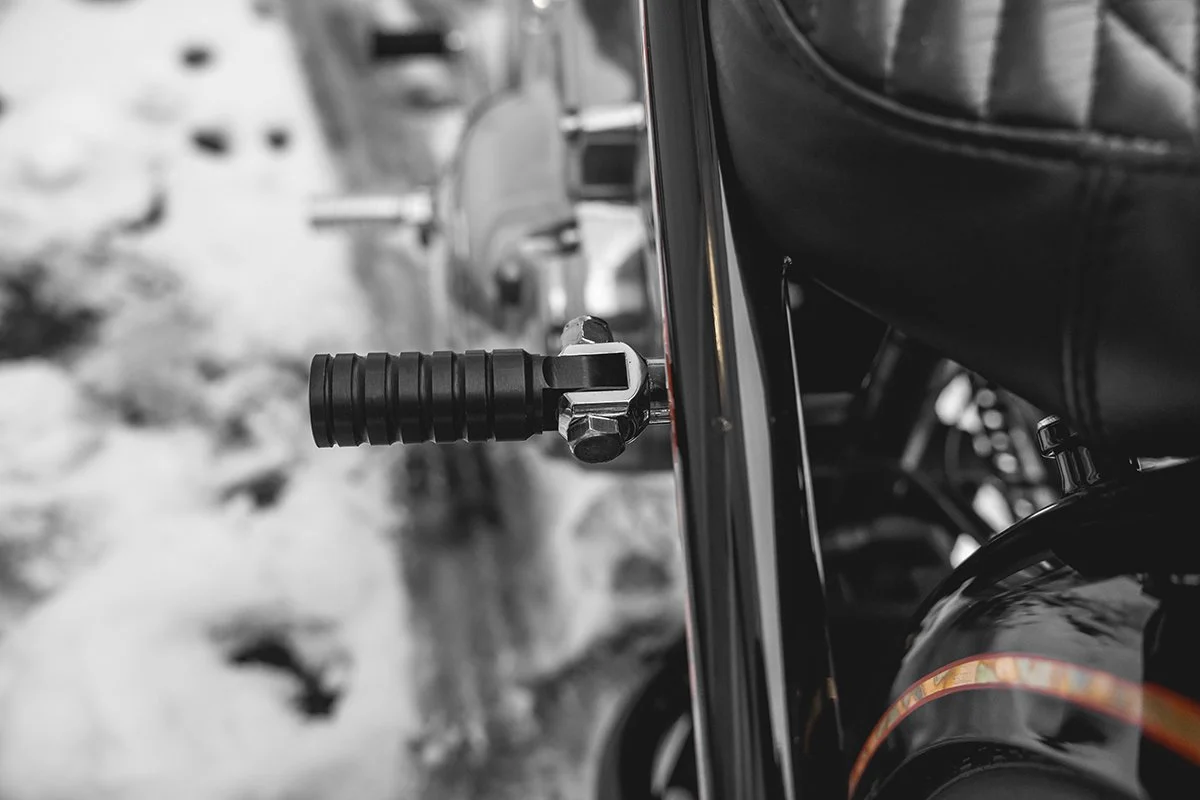
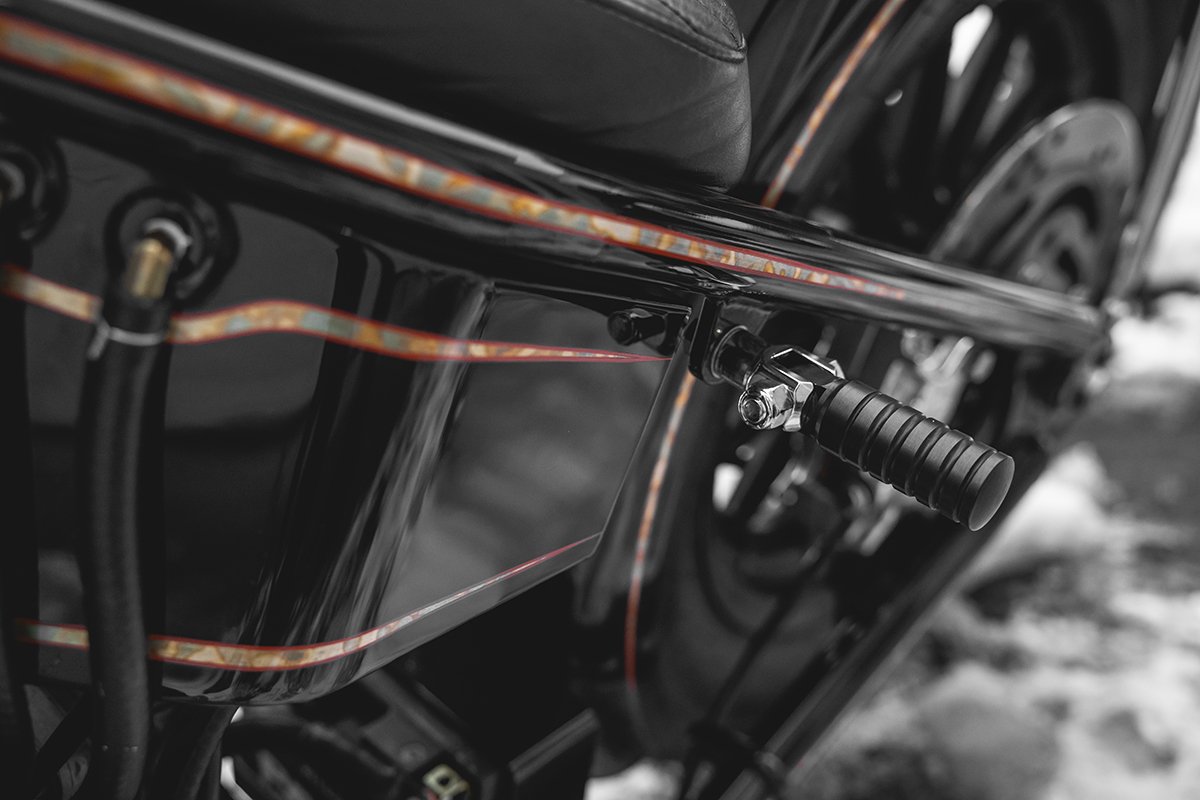
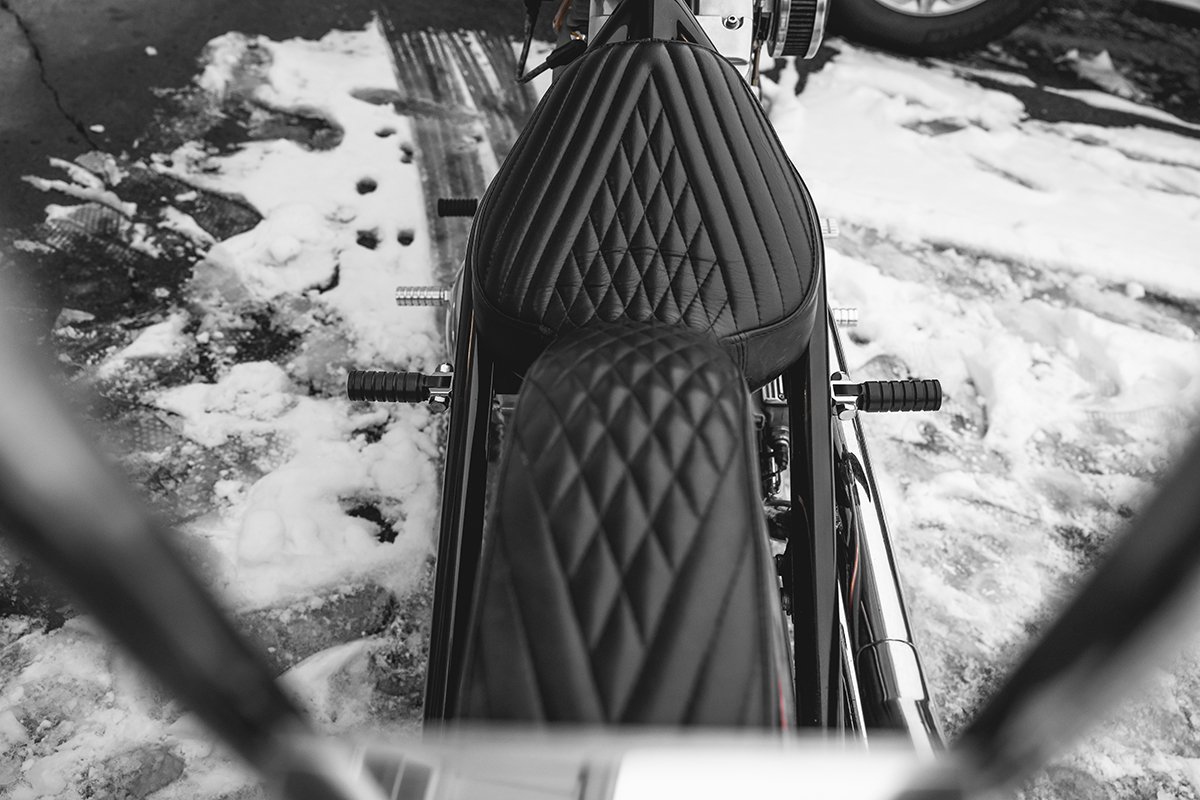
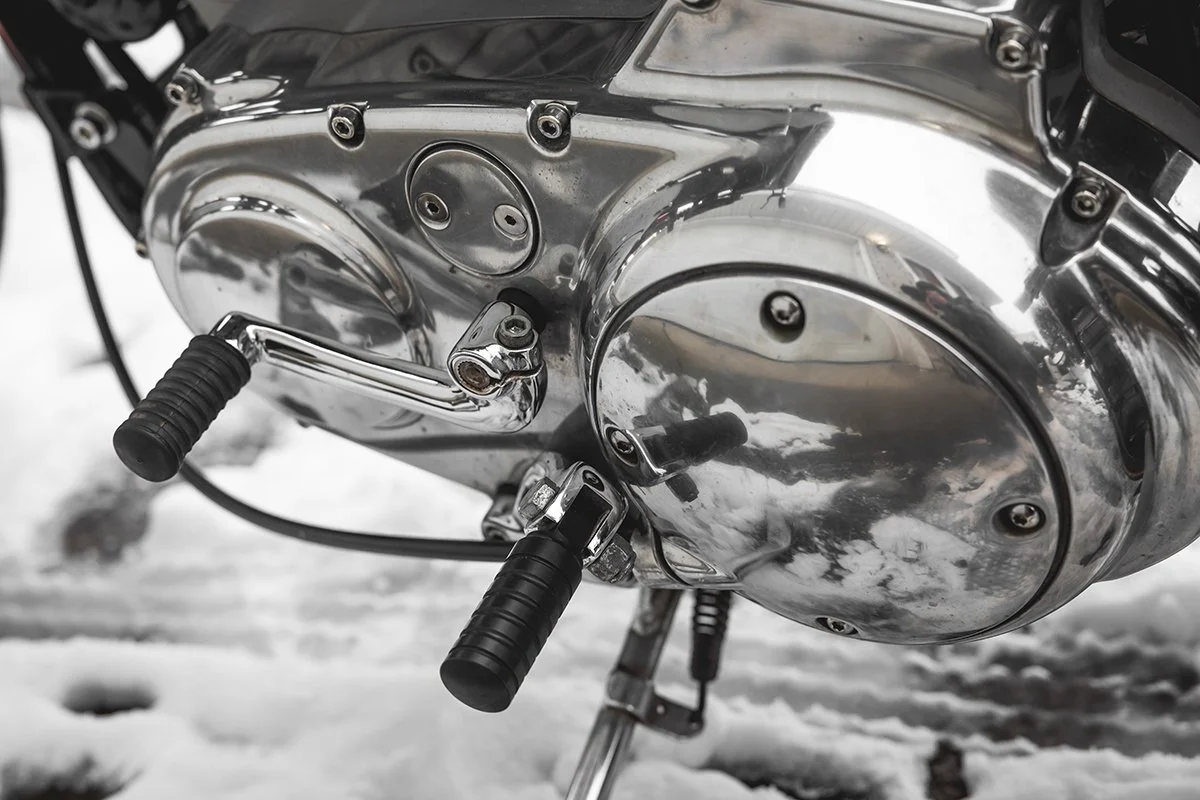
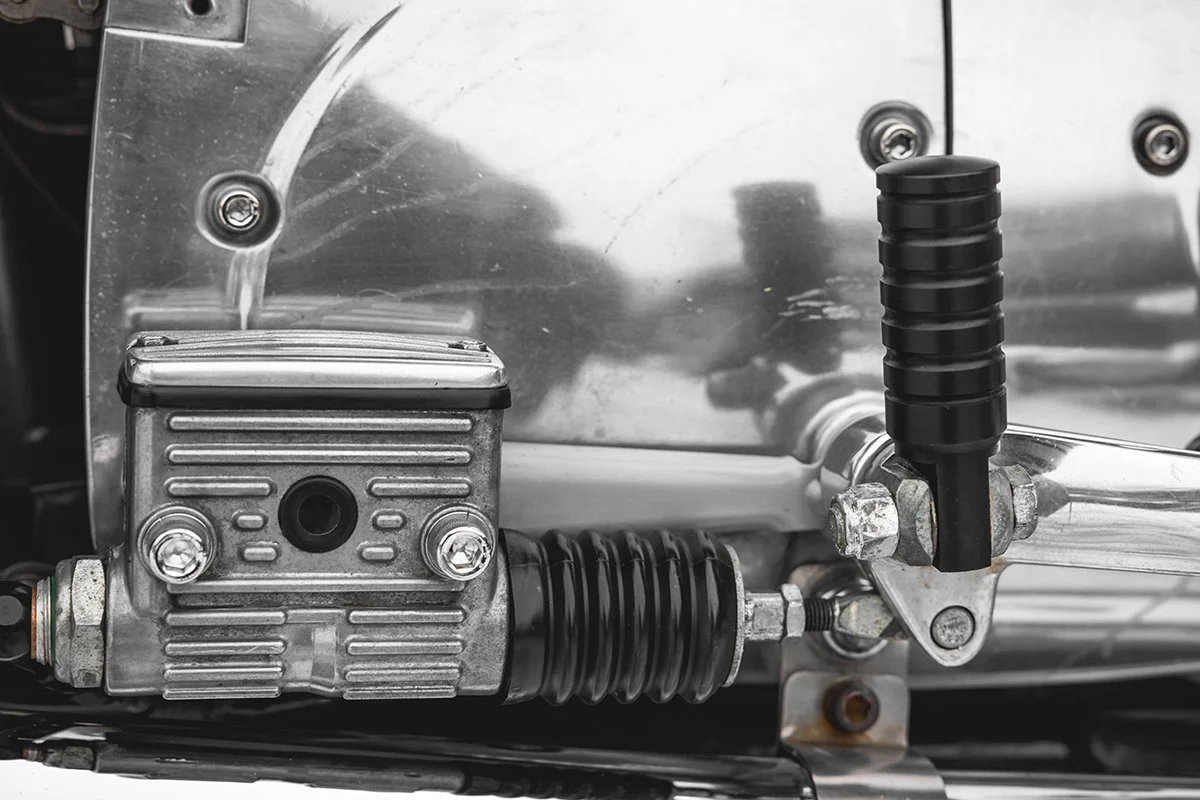
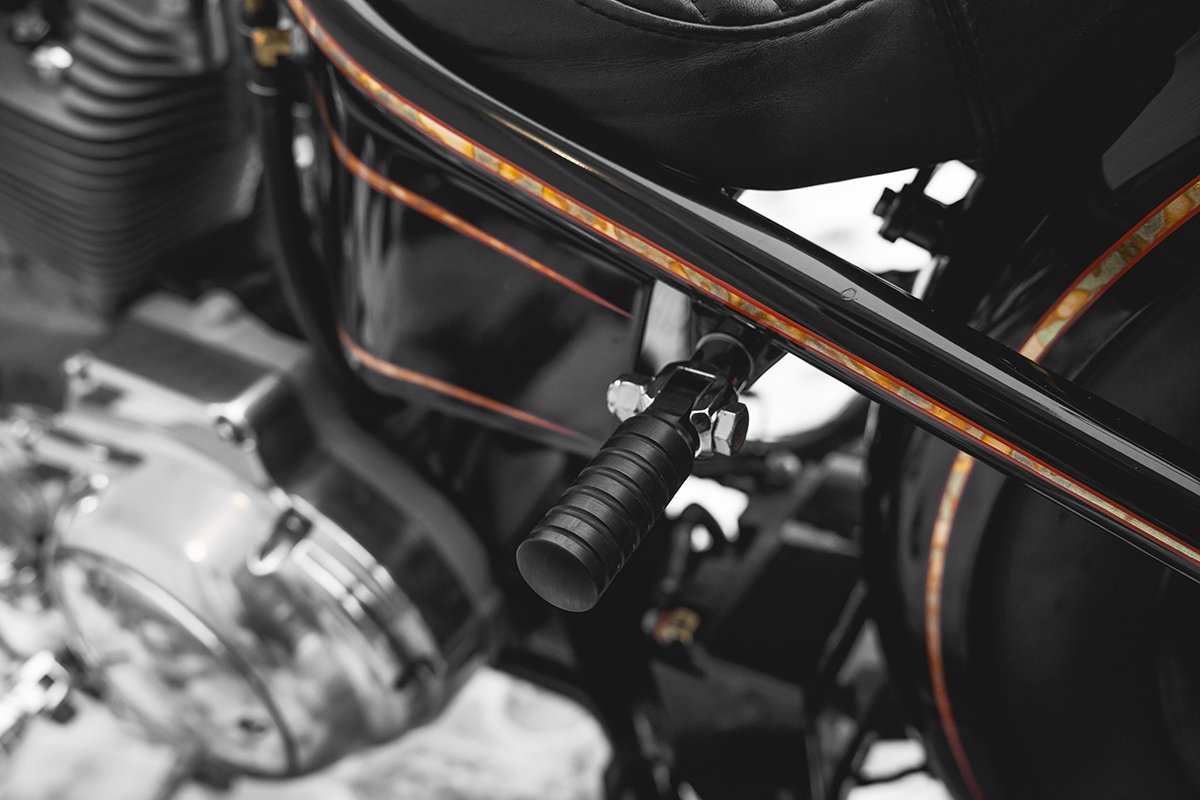
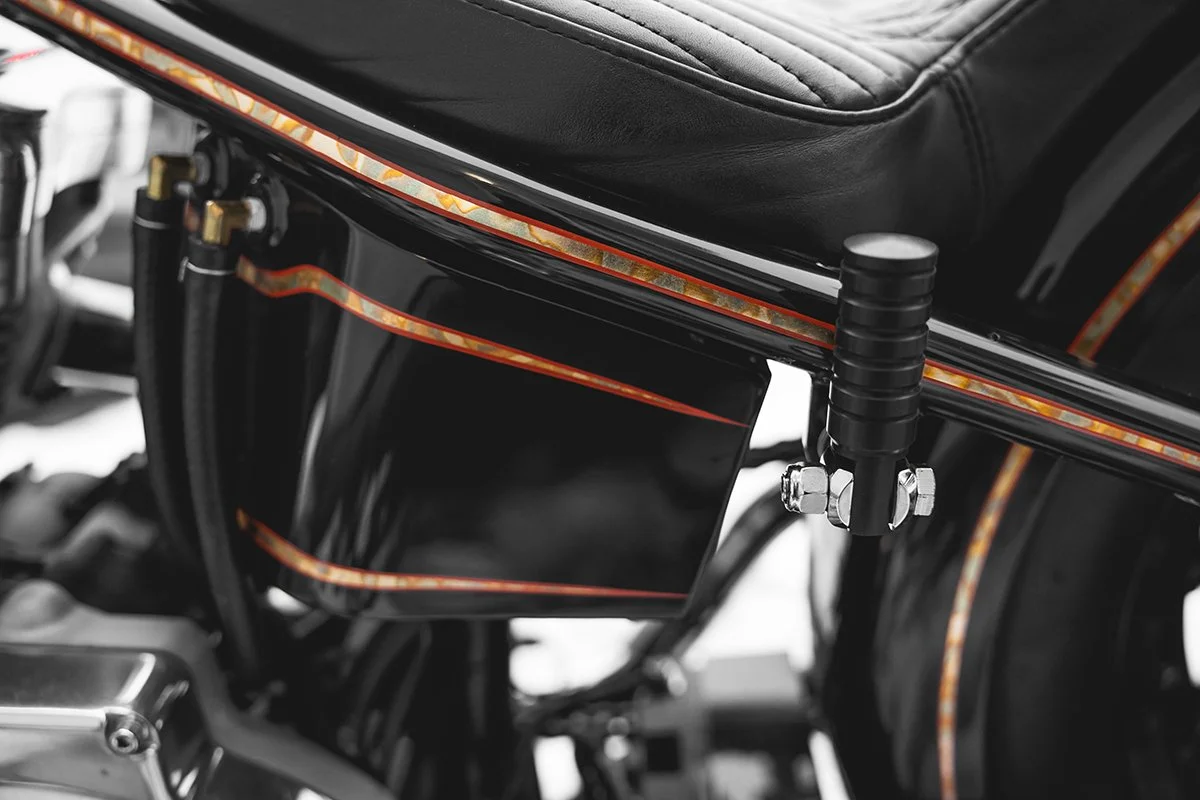
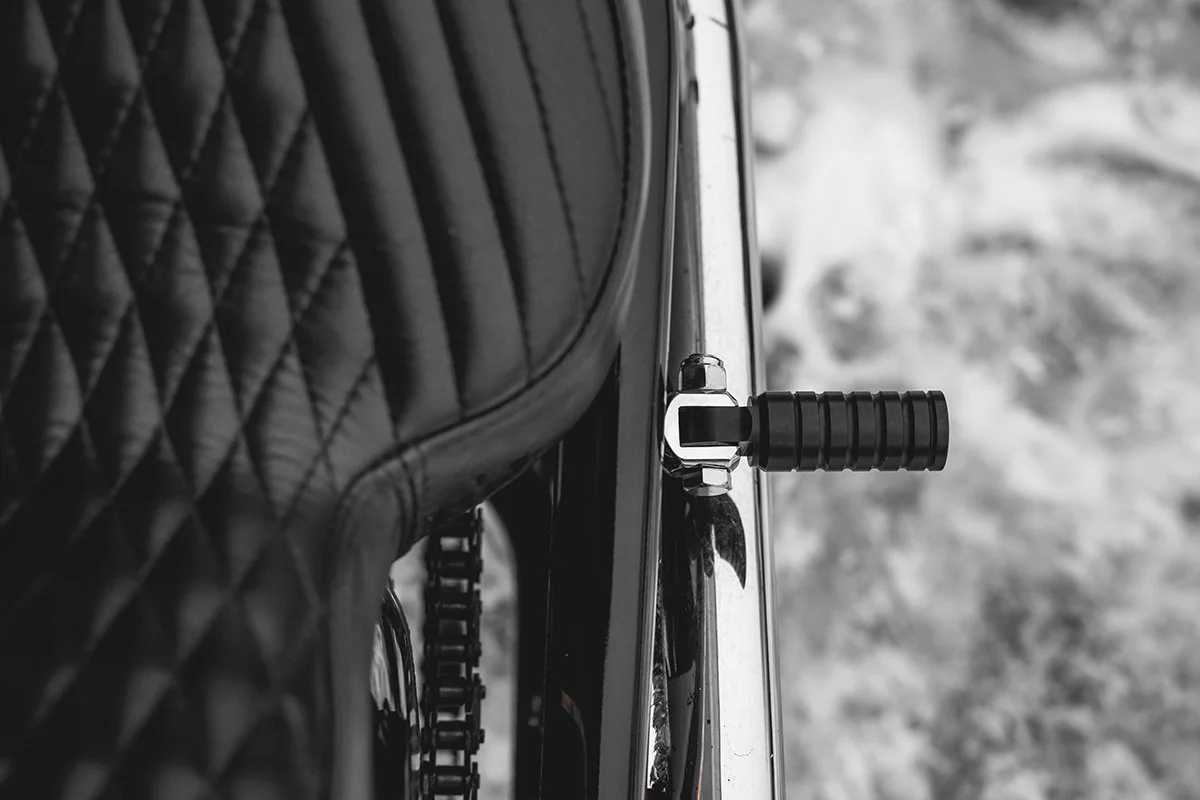
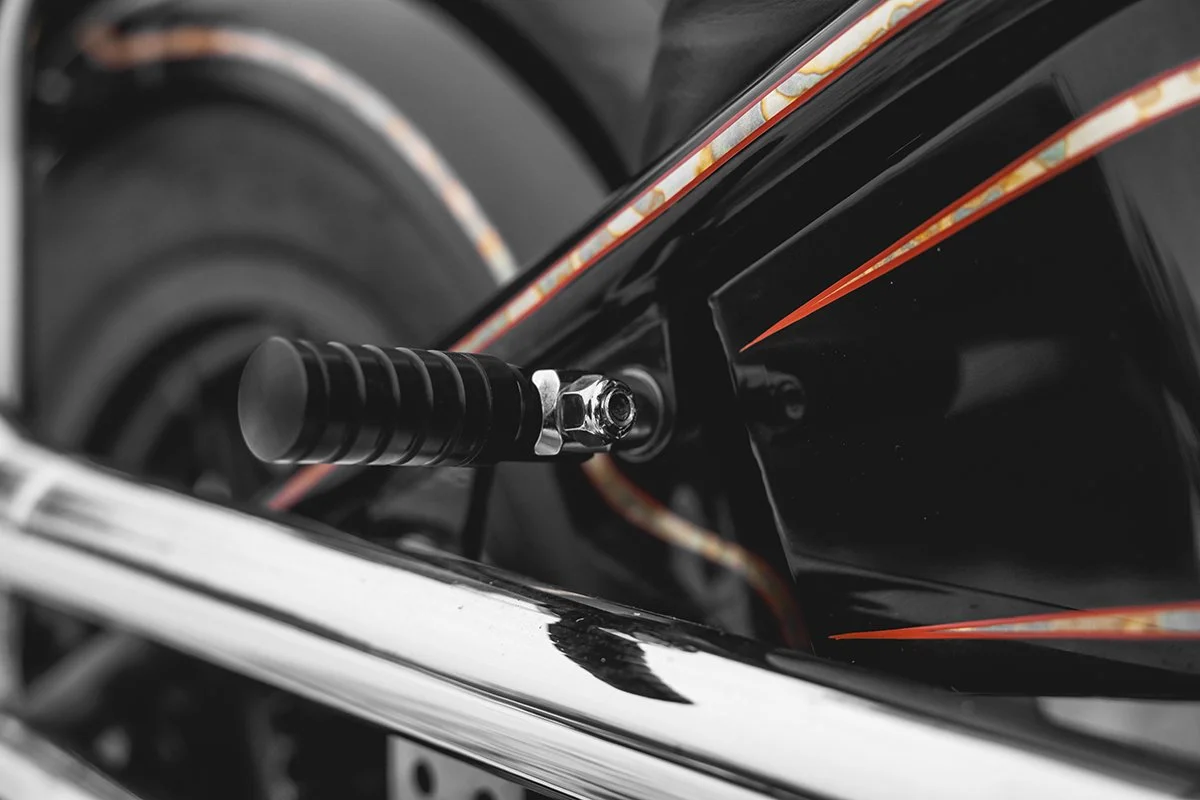
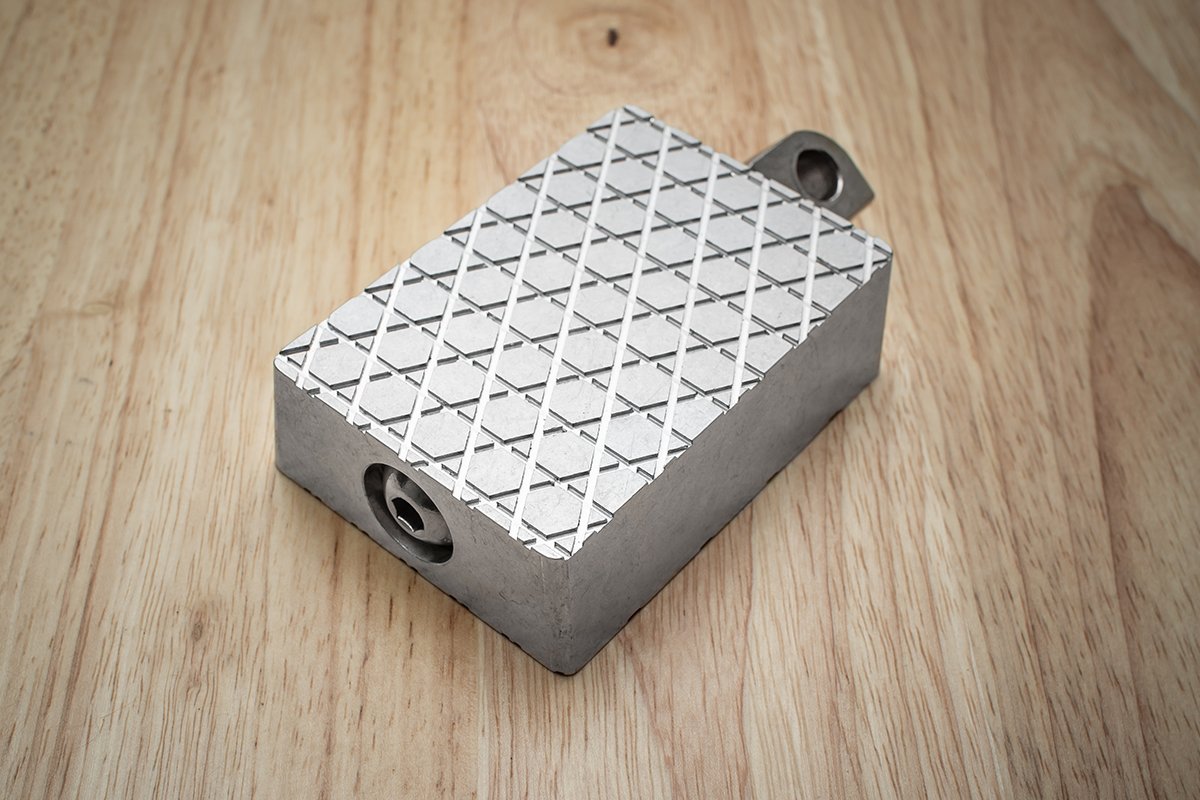
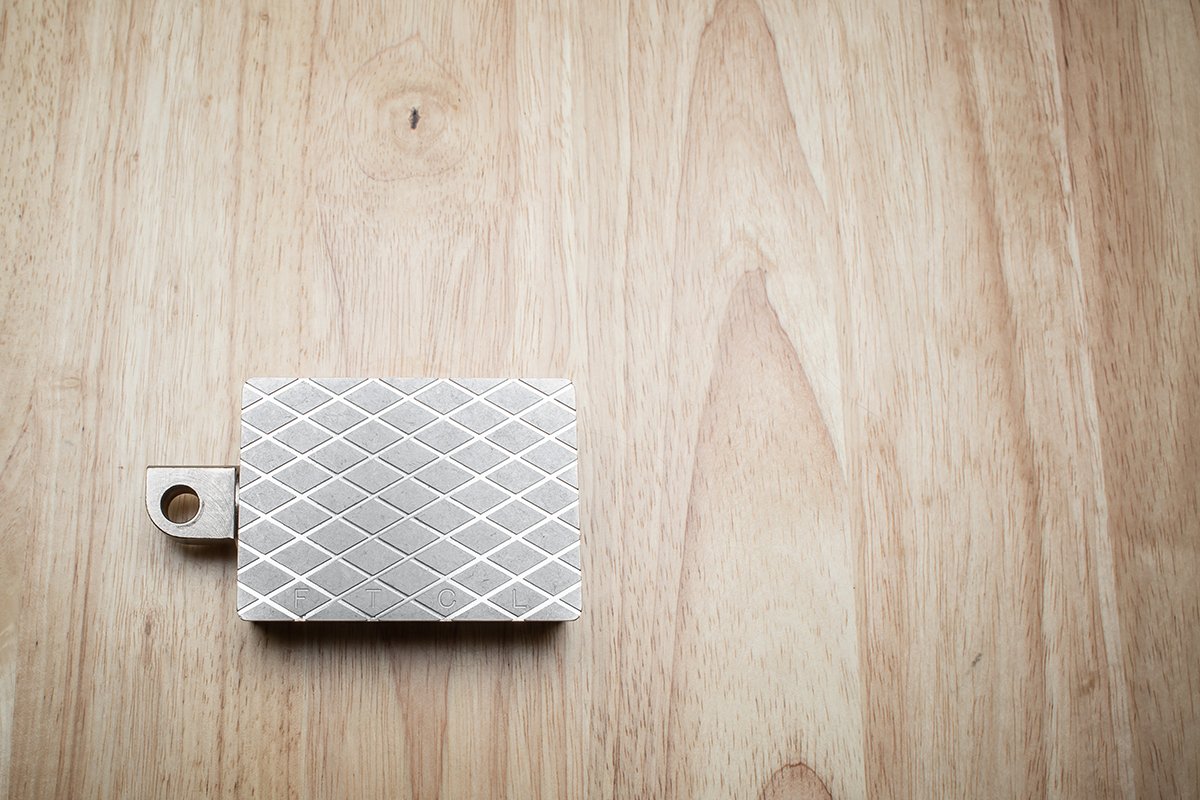
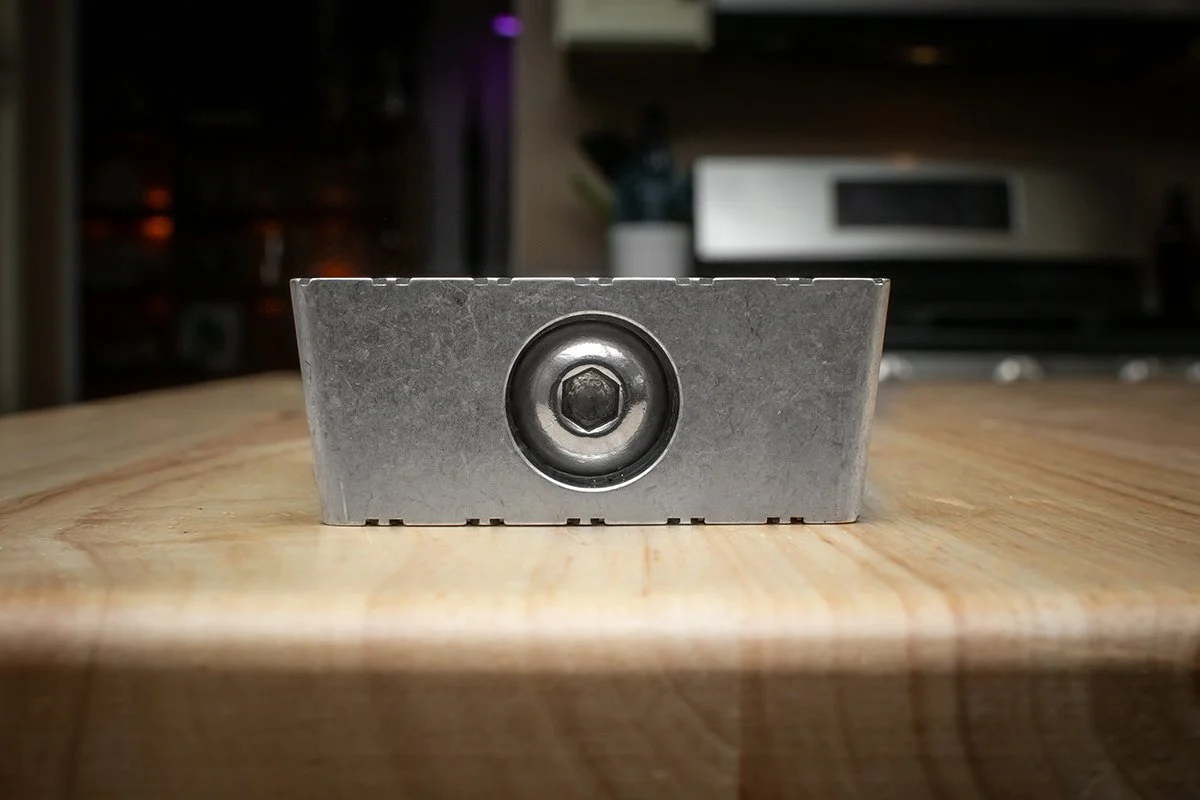
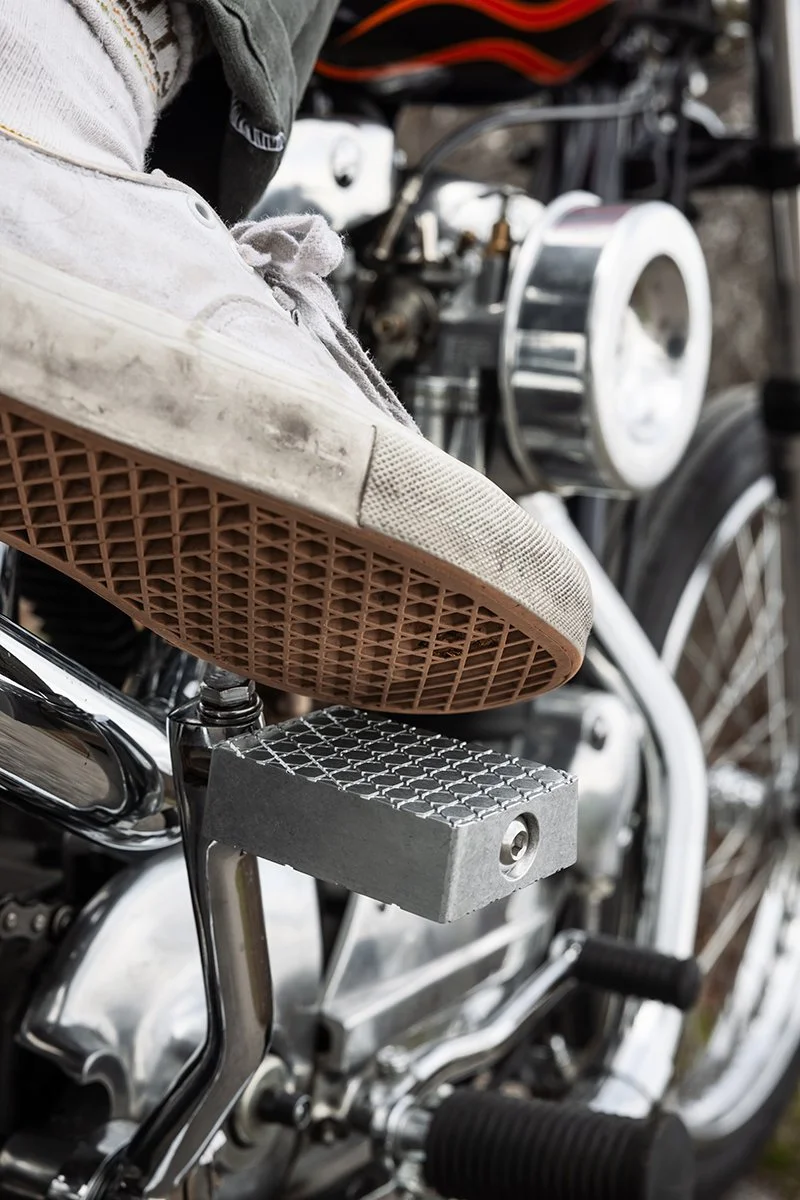
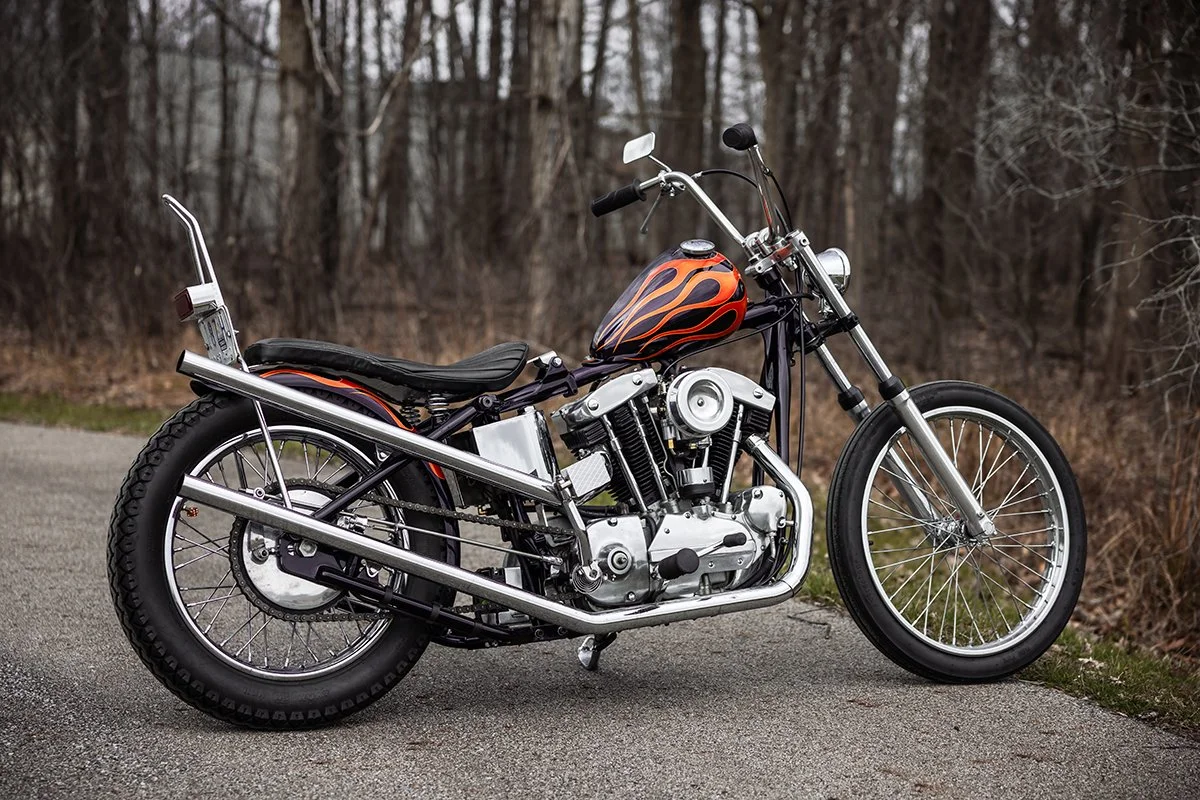
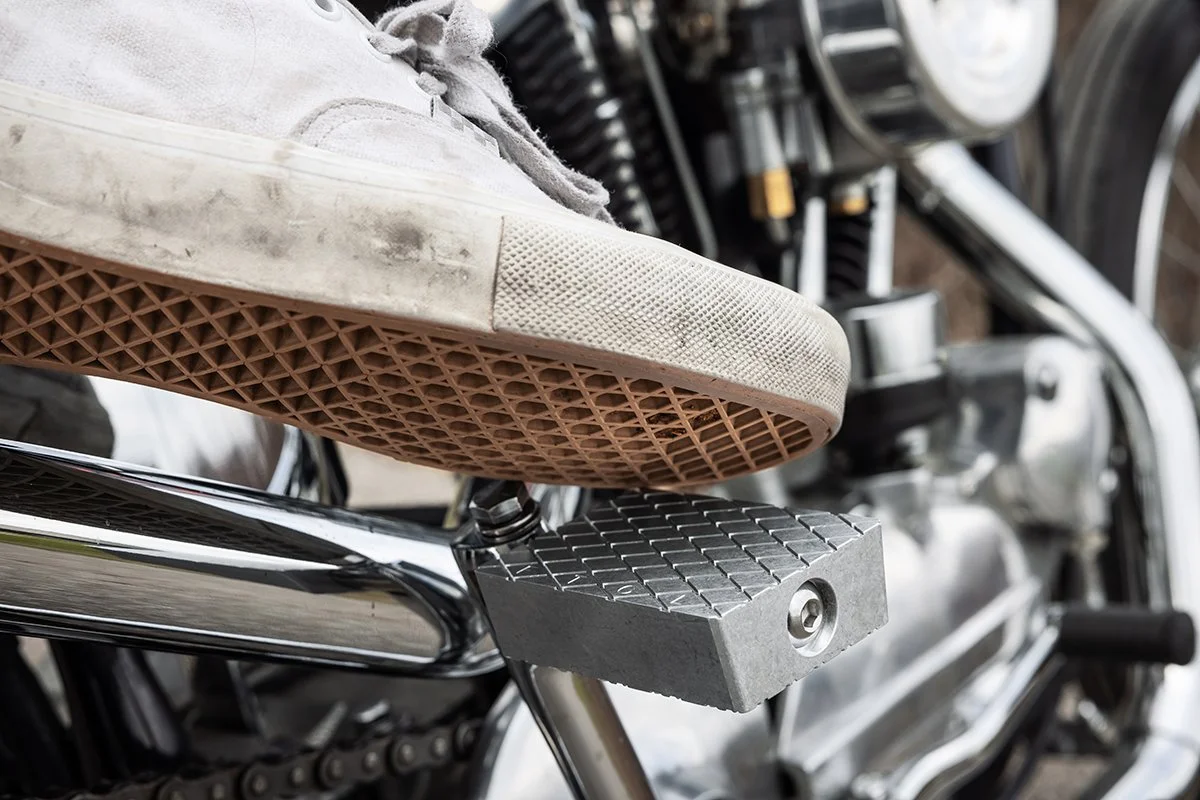
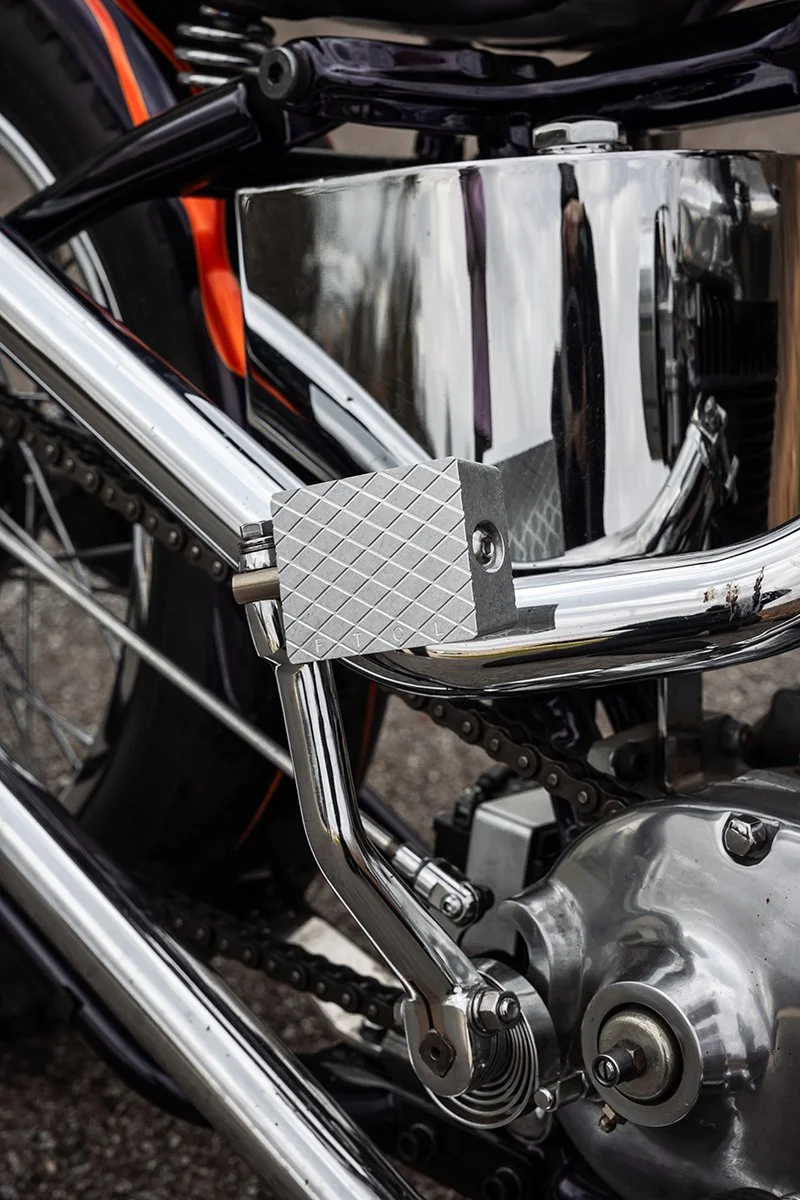
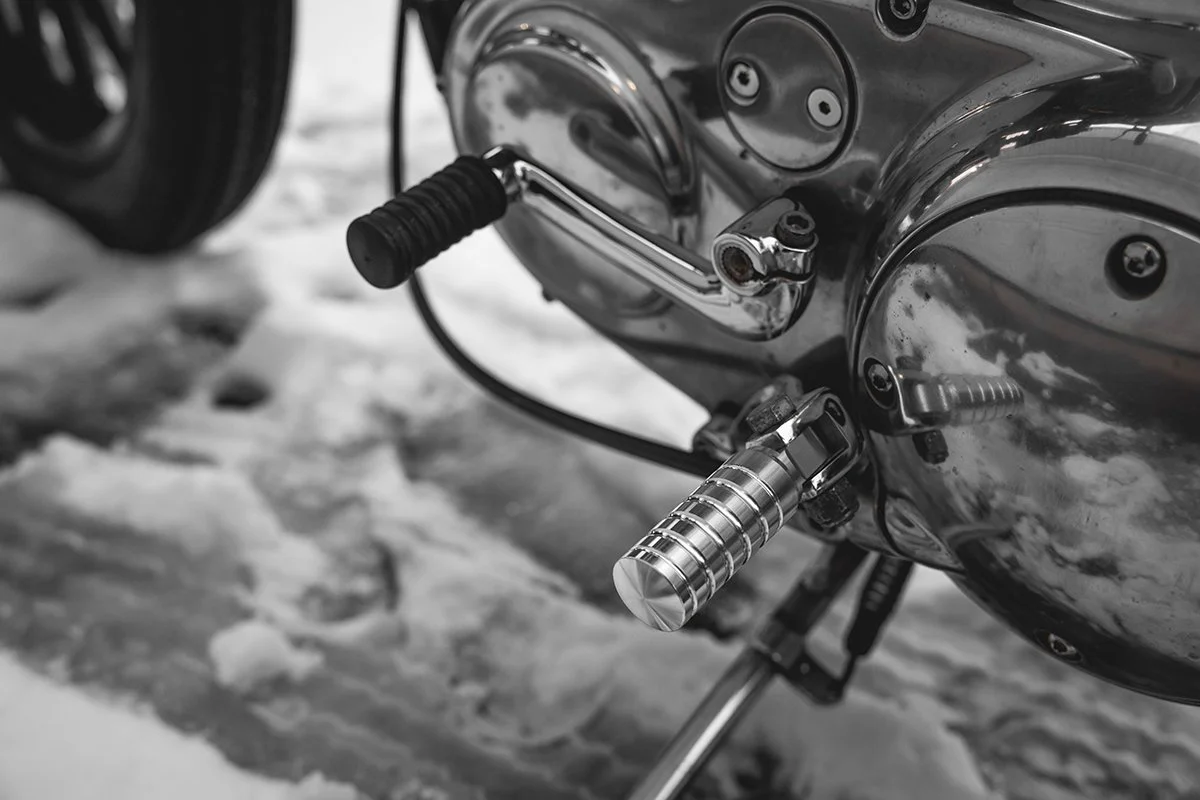
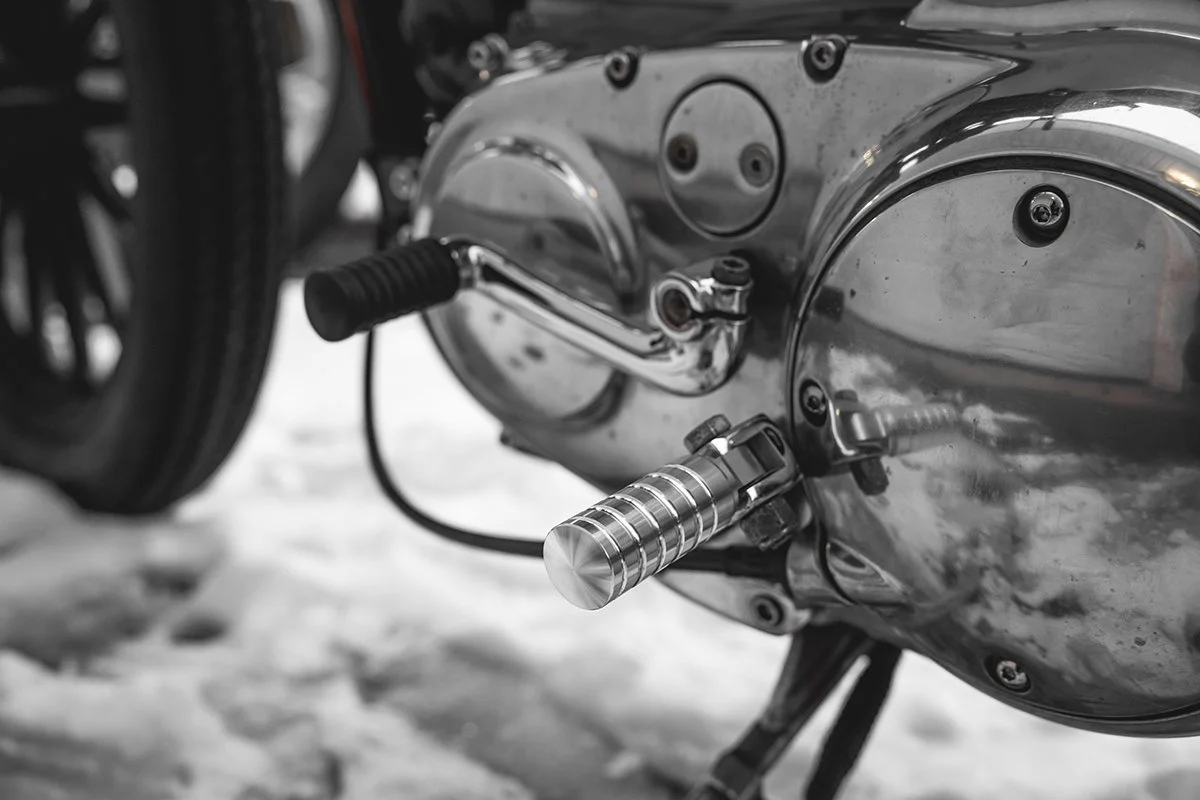
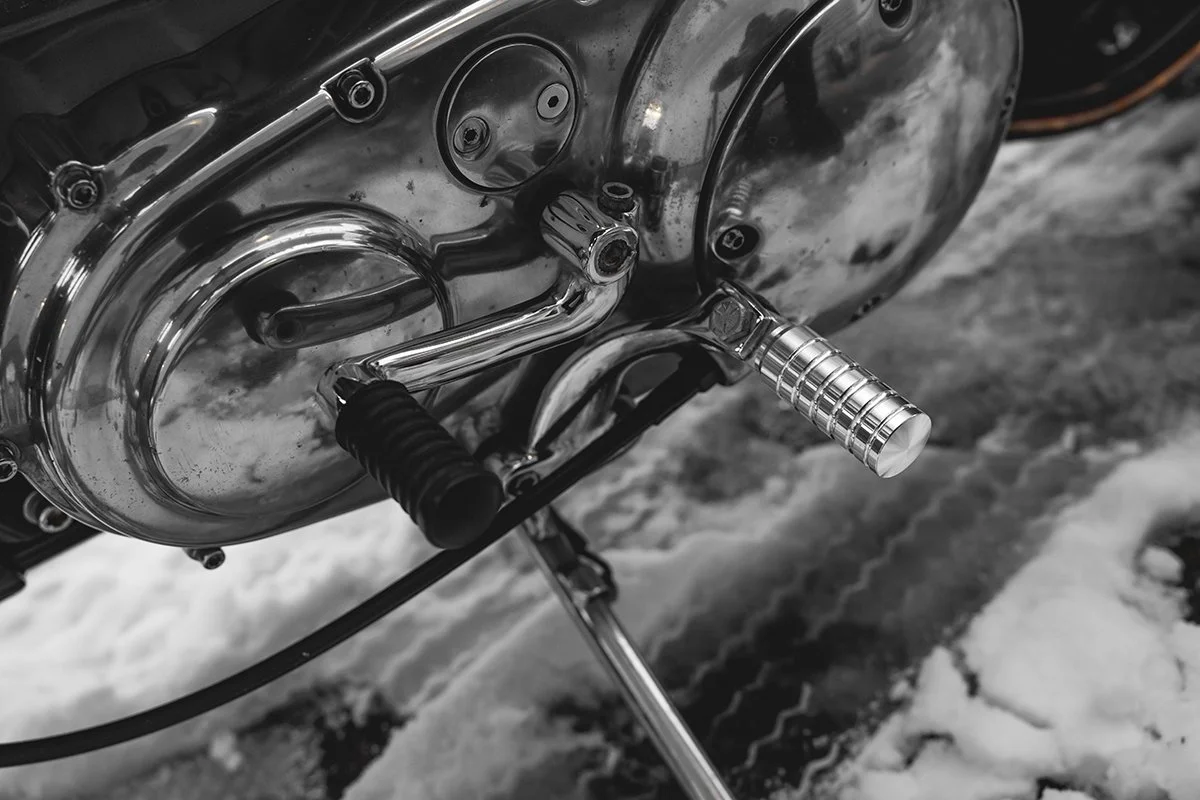
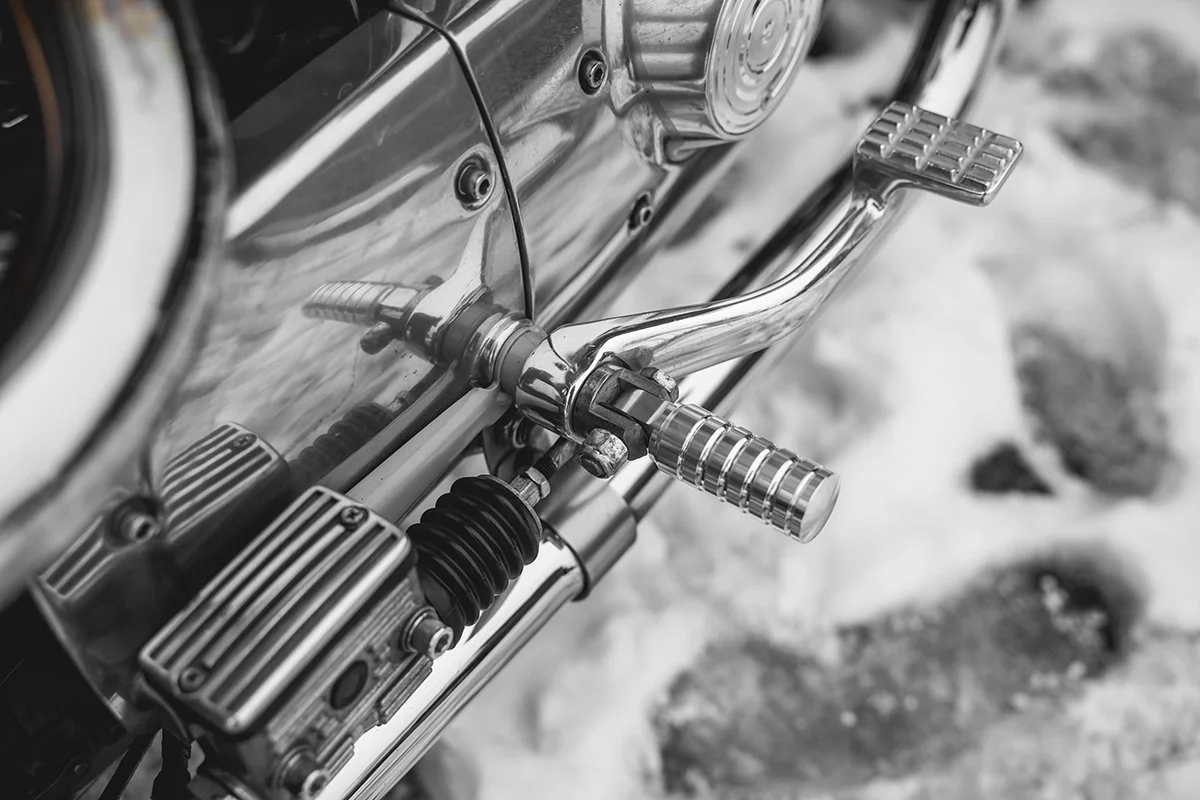
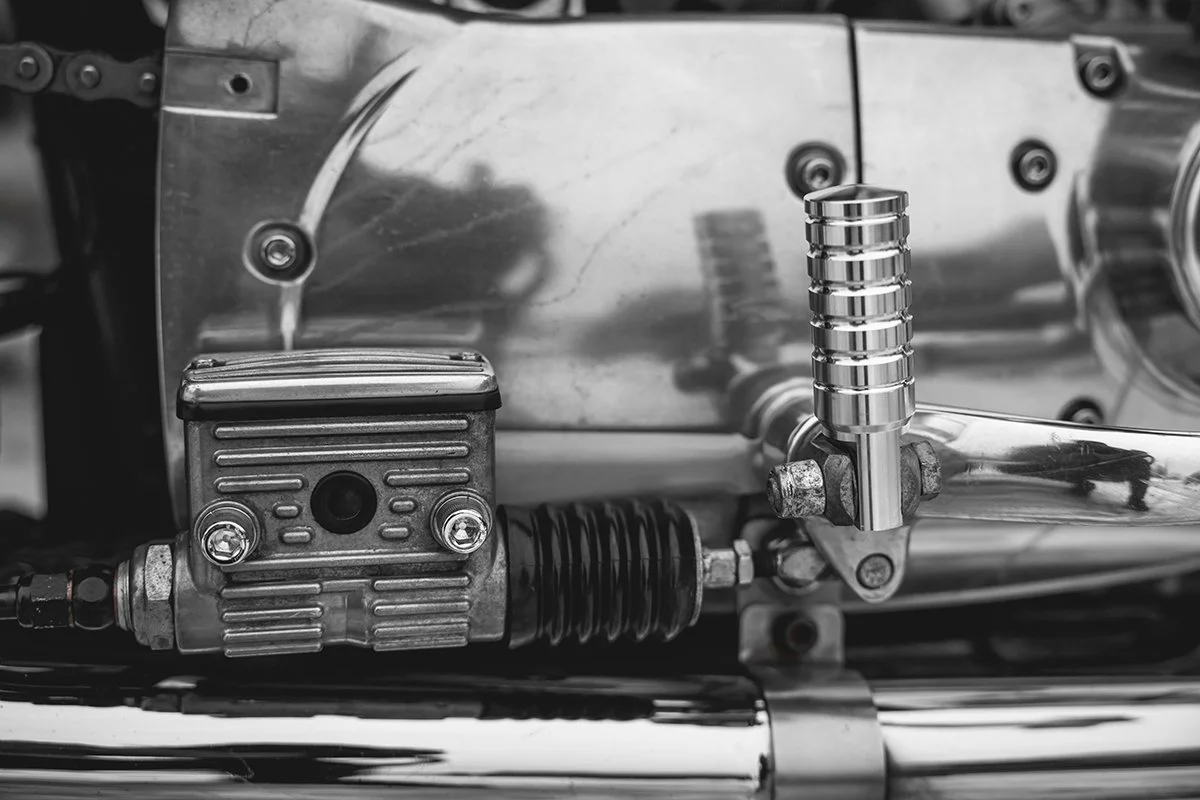
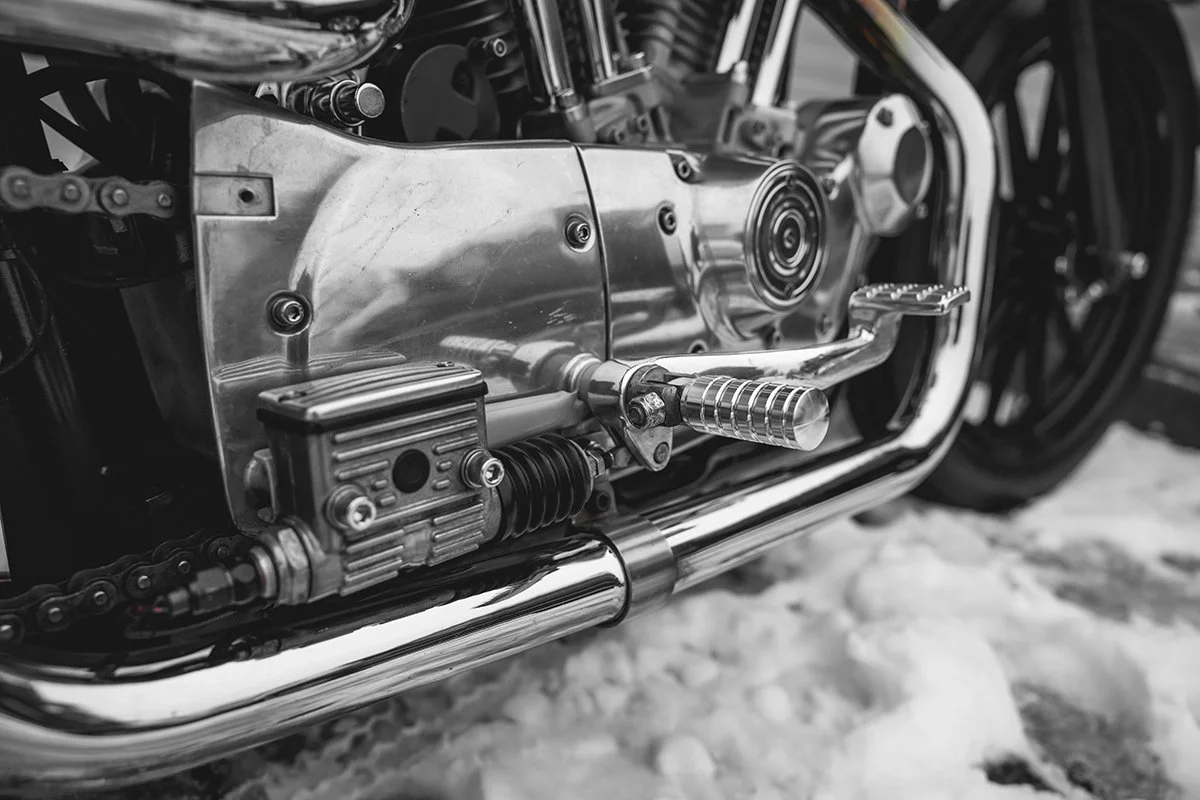
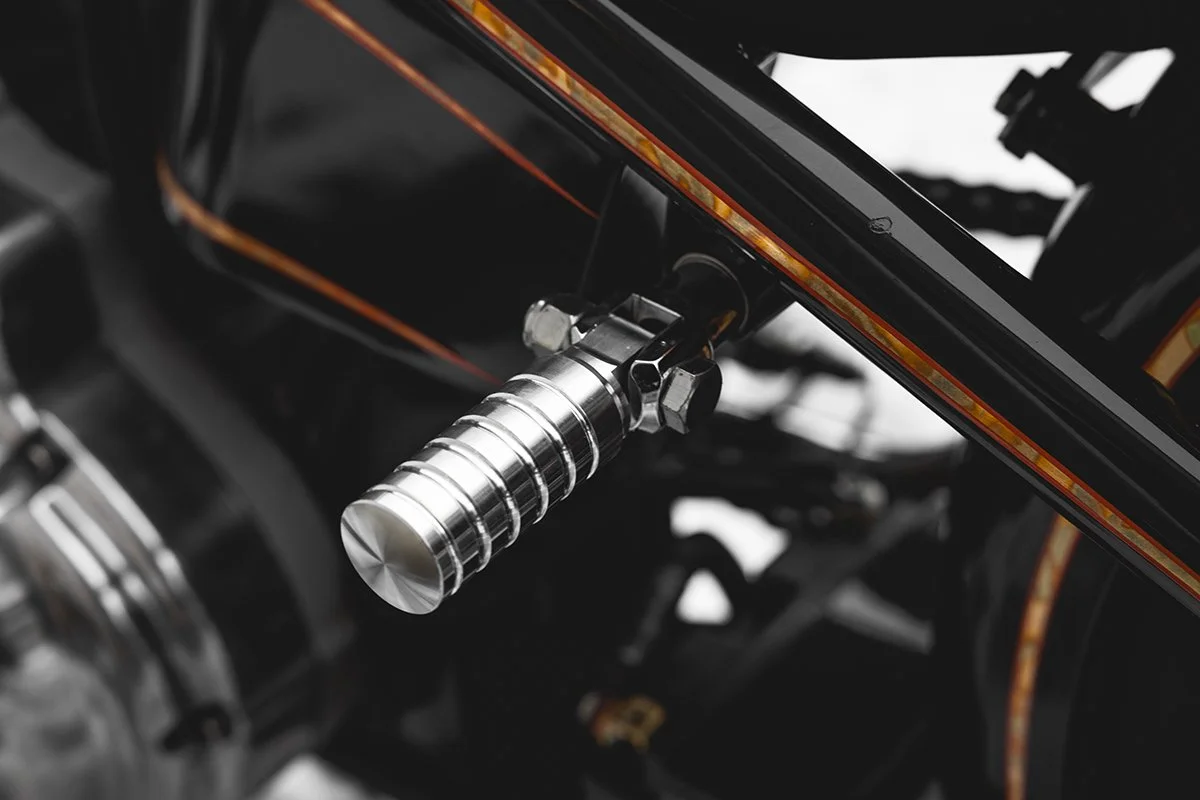
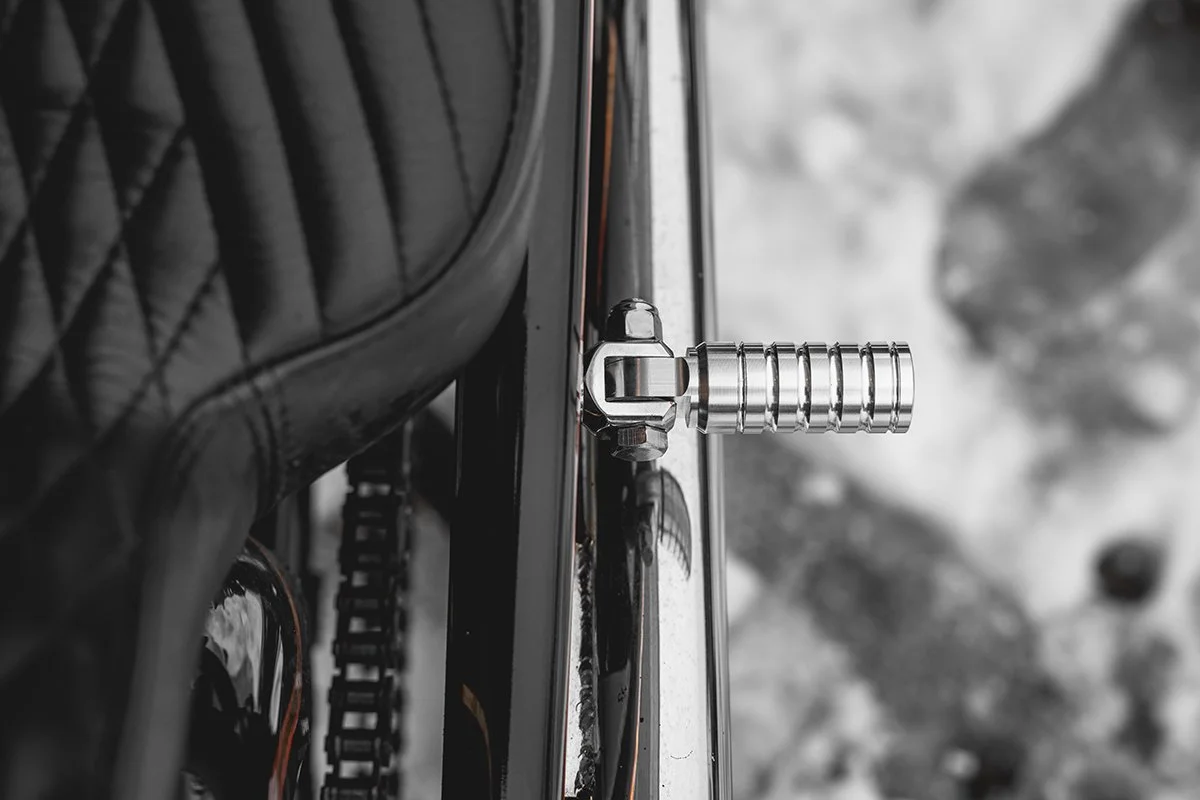
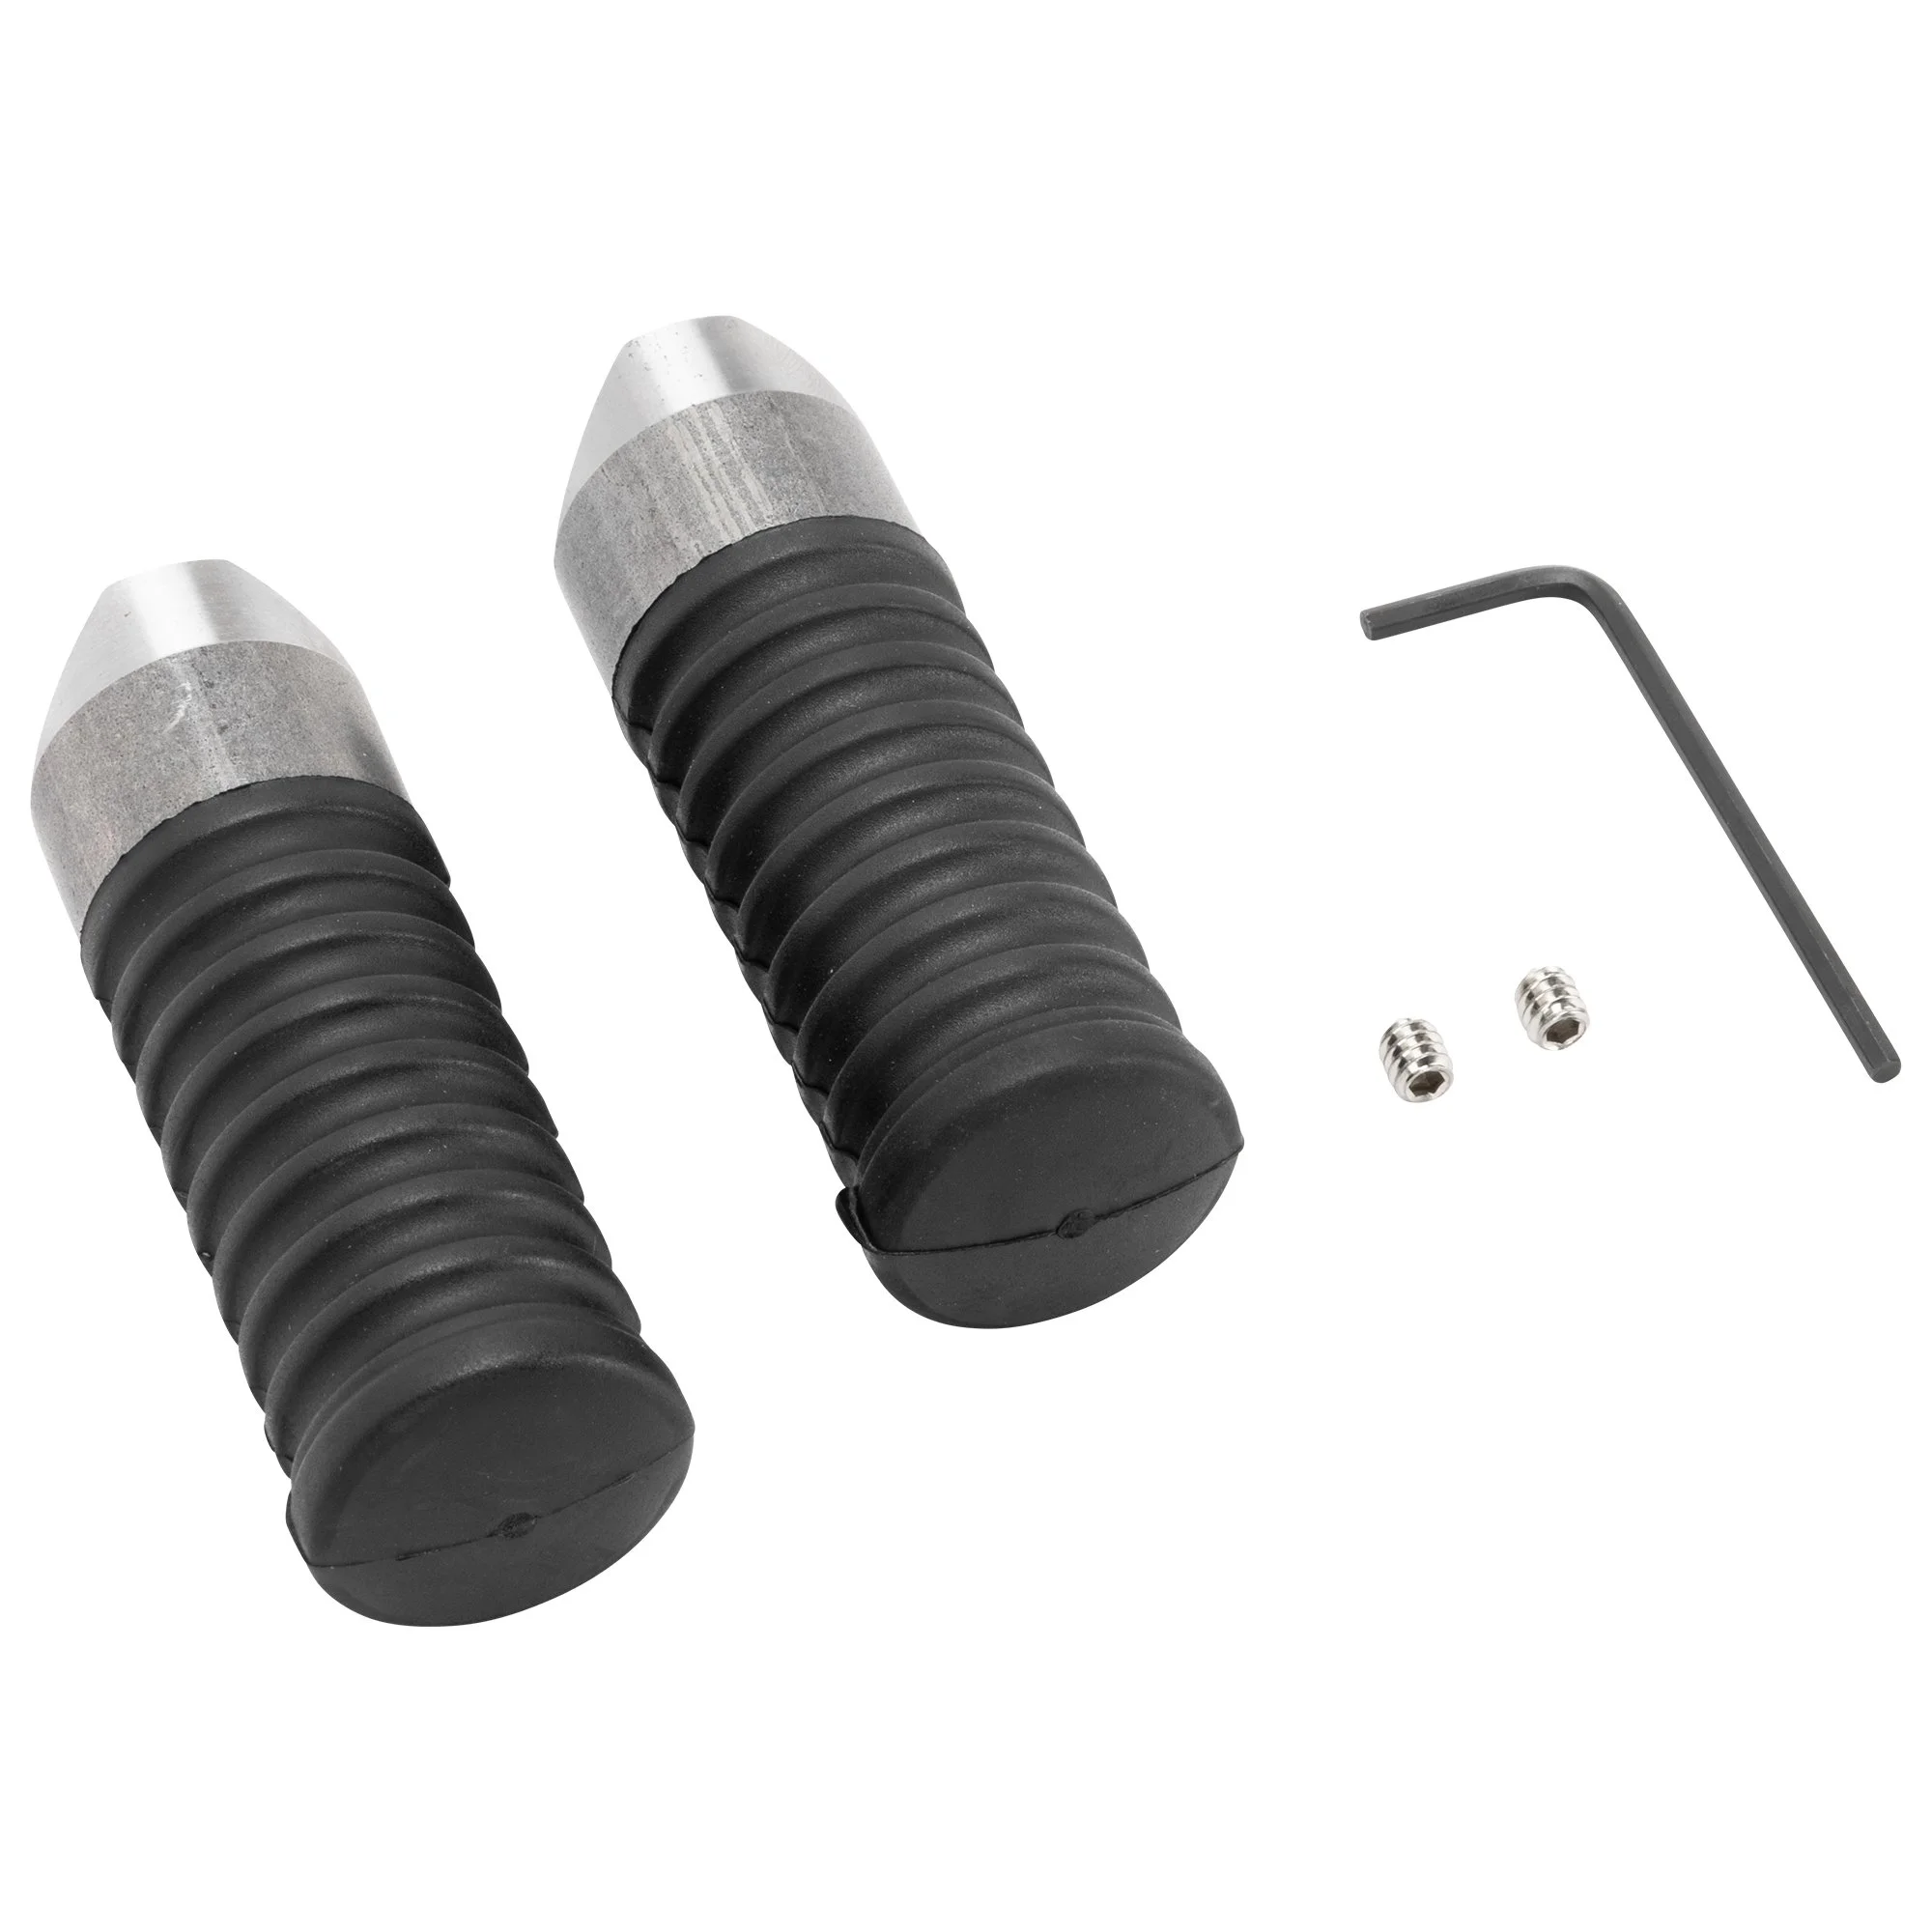
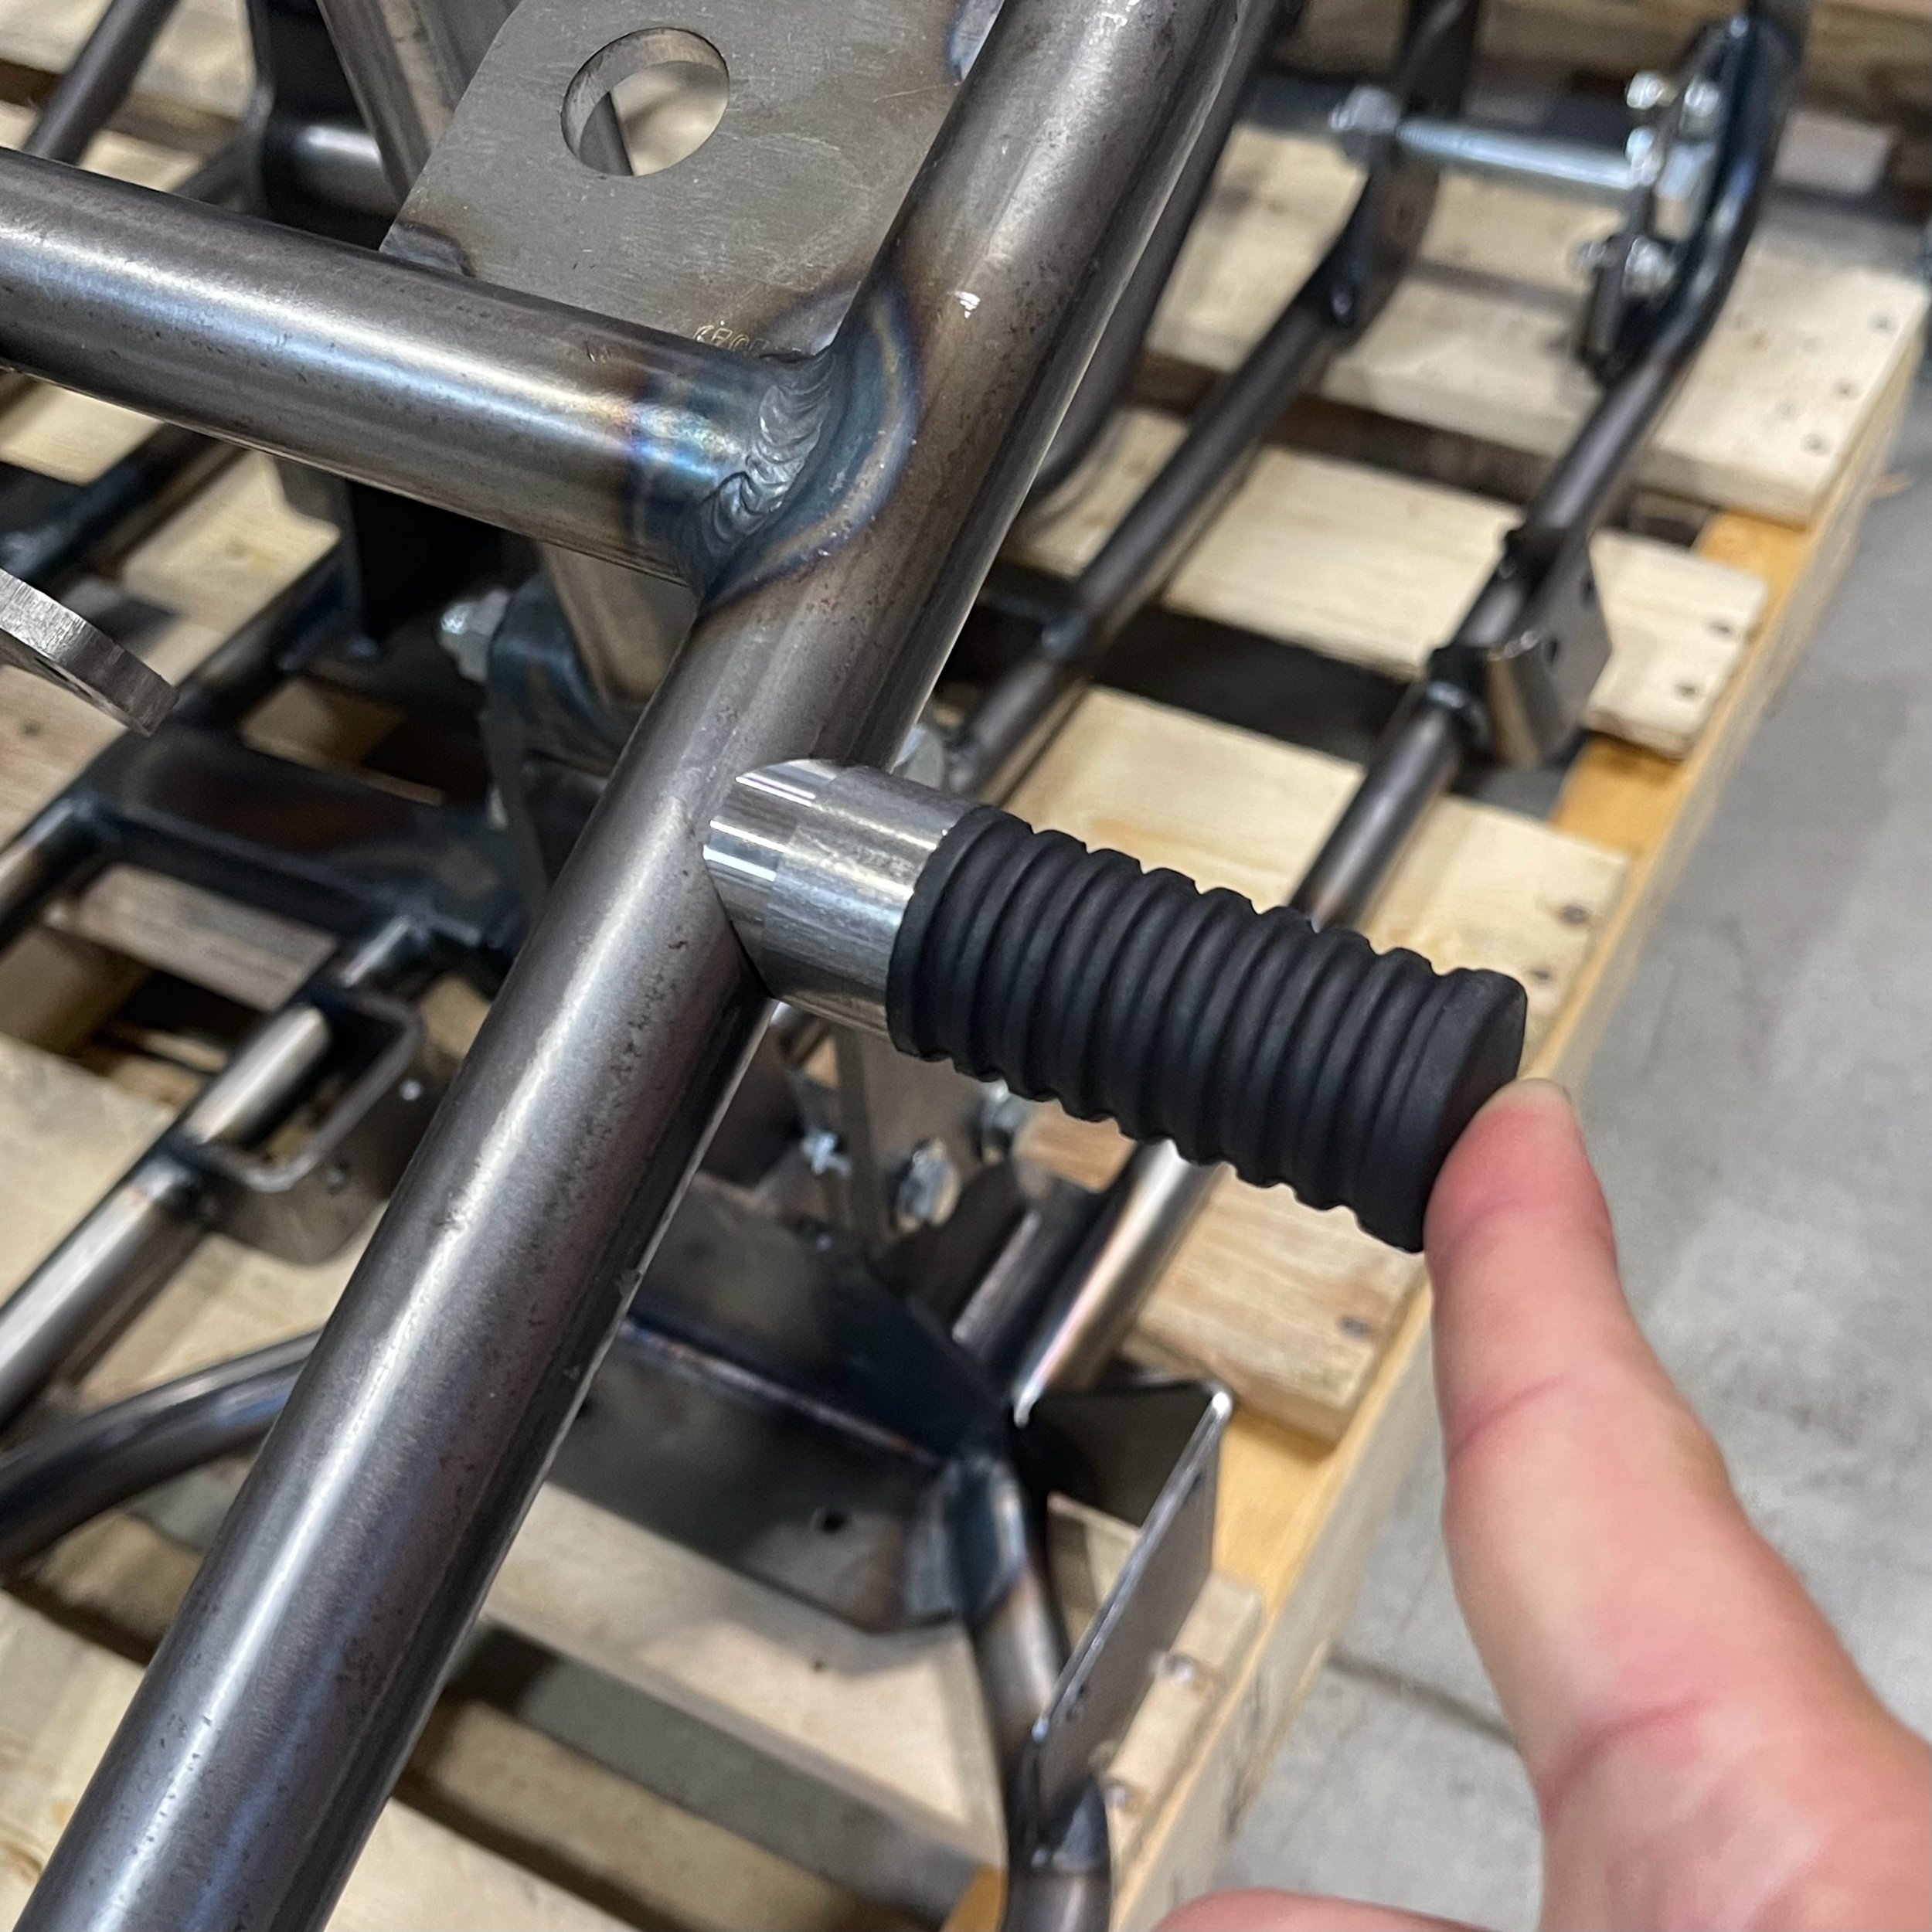
Planning your next chopper build but unsure whether to run passenger pegs or some other alternative? Most options out there are bulky and long—but not these. The Weld-on SHoRTi Passenger Foot Rests offer a sleek, minimalist look without sacrificing function.
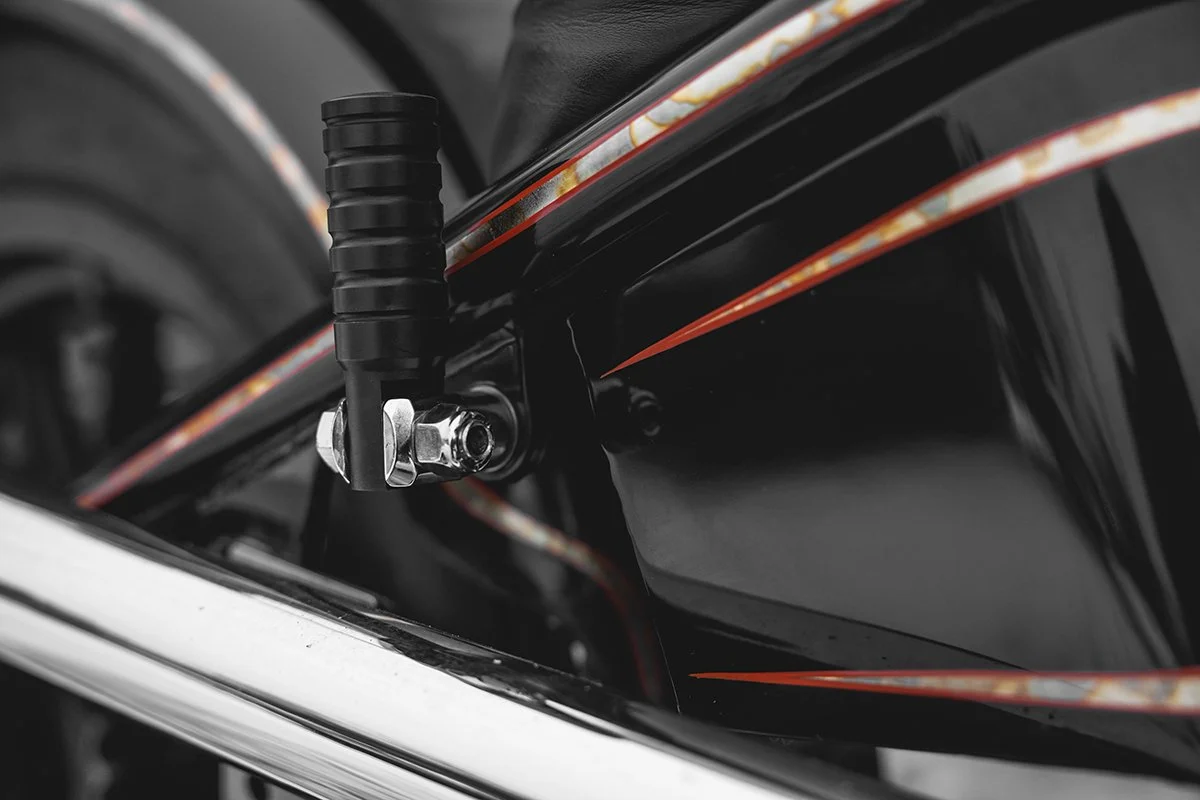
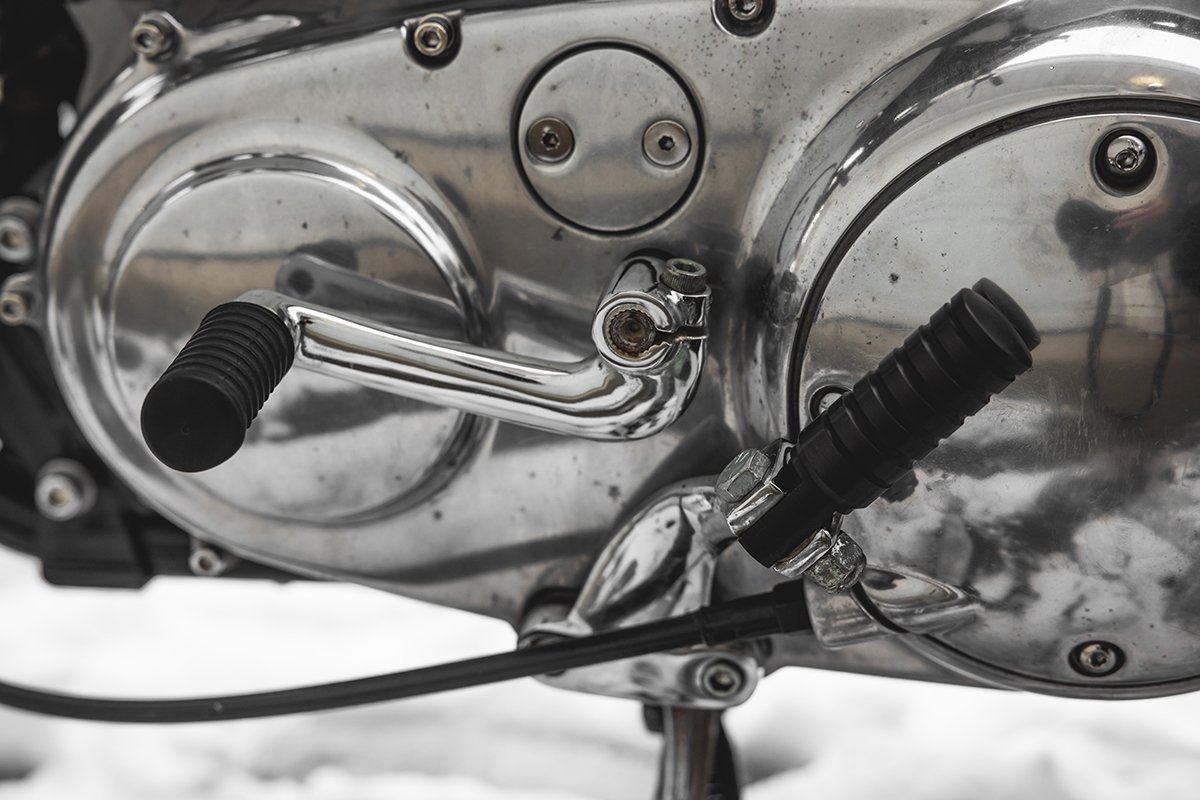
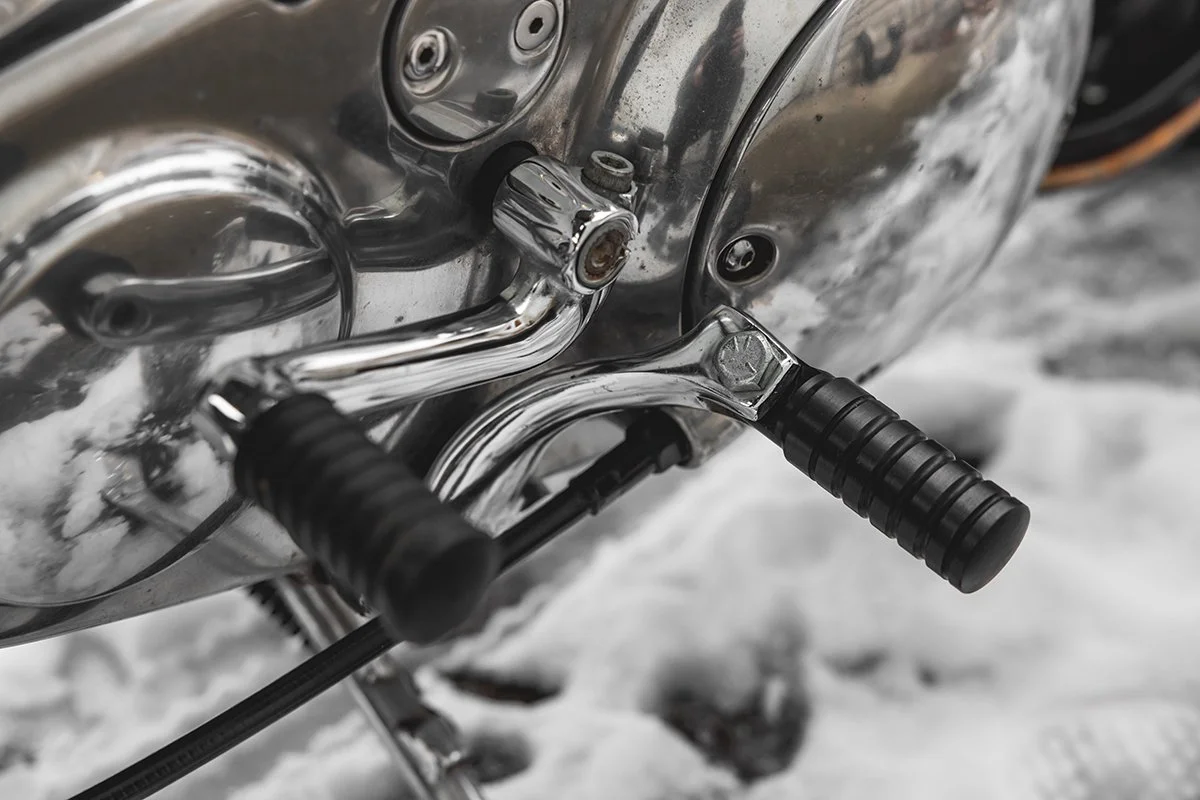
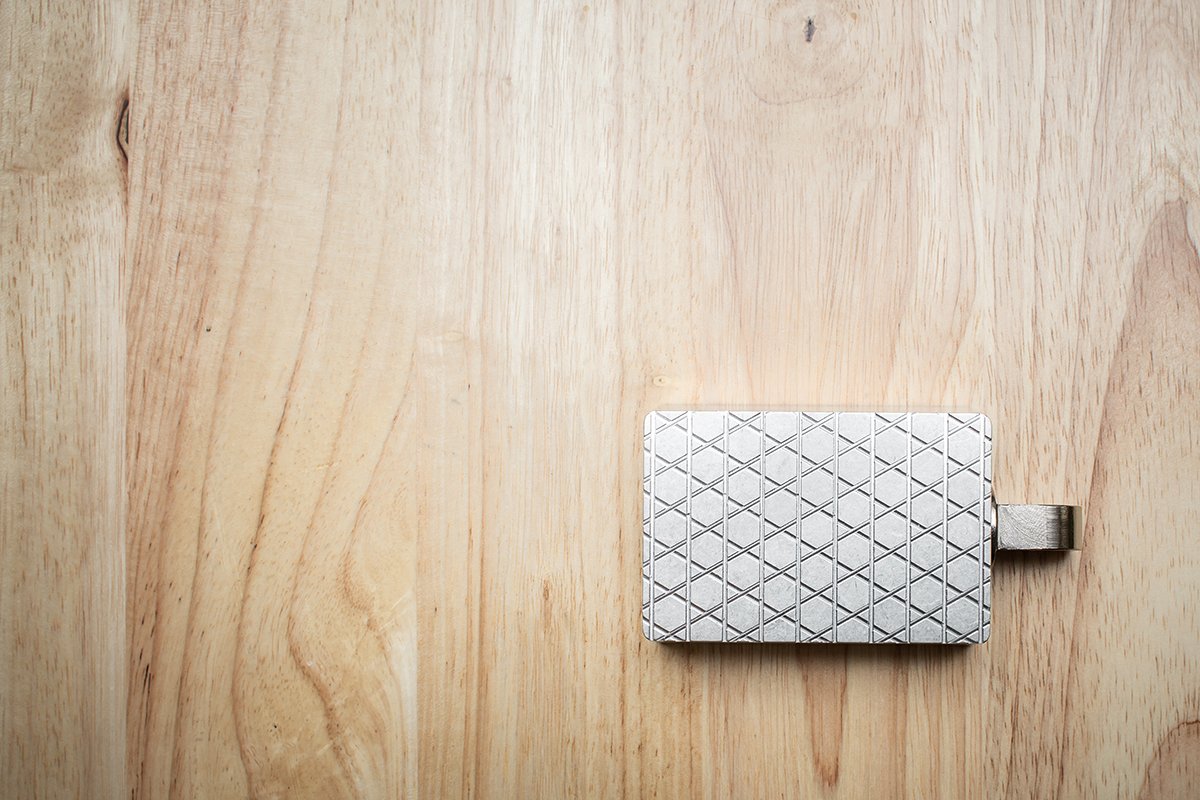
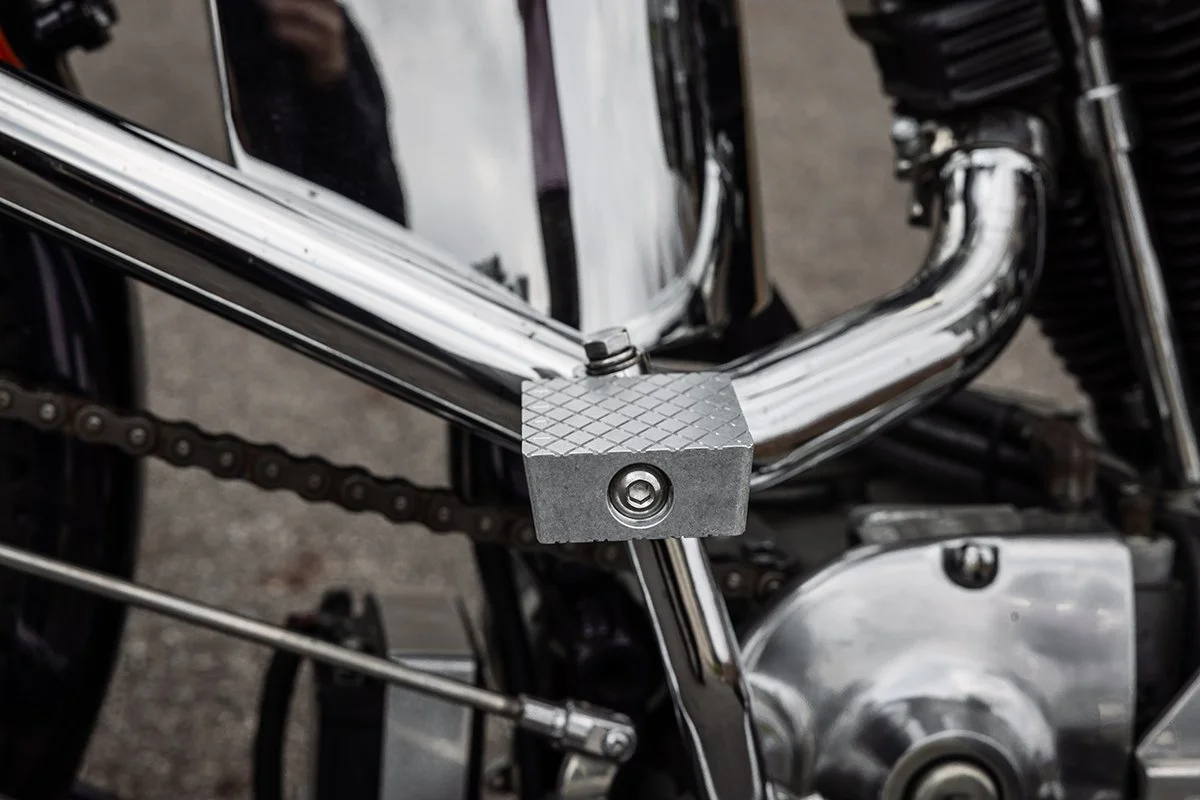
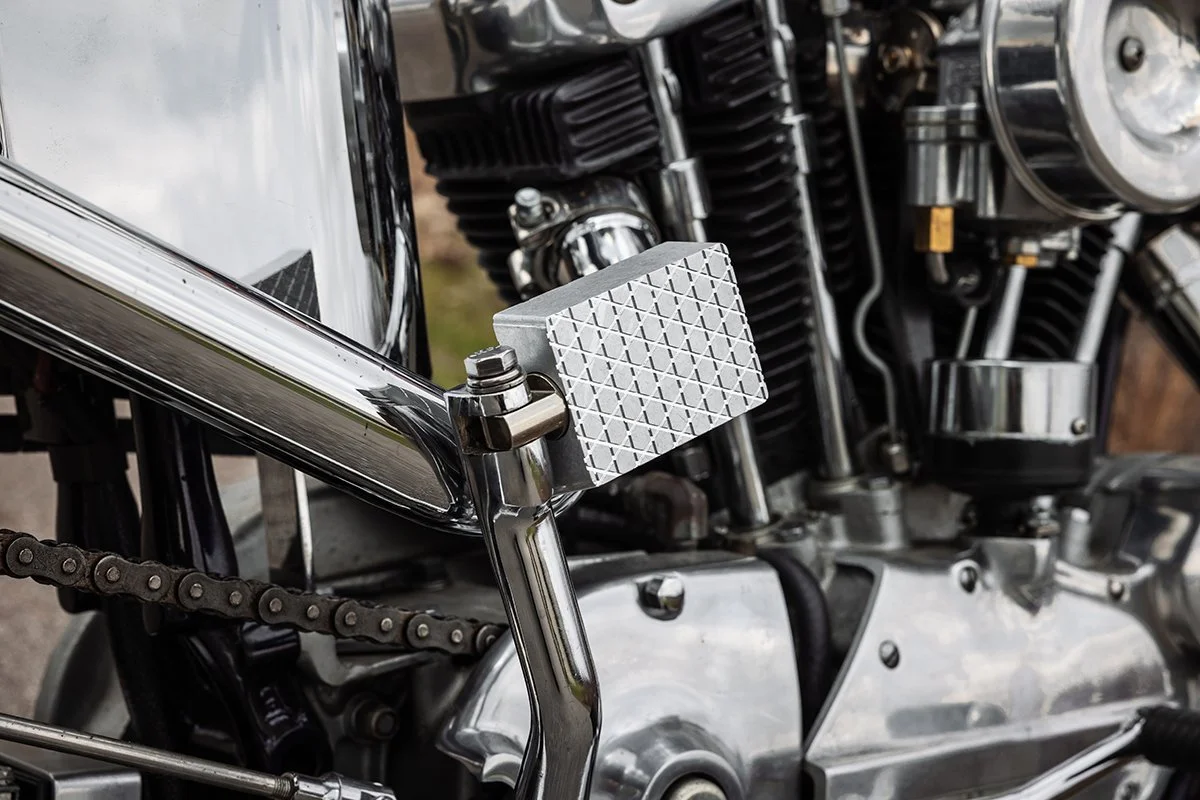
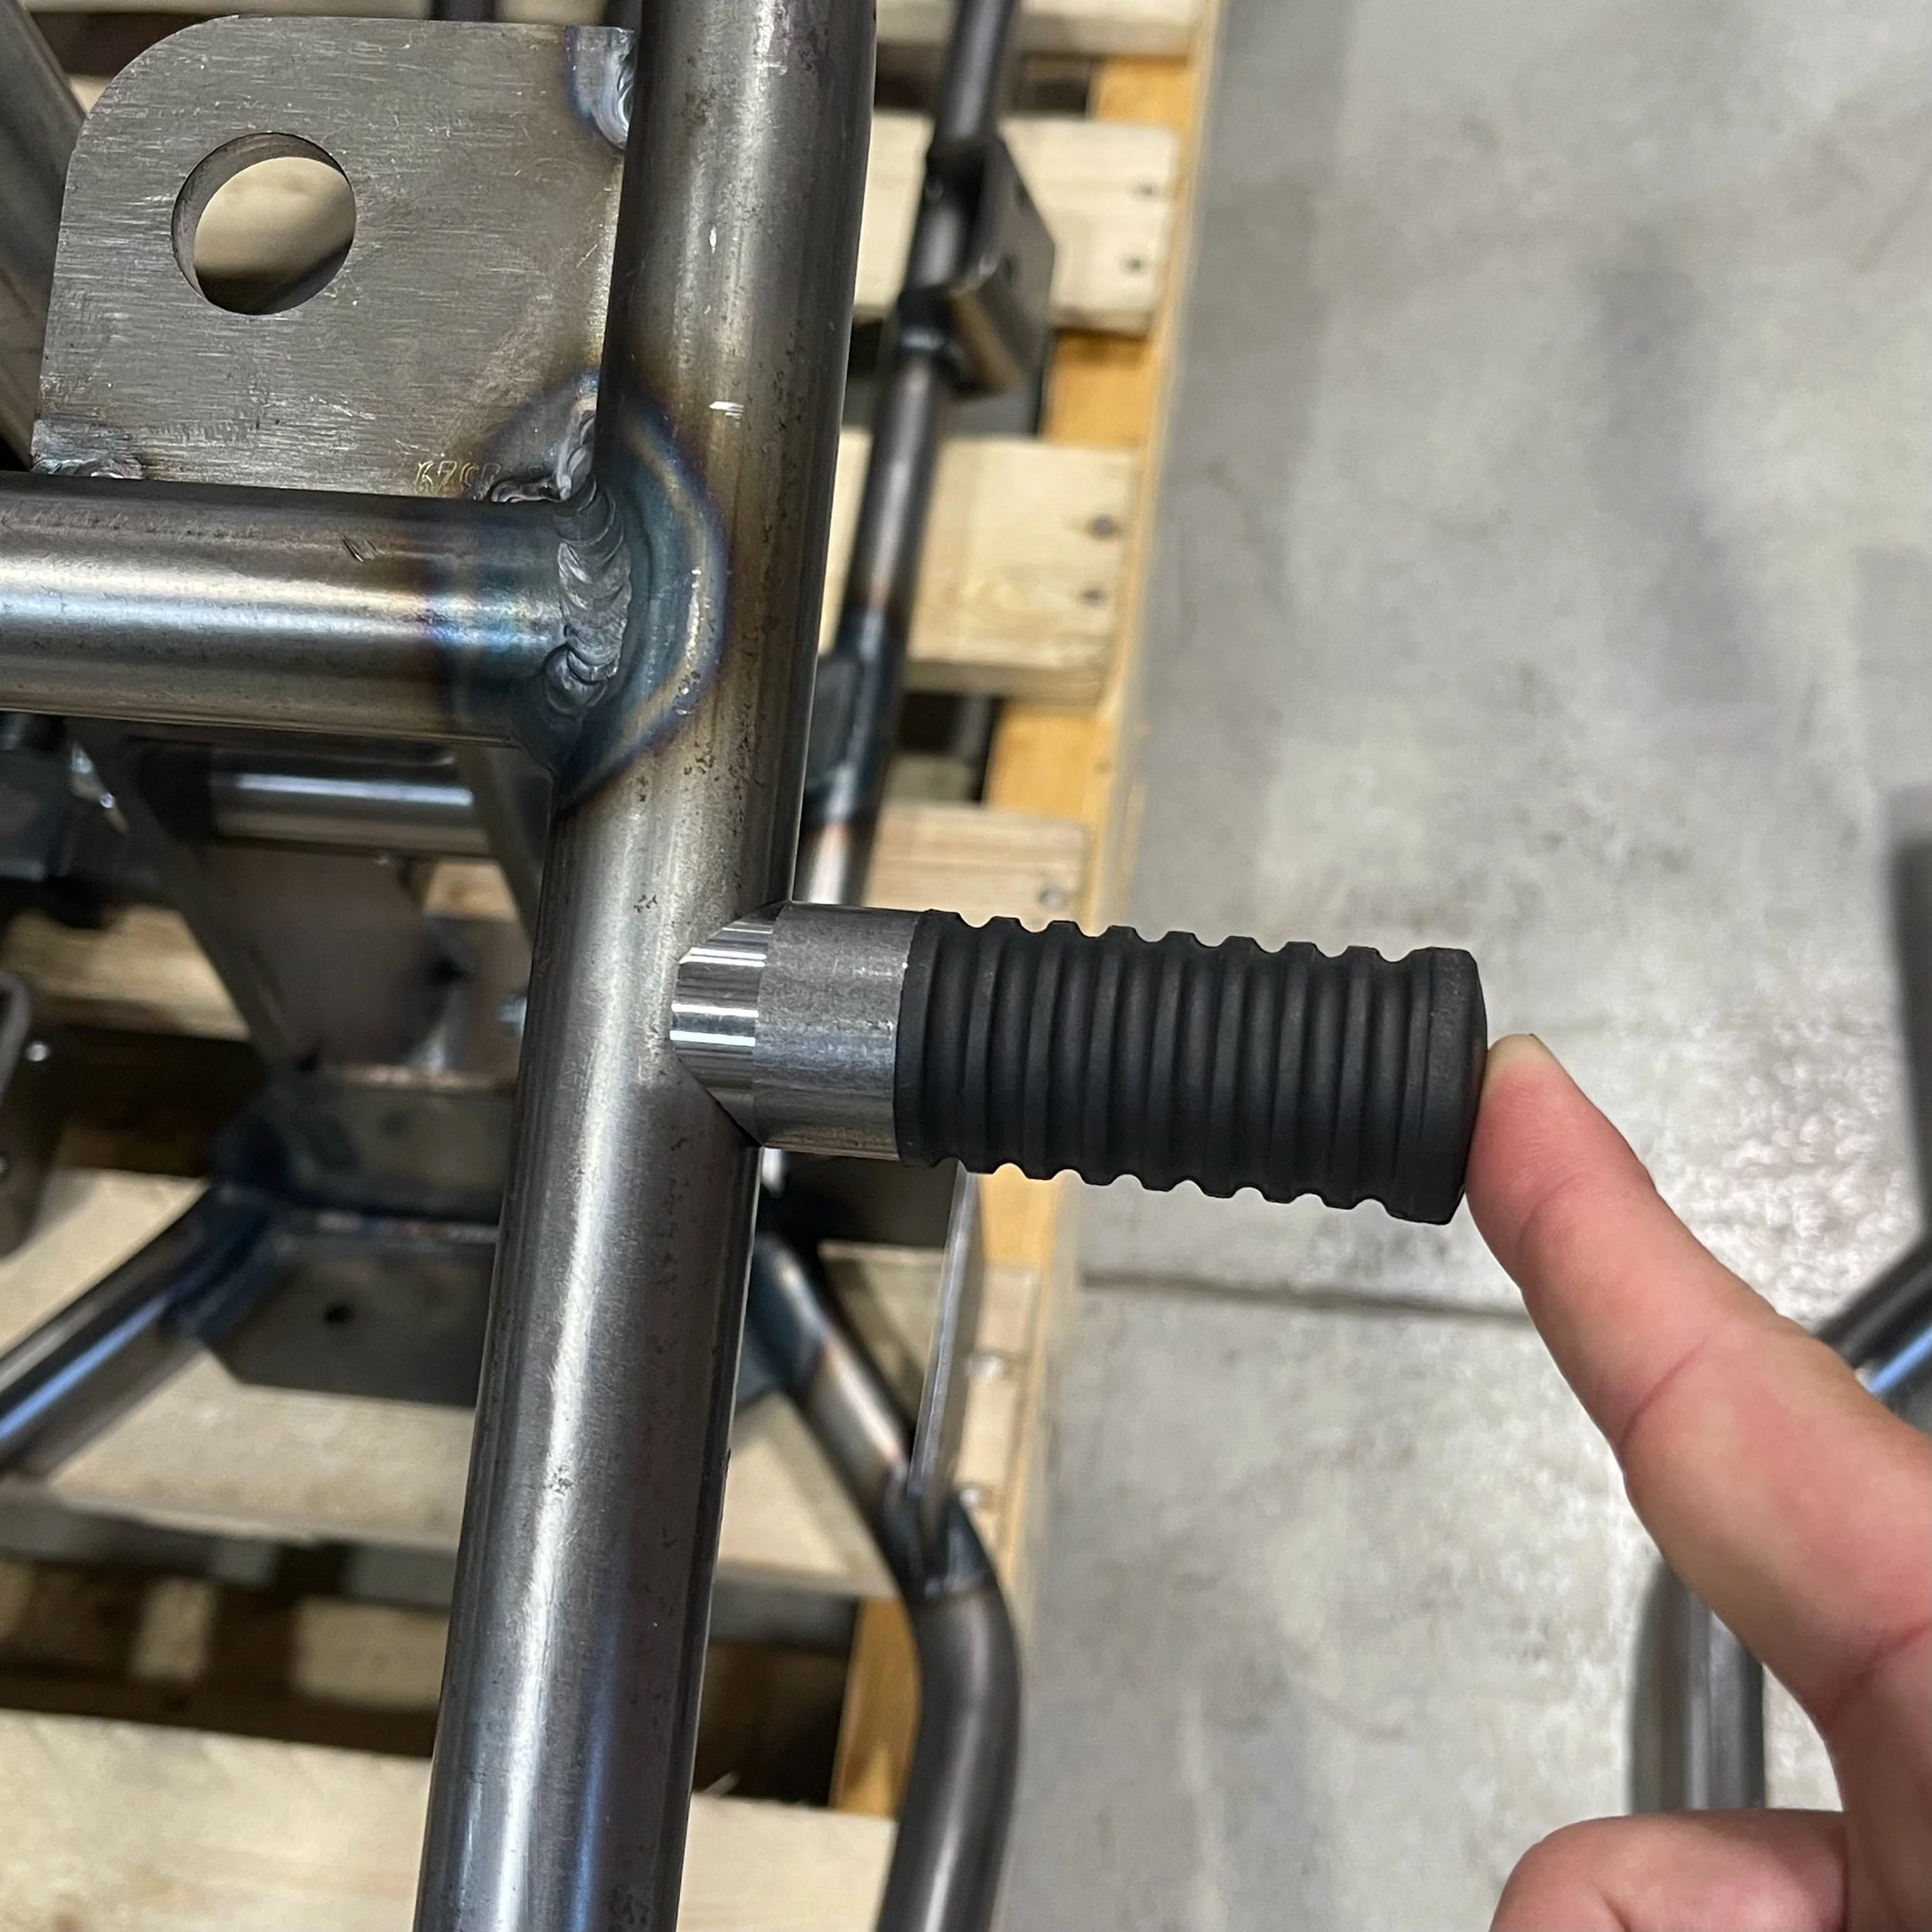
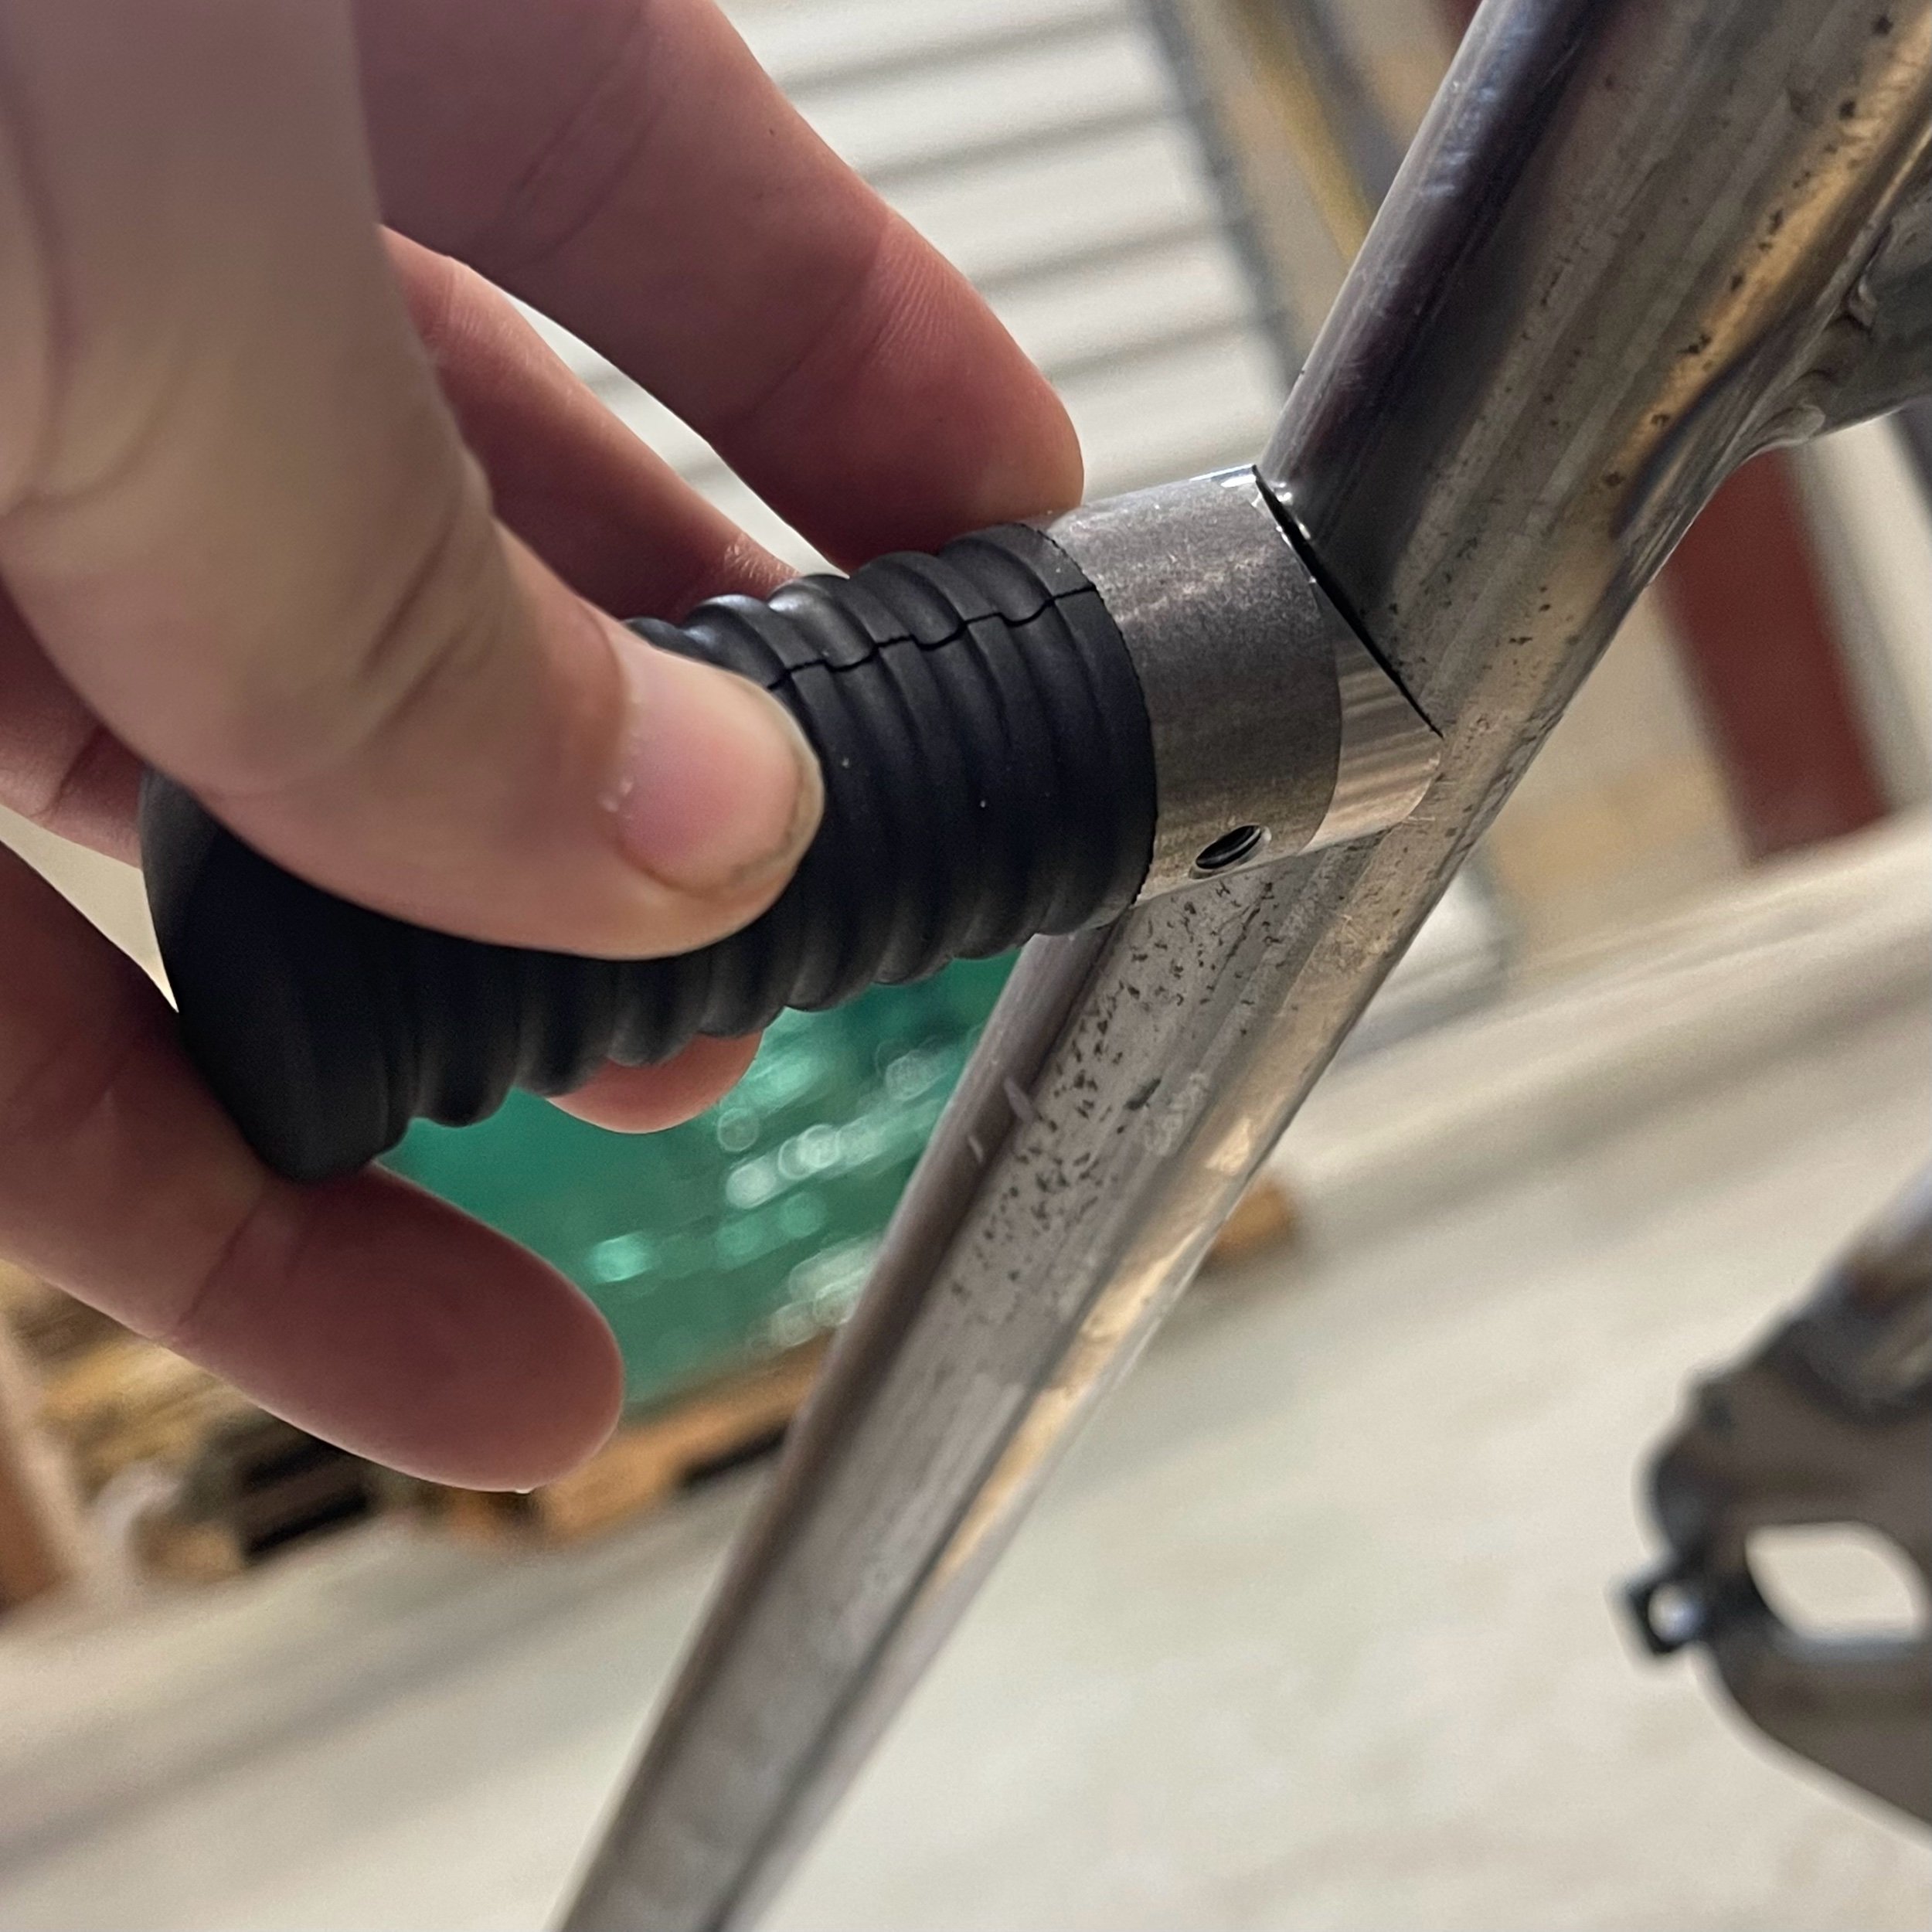
Measuring just over 2.8” in length once welded to a frame rail, these pegs provide a solid footrest for your passenger while staying out of your way. They’re clean, classy, and have that “always meant to be there” vibe.
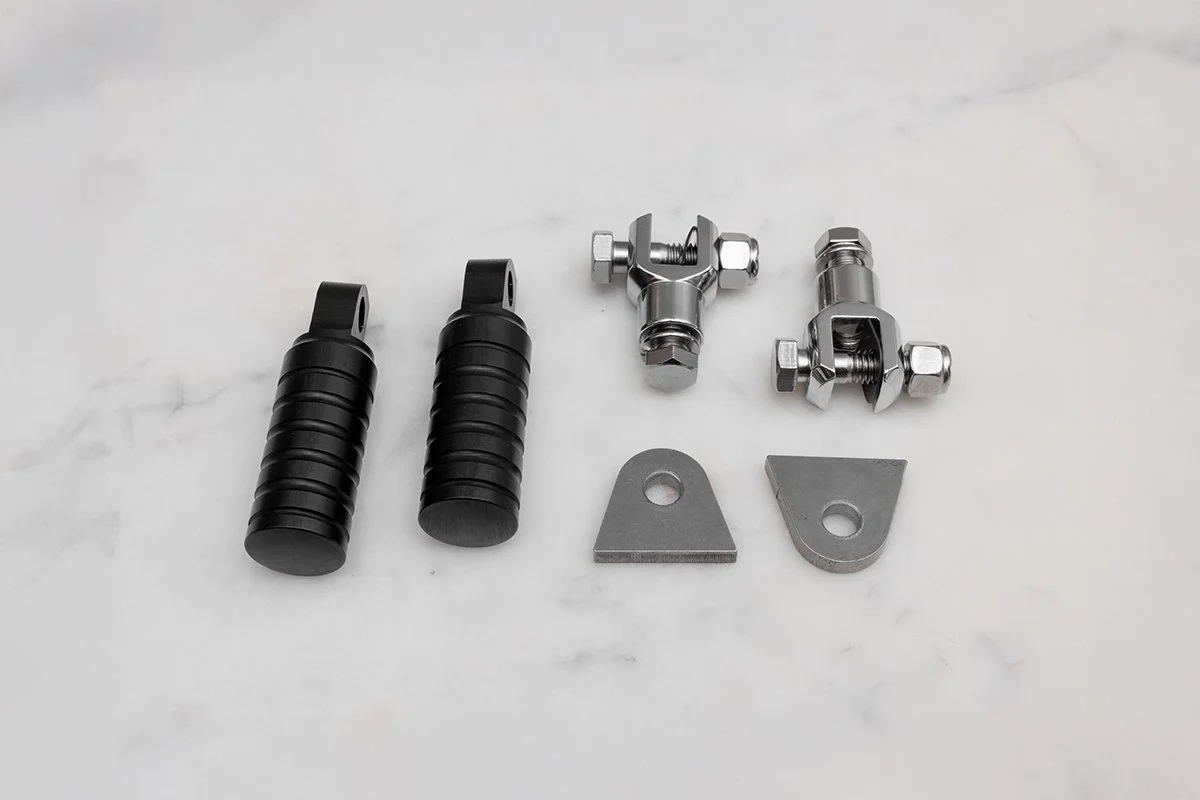
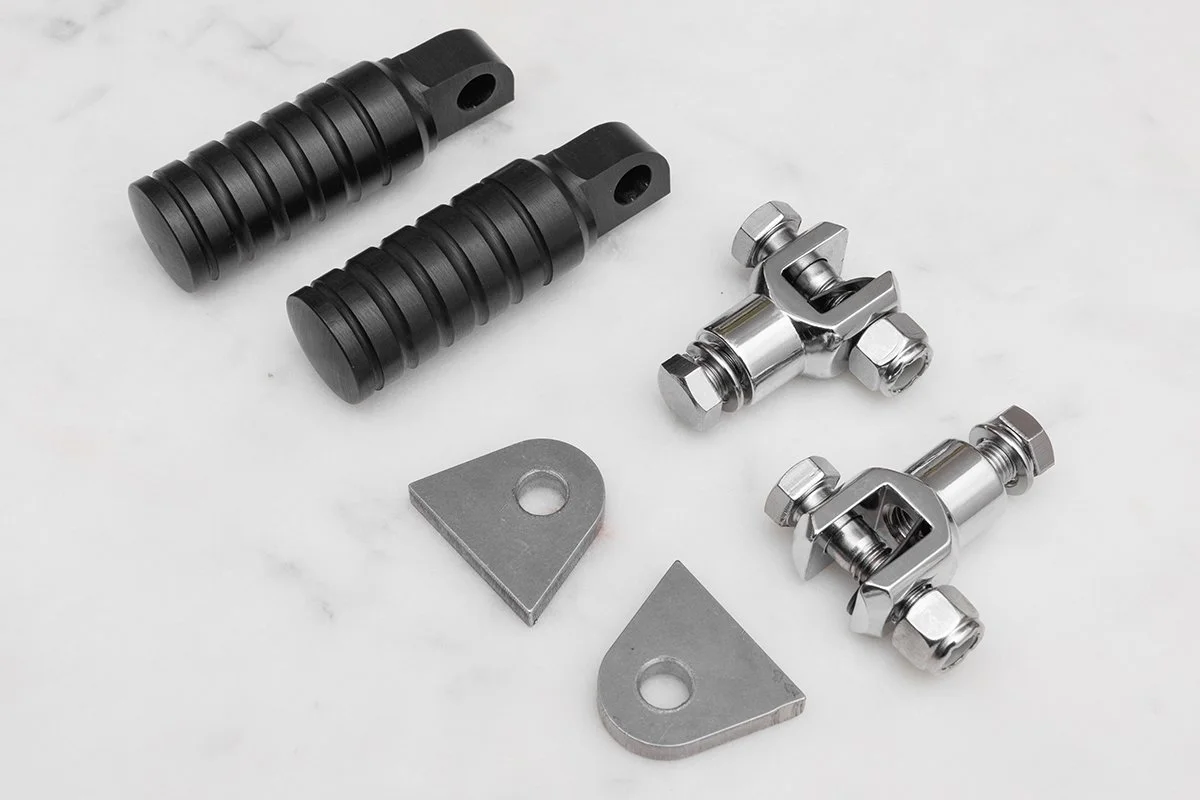
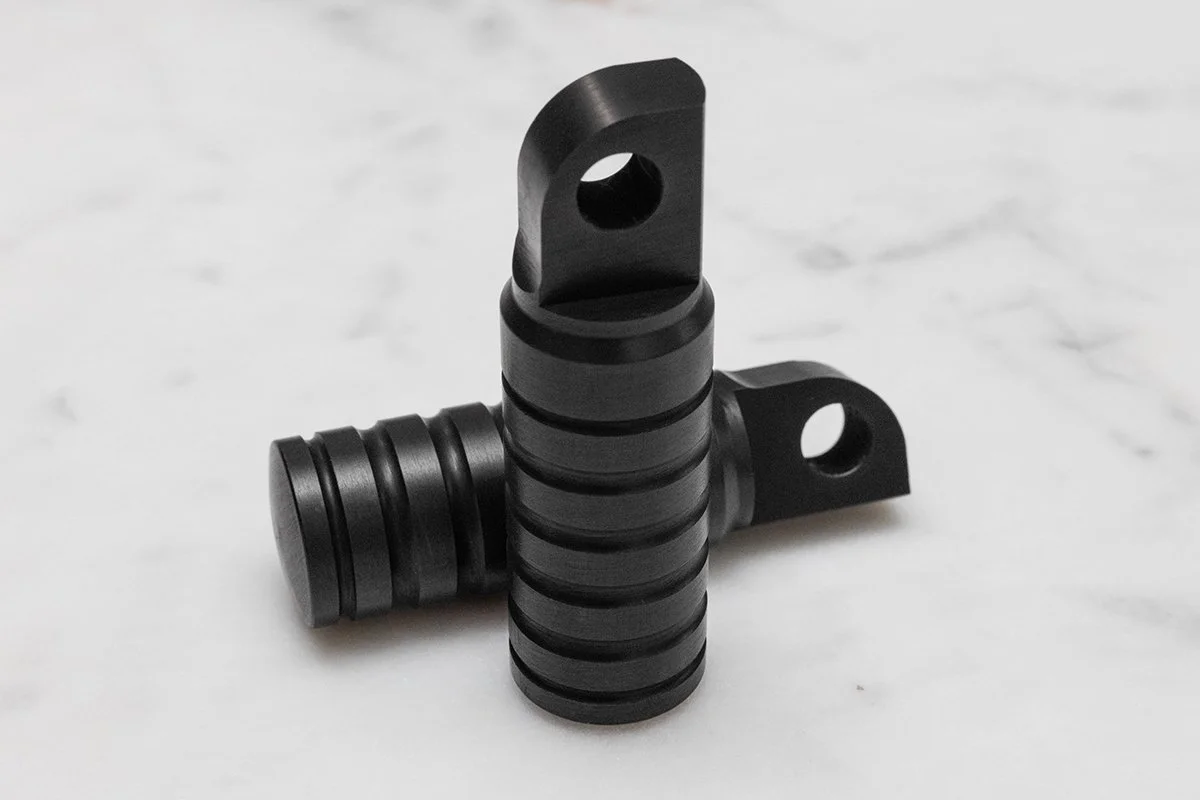
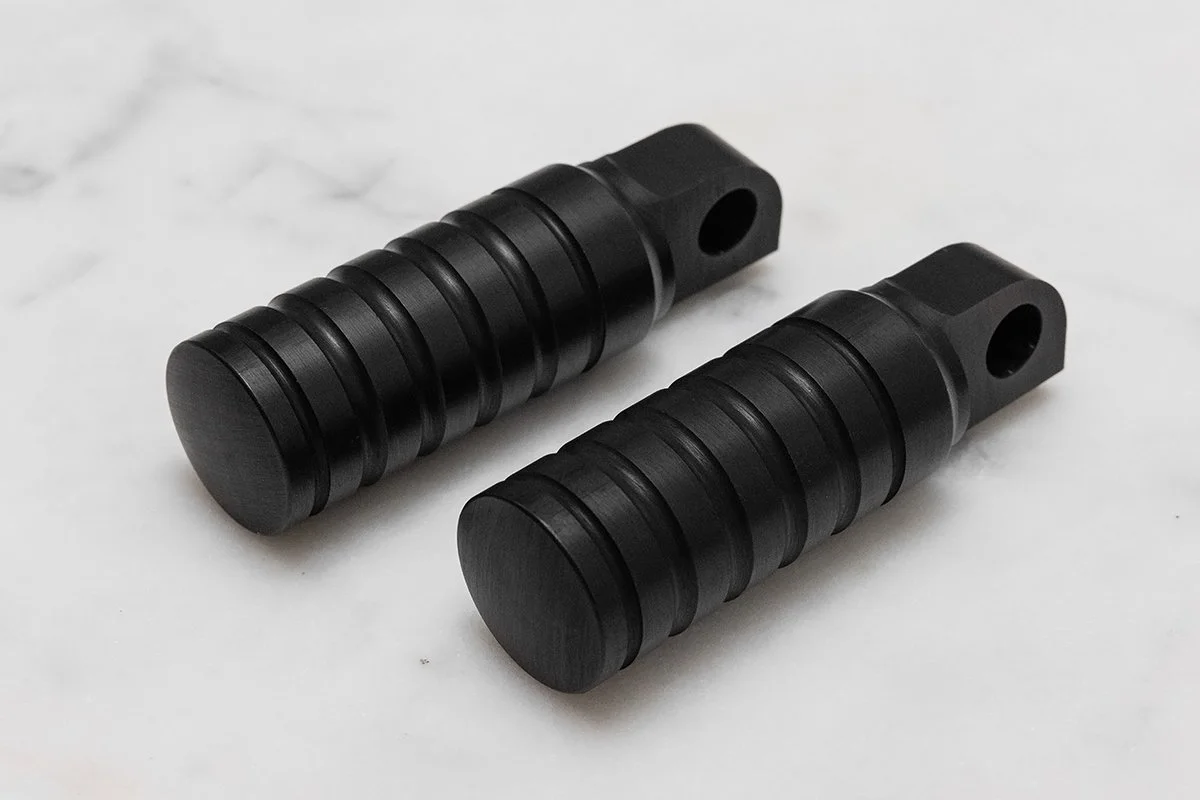
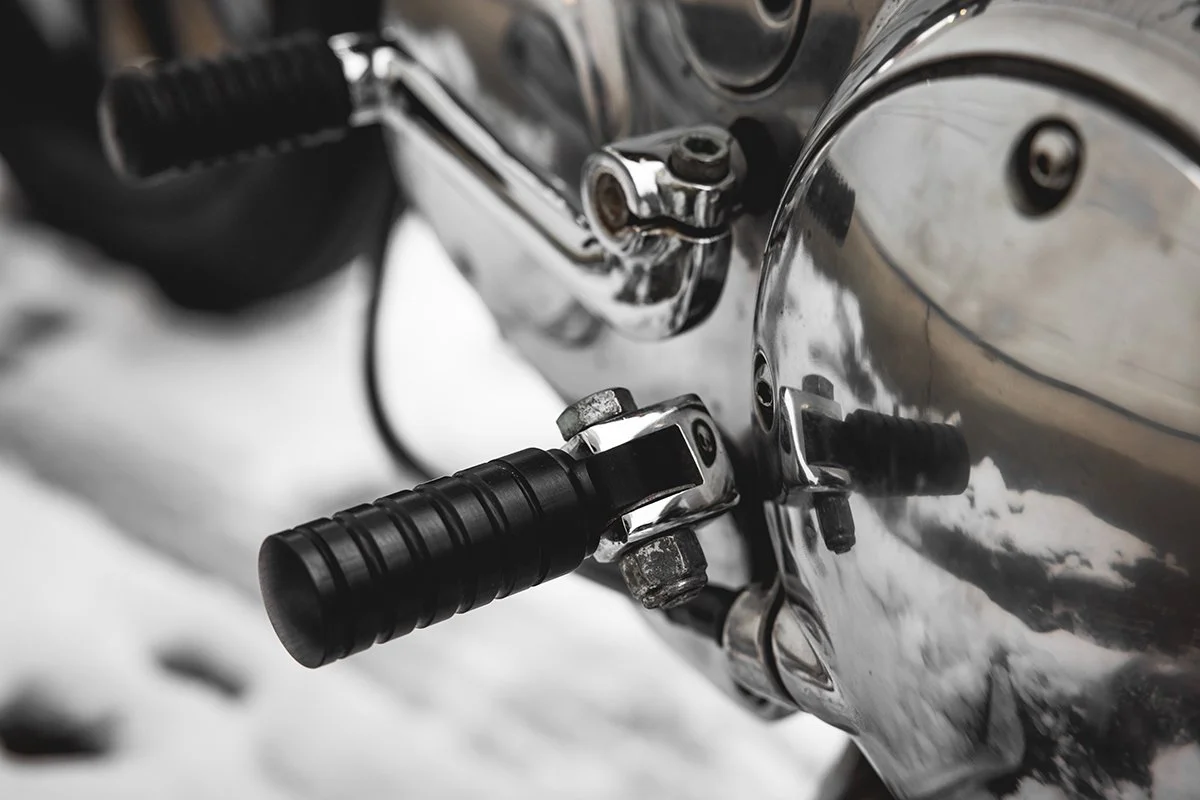
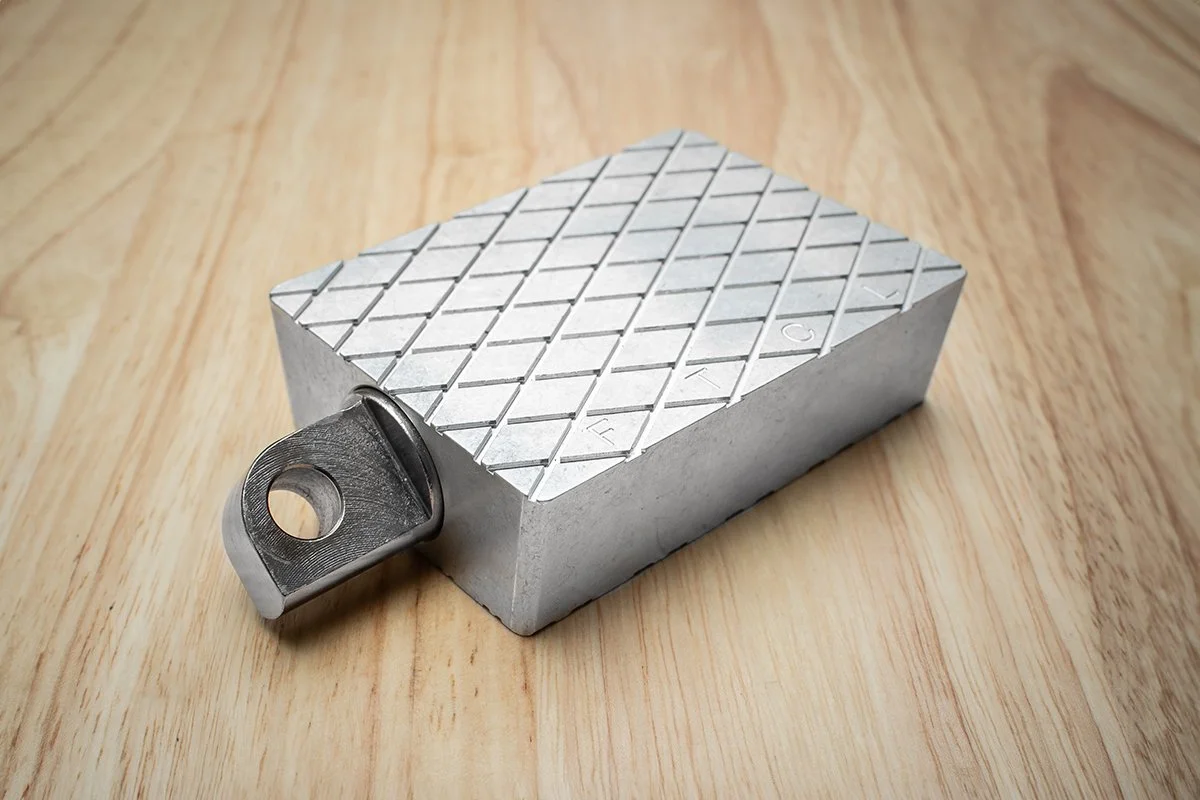
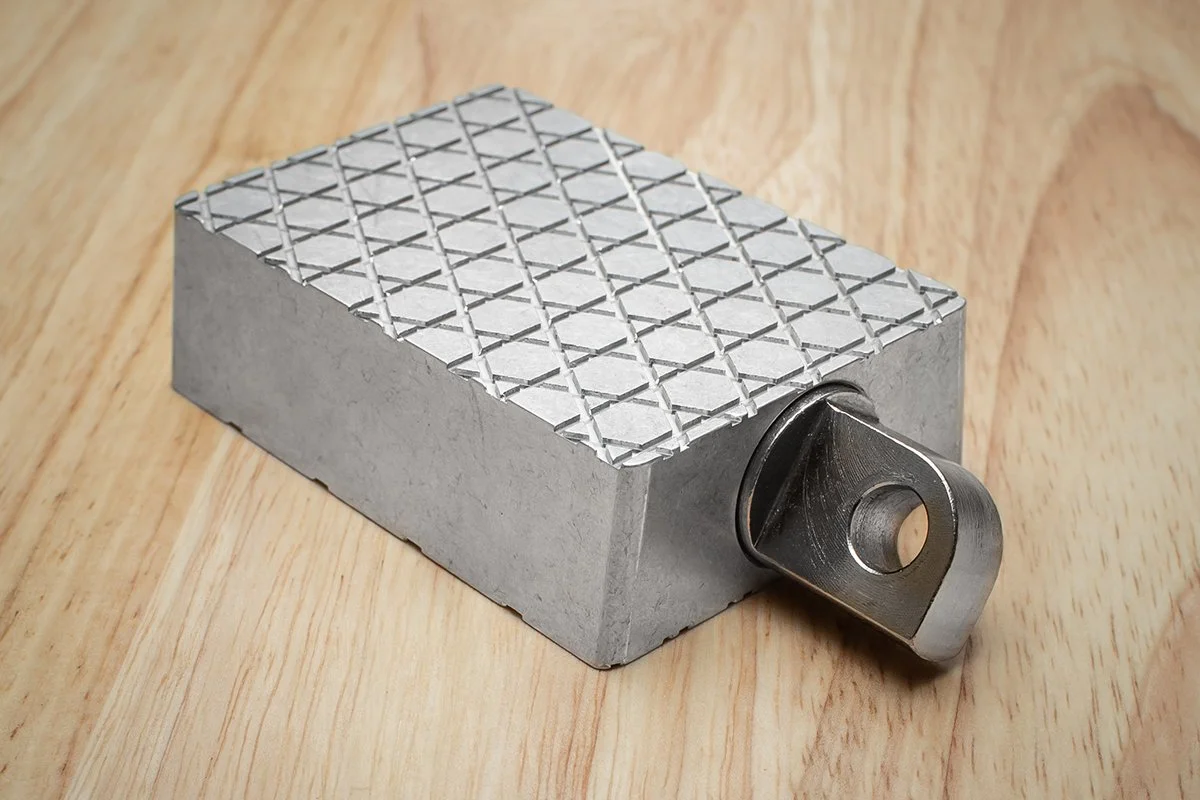
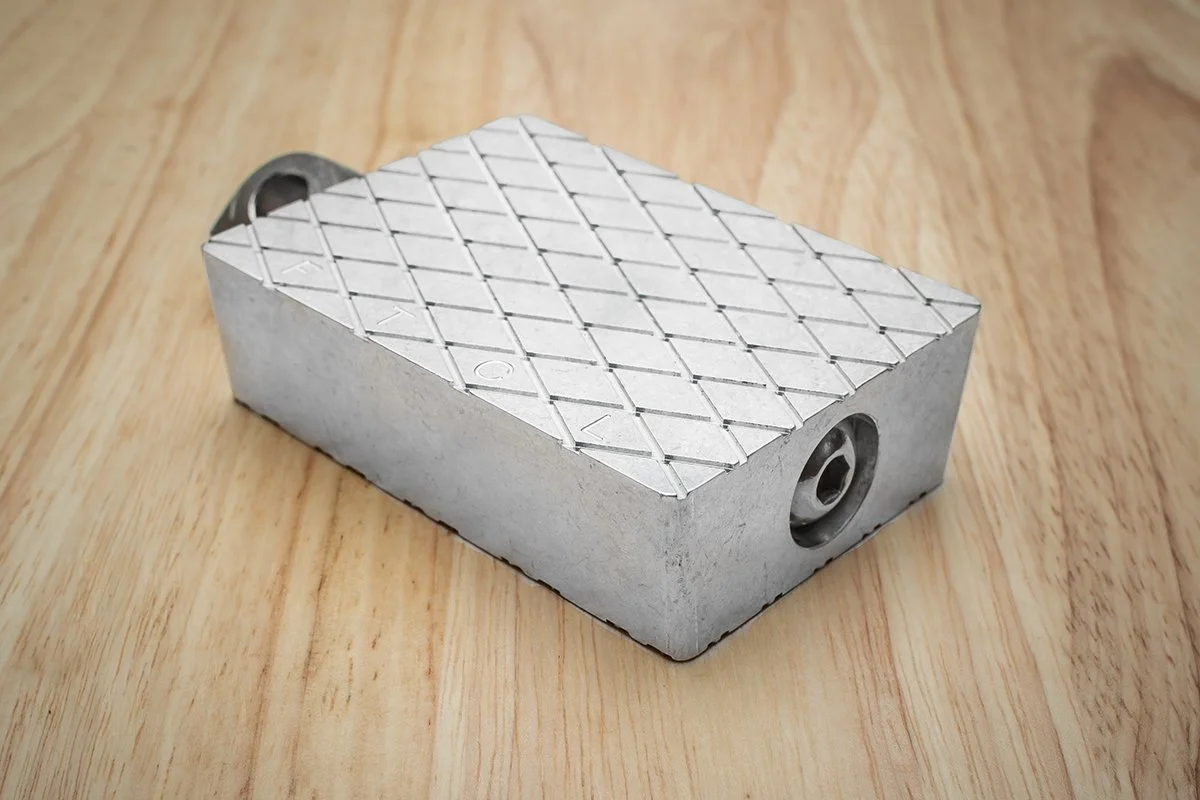
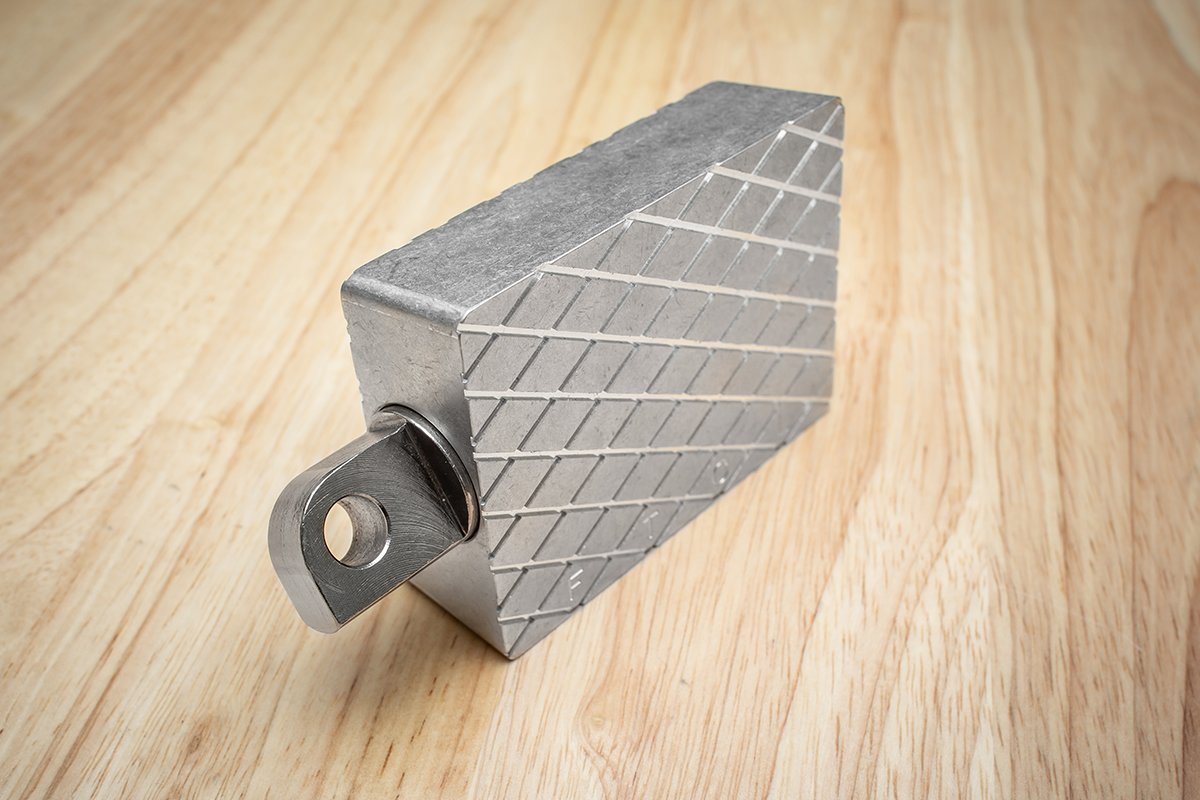
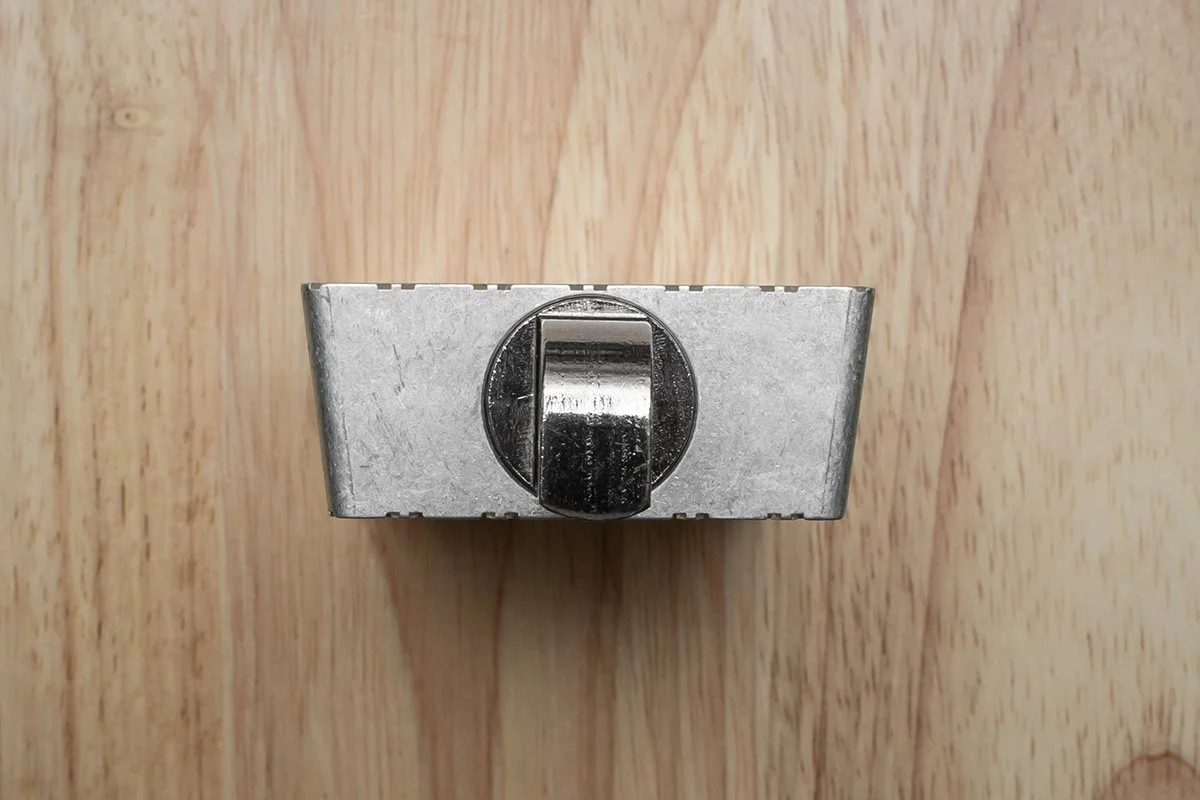
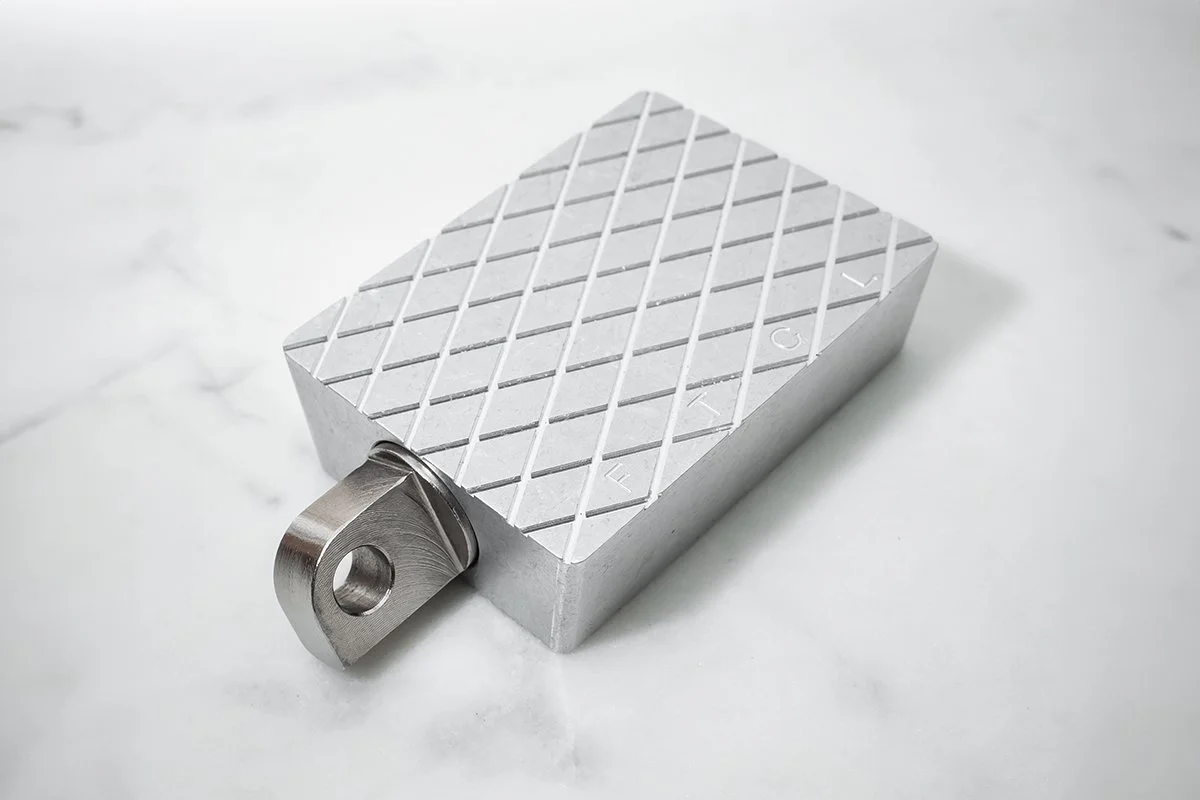
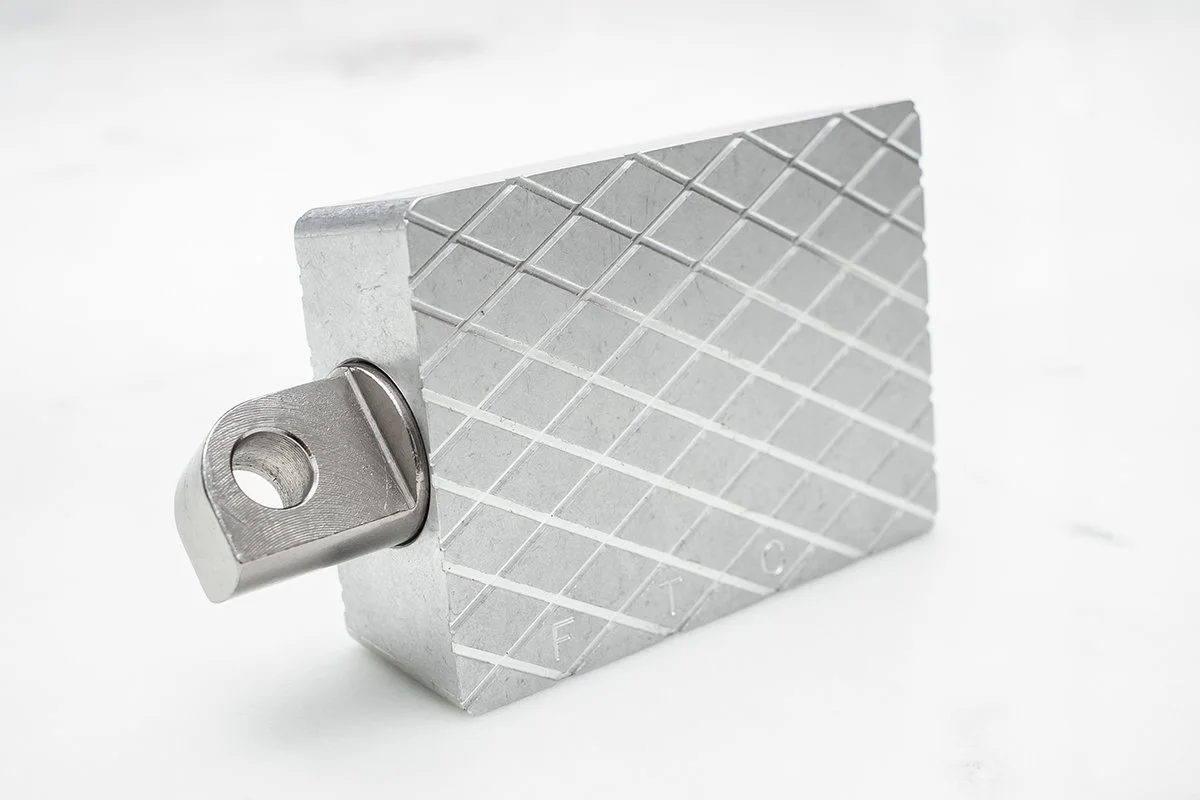
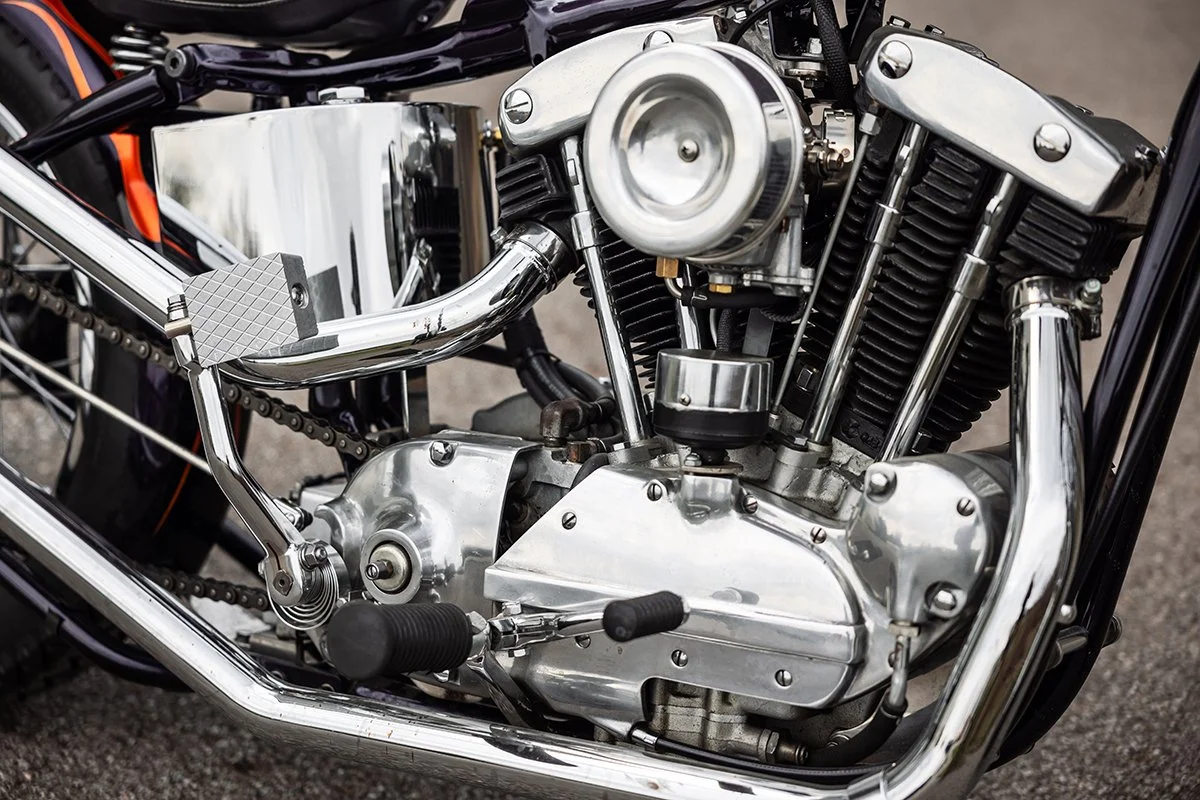
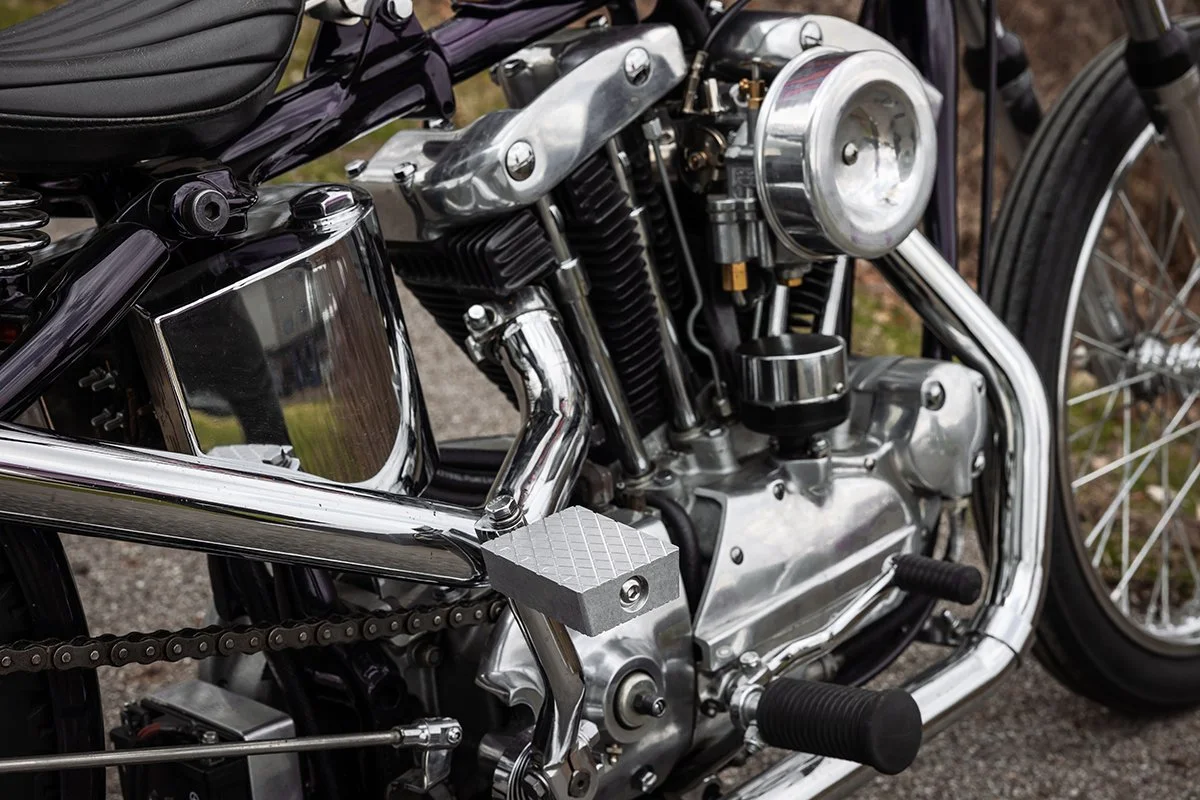
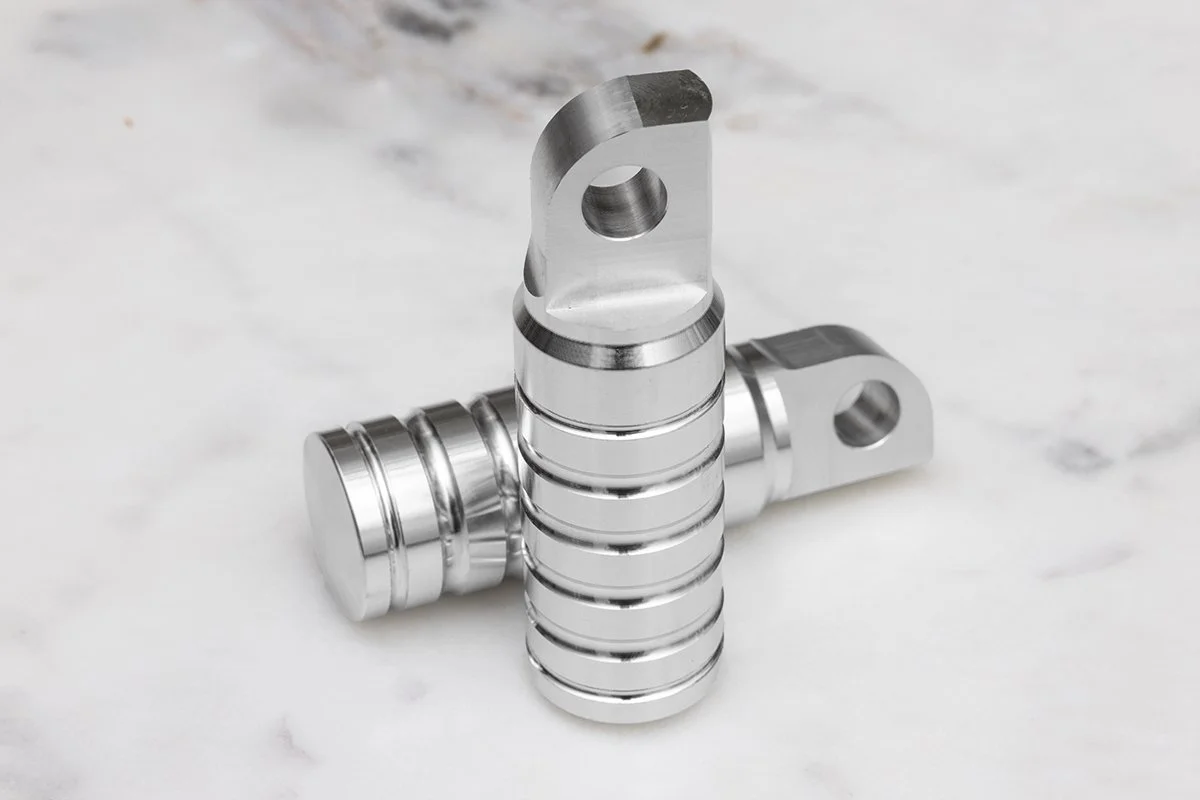
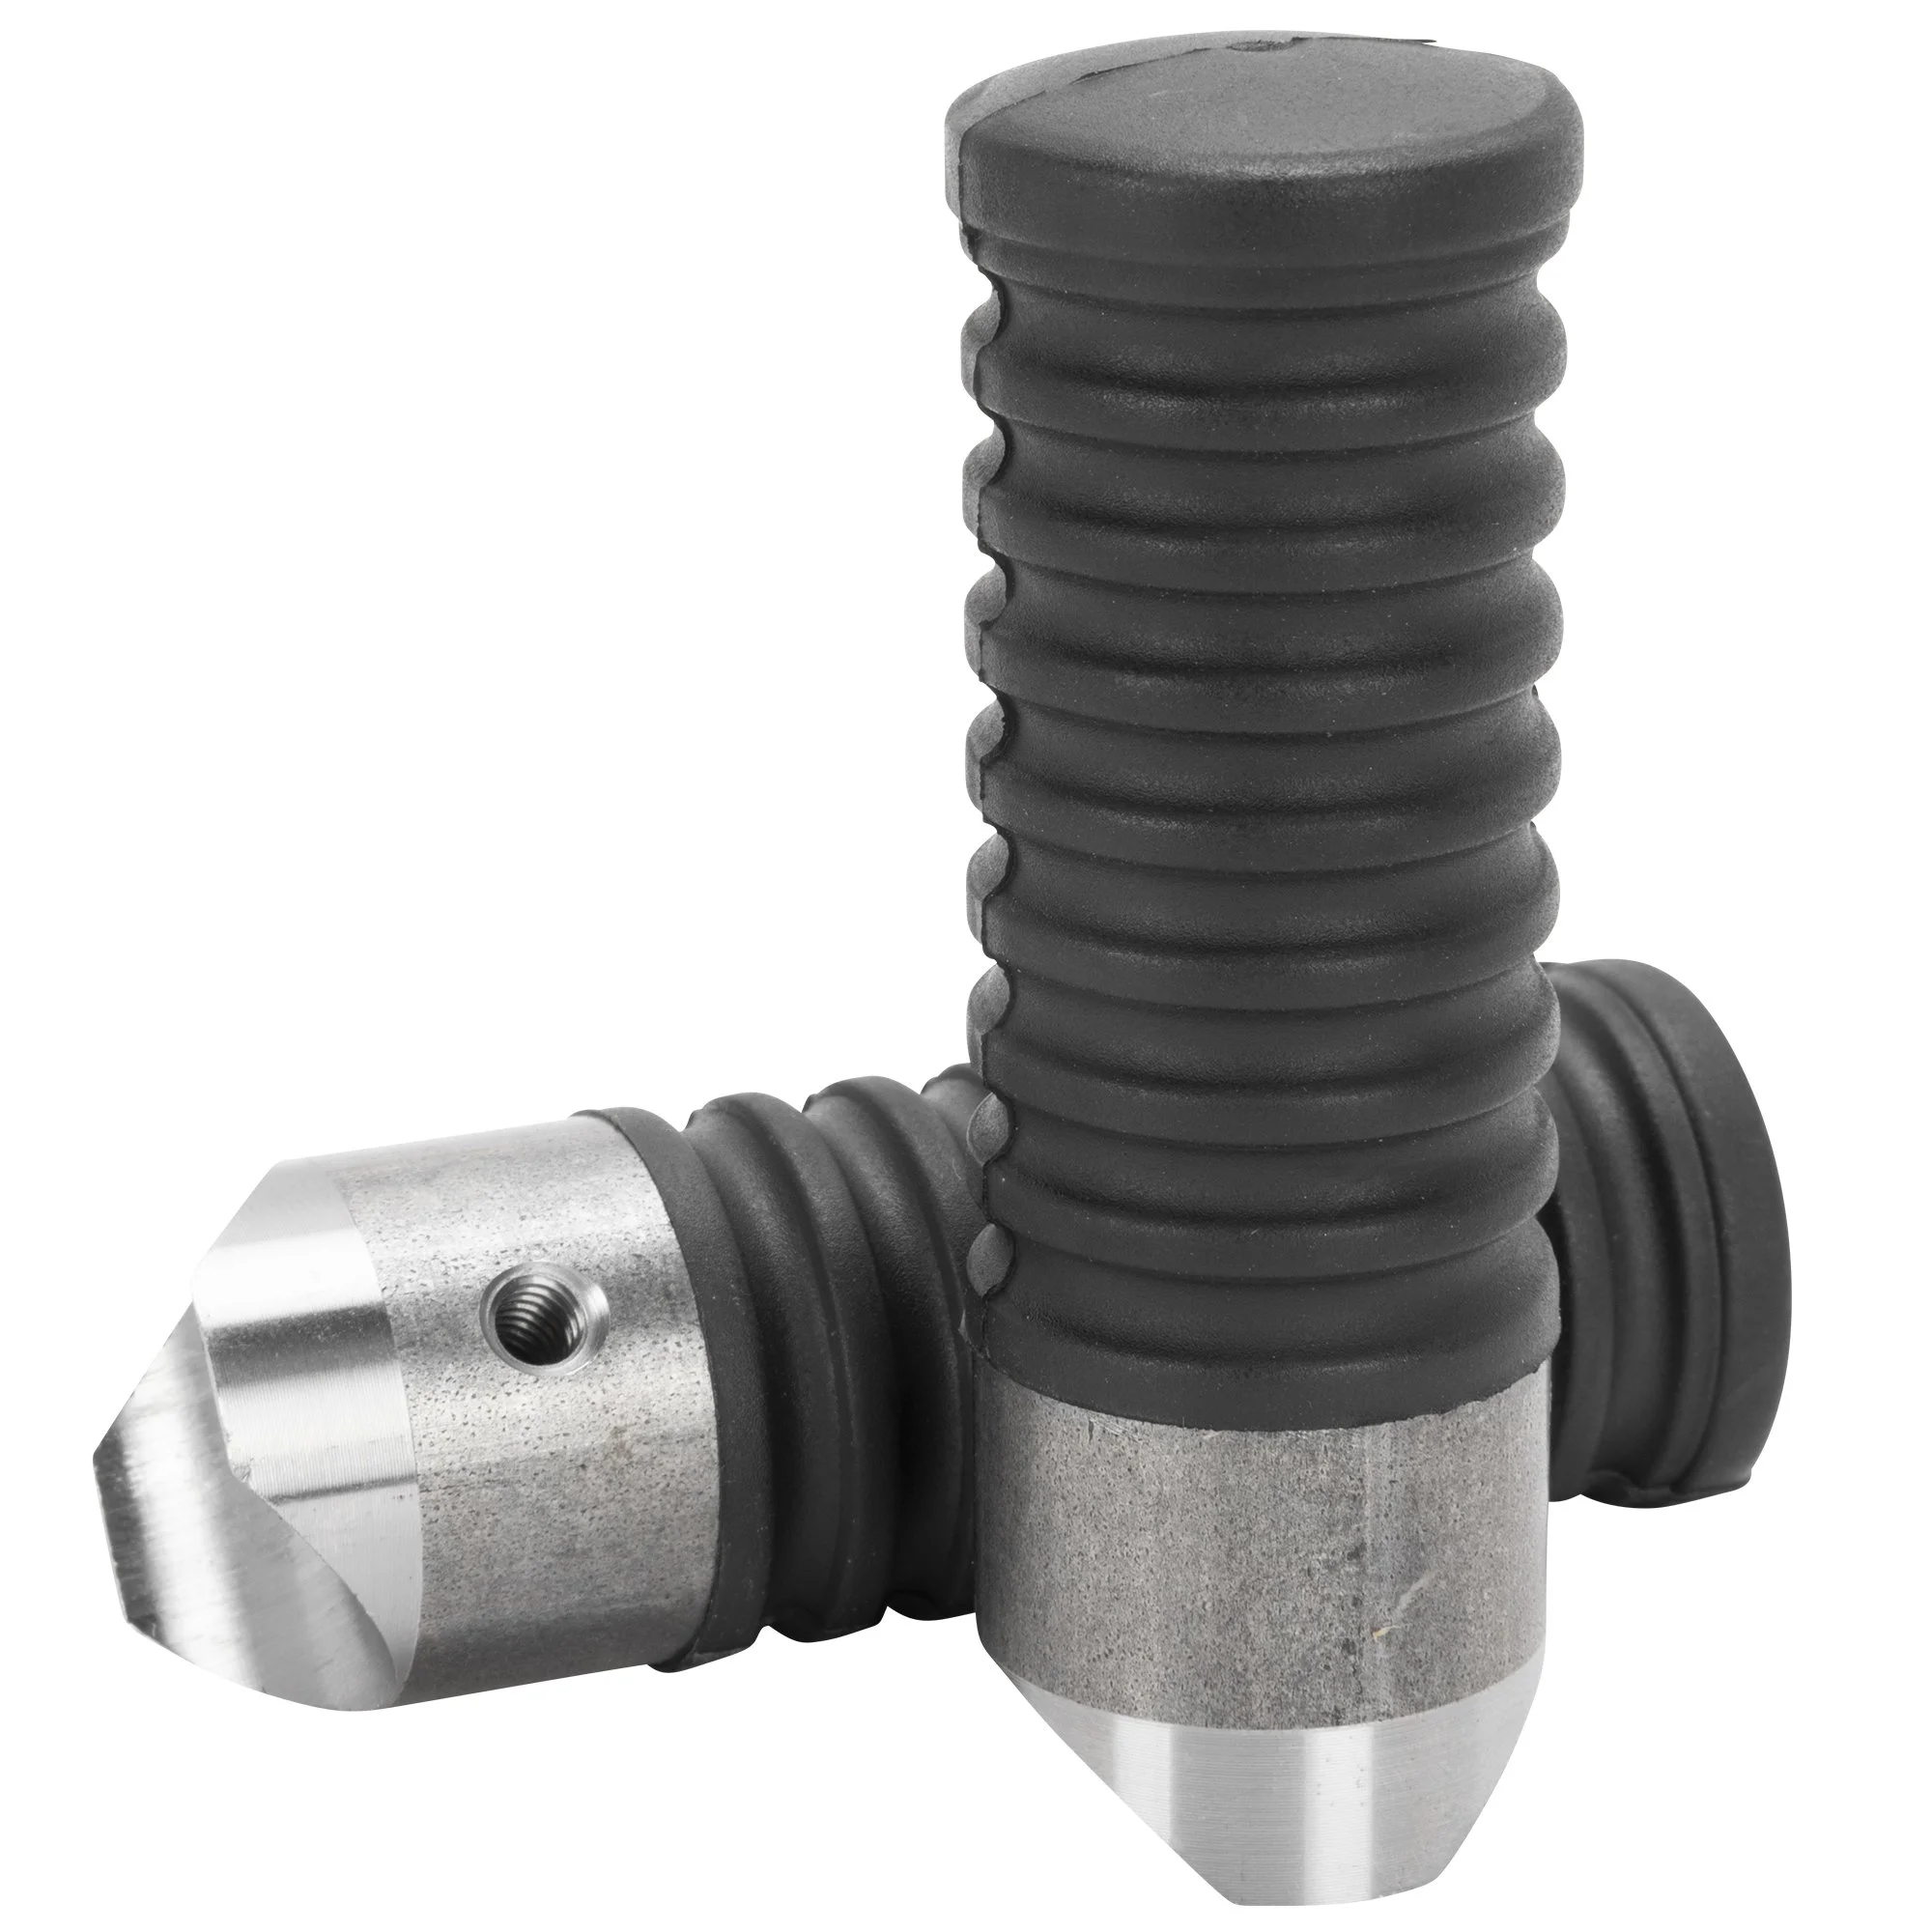
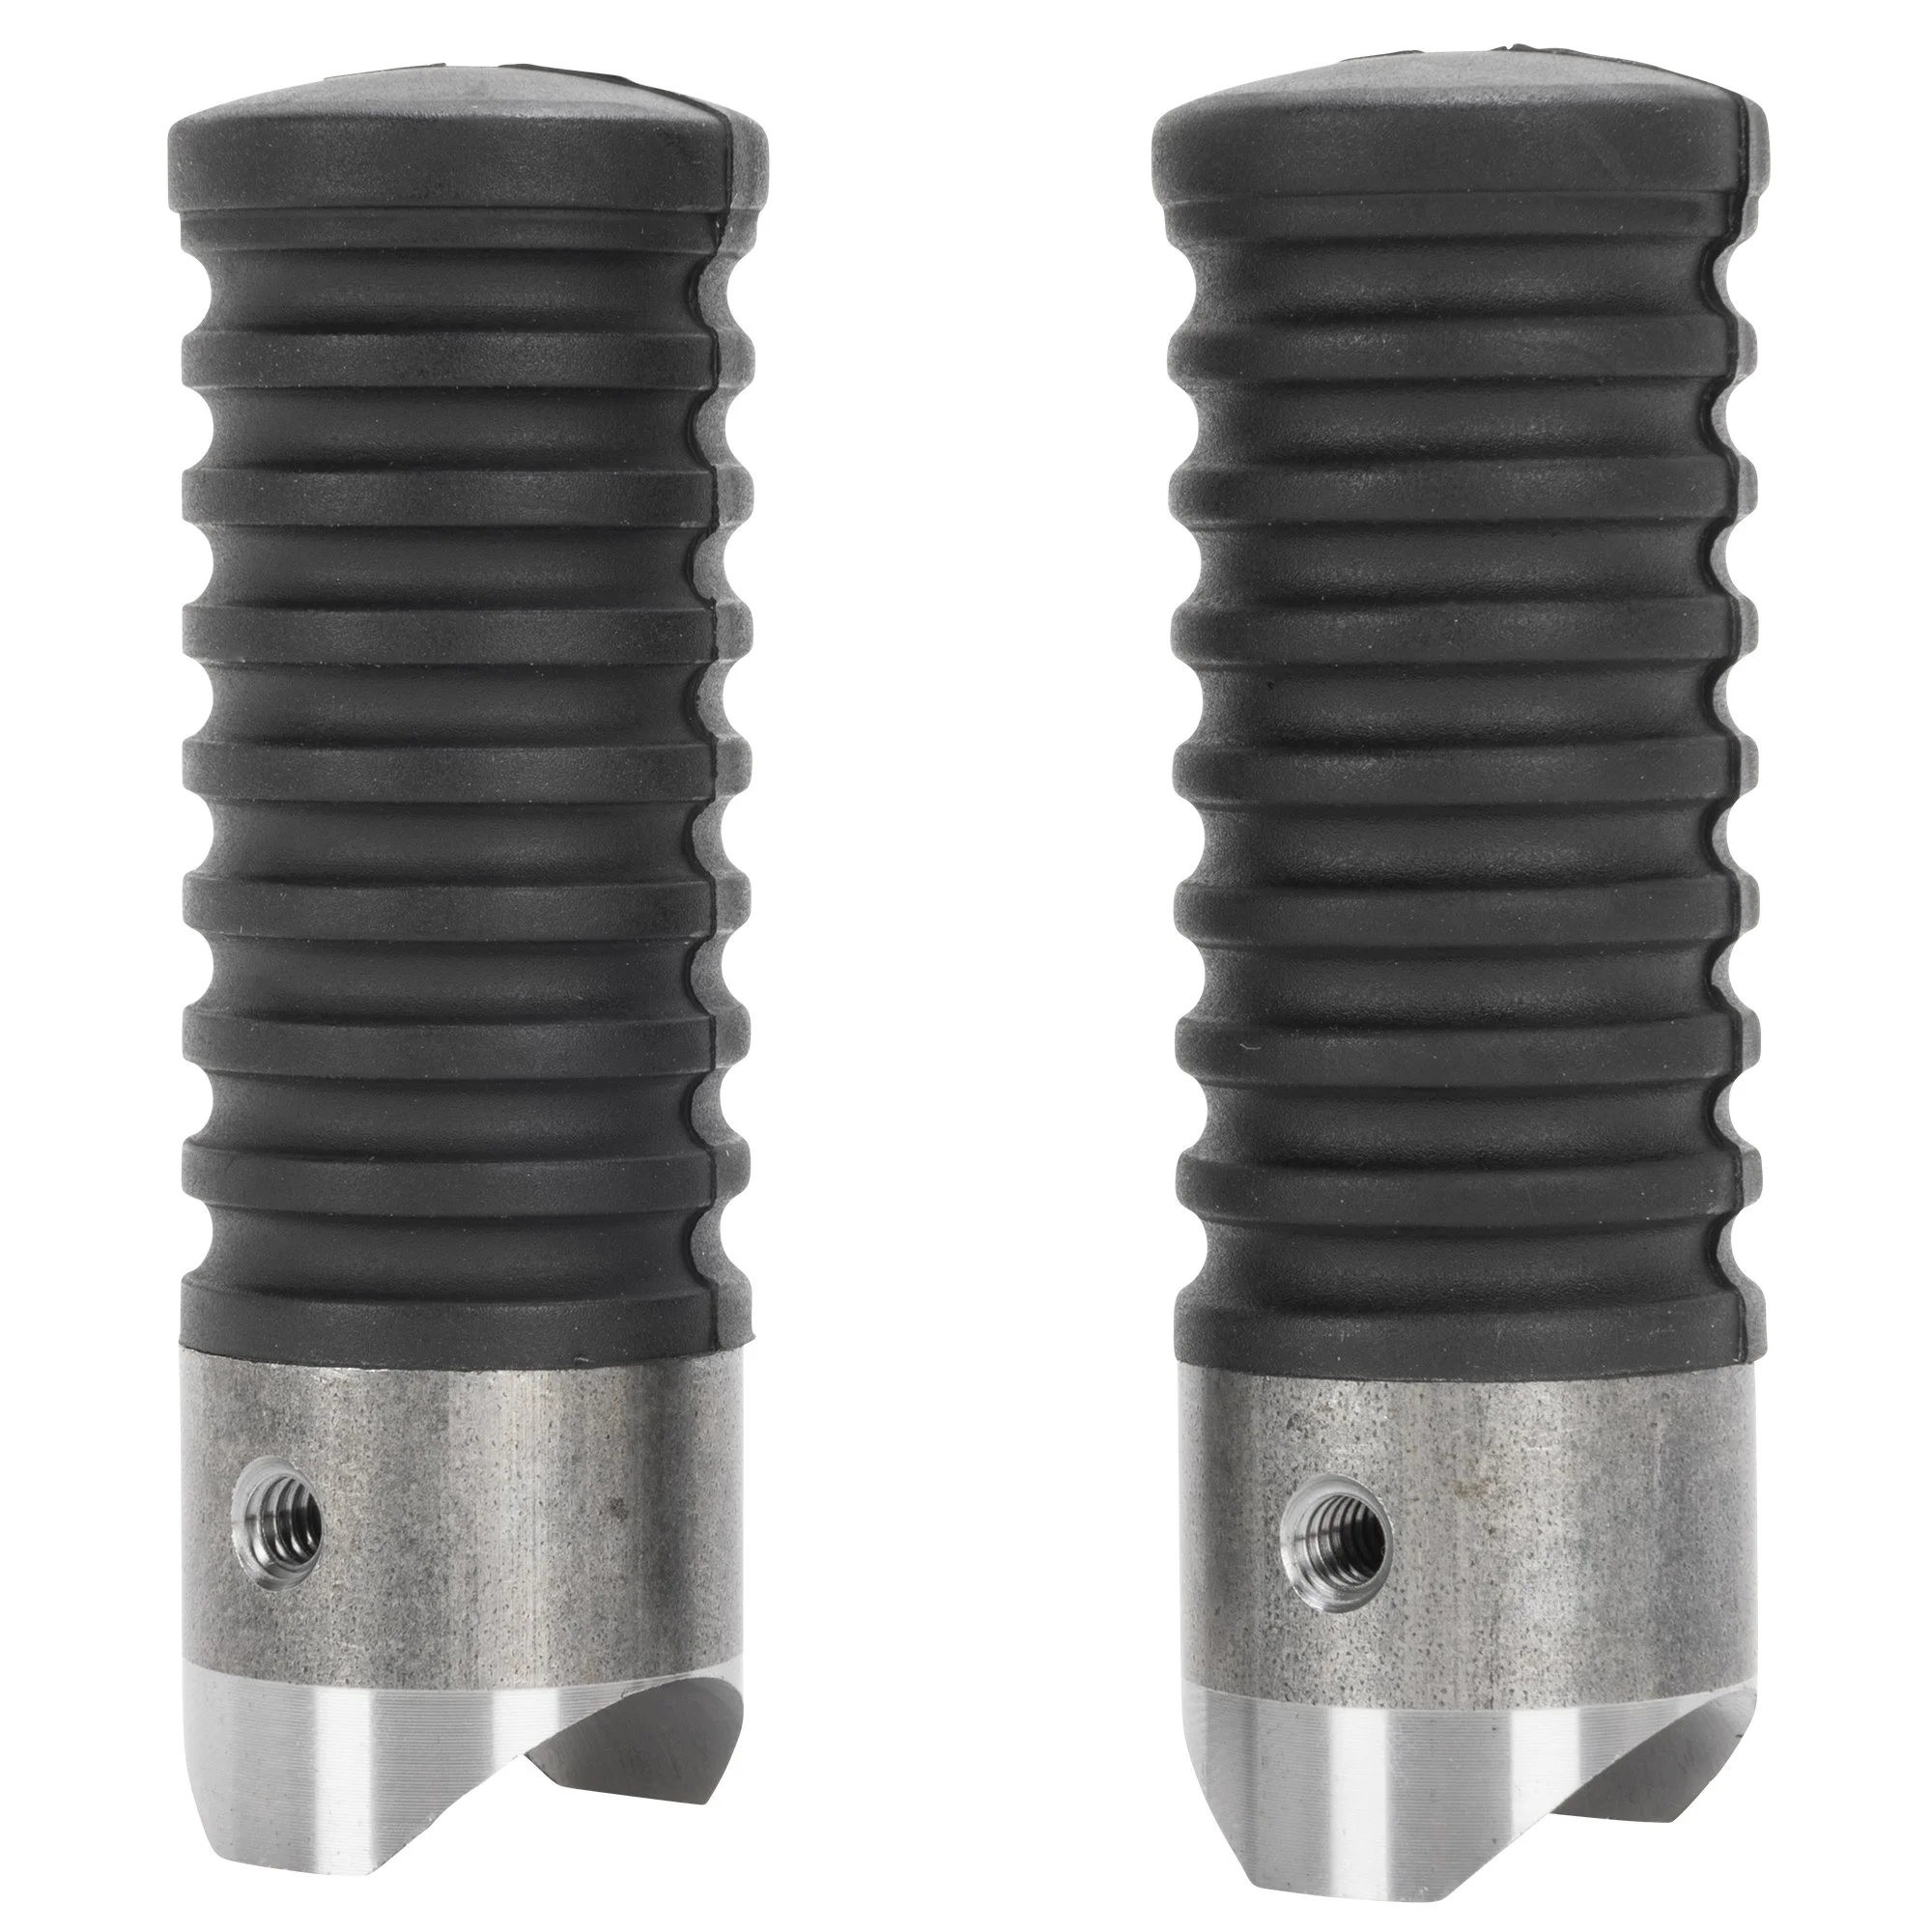
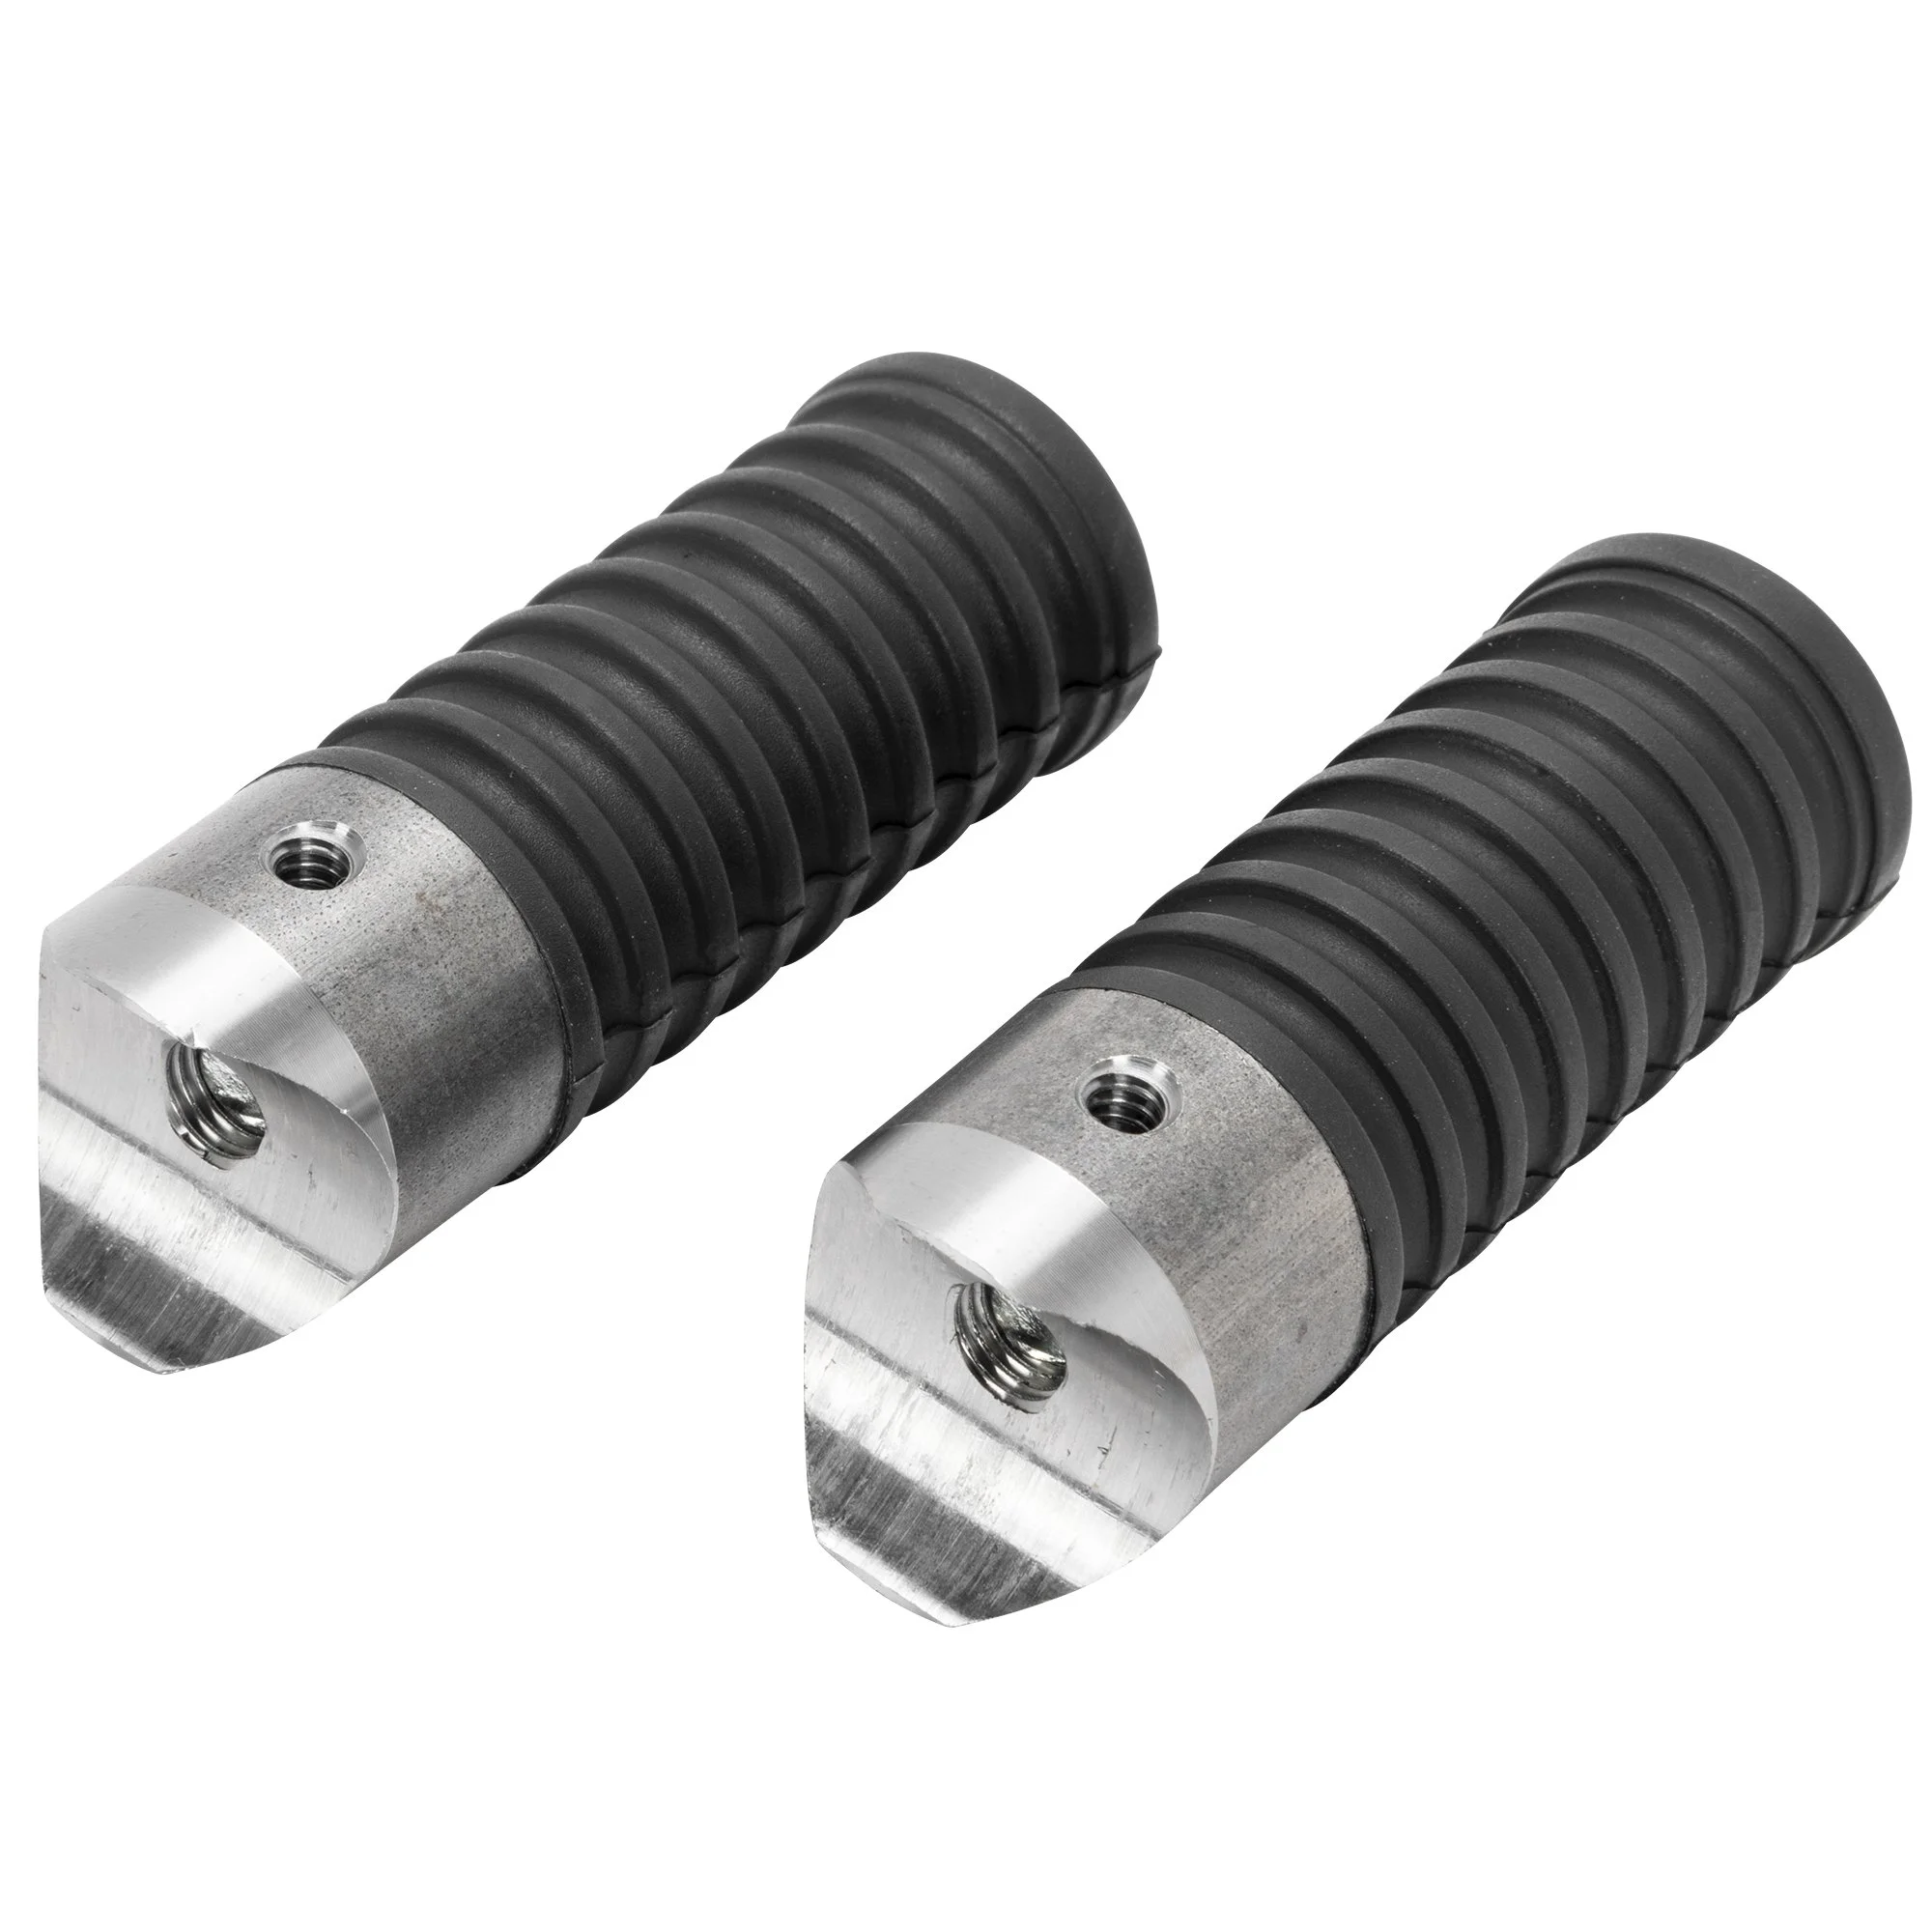
These coped bungs are designed to weld onto 1.25” tubing which is ideal for any Lowbrow Customs Hardtails or other frame rails with the diameter of 1.25” tubing. Each bung is threaded with 5/16”-24 threads, allowing compatibility with a wide variety of aftermarket shifter pegs. Stock OEM replica shifter pegs are included.
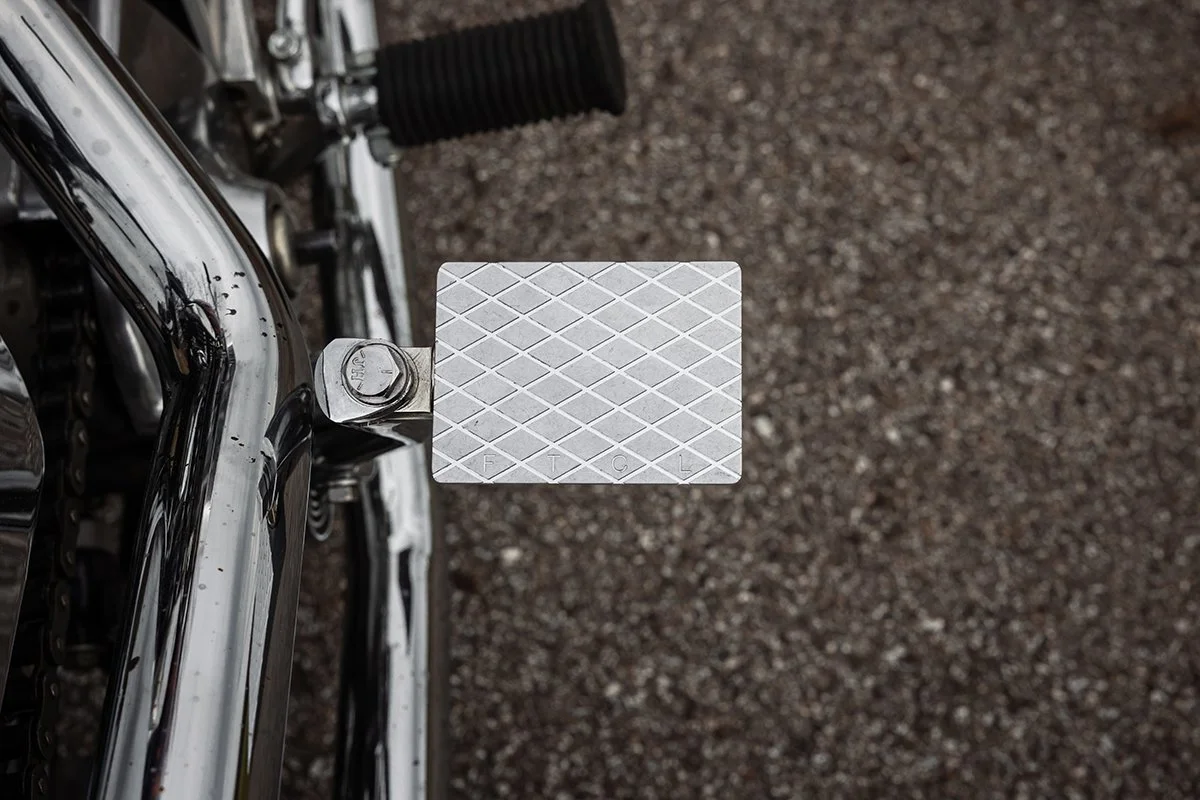
The bungs also feature a 10-24 set screw hole and a cone-tipped set screw for extra security. When installing, face the set screw hole downward to maintain an ultra-clean look.
(NOTE: These foot rests are not meant to stand on, or handle someone’s full body weight. )
(NOTE: Always use Loctite on peg threads and set screws.)
Kit Includes:
• 2 - Coped Bungs
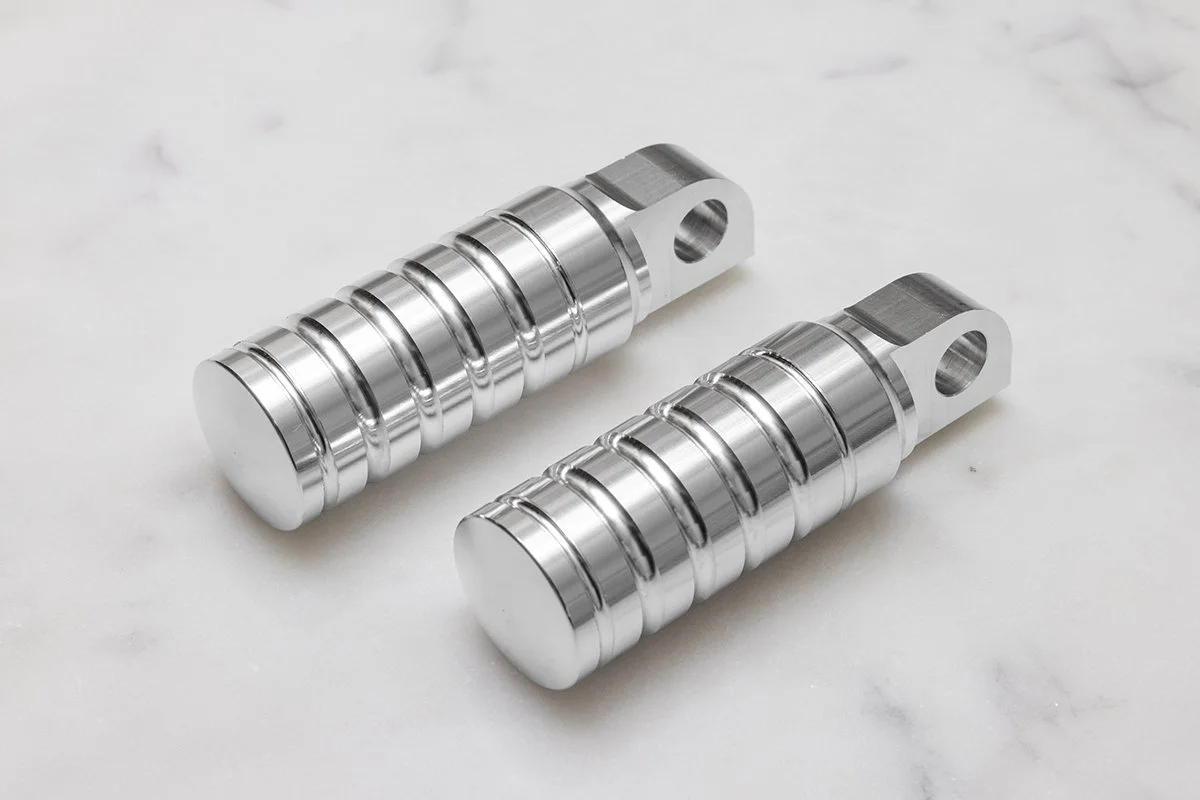
• 2 - OEM Replica Style Shifter Pegs
• 2 - Cone-Tipped Set Screws
• 1 - 3/32” Allen Key
Origin:
• Bungs and Allen Key: Made in America
• Pegs, and Set Screws: Made in Taiwan
Installation Instructions:
Step 1: Screw the peg into the bung until it seats fully and is flush with the rubber.
Step 2: Position the bung on the frame where you want to install it. Ensure the set screw hole faces downward. Use a marker or Dykem to mark the center of the cope and align it with a corresponding mark on the frame for proper positioning.
Step 3: Once placement is confirmed, remove the peg. Clamp the bung in position and tack weld it at four corners. (Important: Do not leave the peg installed during tack or finish welding—heat can damage the rubber.)
Step 4: Finish weld the bung securely to the frame.
Step 5: Final assembly—apply Blue or Red Loctite to the peg threads and install into the bung.
Step 6: If using the set screw for additional security, apply Loctite and install it using the 3/32” Allen key until fully seated. (Use the set screw only during final assembly.)
Planning your next chopper build but unsure whether to run passenger pegs or some other alternative? Most options out there are bulky and long—but not these. The Weld-on SHoRTi Passenger Foot Rests offer a sleek, minimalist look without sacrificing function.
Measuring just over 2.8” in length once welded to a frame rail, these pegs provide a solid footrest for your passenger while staying out of your way. They’re clean, classy, and have that “always meant to be there” vibe.
These coped bungs are designed to weld onto 1.25” tubing which is ideal for any Lowbrow Customs Hardtails or other frame rails with the diameter of 1.25” tubing. Each bung is threaded with 5/16”-24 threads, allowing compatibility with a wide variety of aftermarket shifter pegs. Stock OEM replica shifter pegs are included.
The bungs also feature a 10-24 set screw hole and a cone-tipped set screw for extra security. When installing, face the set screw hole downward to maintain an ultra-clean look.
(NOTE: These foot rests are not meant to stand on, or handle someone’s full body weight. )
(NOTE: Always use Loctite on peg threads and set screws.)
Kit Includes:
• 2 - Coped Bungs
• 2 - OEM Replica Style Shifter Pegs
• 2 - Cone-Tipped Set Screws
• 1 - 3/32” Allen Key
Origin:
• Bungs and Allen Key: Made in America
• Pegs, and Set Screws: Made in Taiwan
Installation Instructions:
Step 1: Screw the peg into the bung until it seats fully and is flush with the rubber.
Step 2: Position the bung on the frame where you want to install it. Ensure the set screw hole faces downward. Use a marker or Dykem to mark the center of the cope and align it with a corresponding mark on the frame for proper positioning.
Step 3: Once placement is confirmed, remove the peg. Clamp the bung in position and tack weld it at four corners. (Important: Do not leave the peg installed during tack or finish welding—heat can damage the rubber.)
Step 4: Finish weld the bung securely to the frame.
Step 5: Final assembly—apply Blue or Red Loctite to the peg threads and install into the bung.
Step 6: If using the set screw for additional security, apply Loctite and install it using the 3/32” Allen key until fully seated. (Use the set screw only during final assembly.)
 Image 1 of 8
 Image 2 of 8
 Image 3 of 8
 Image 4 of 8
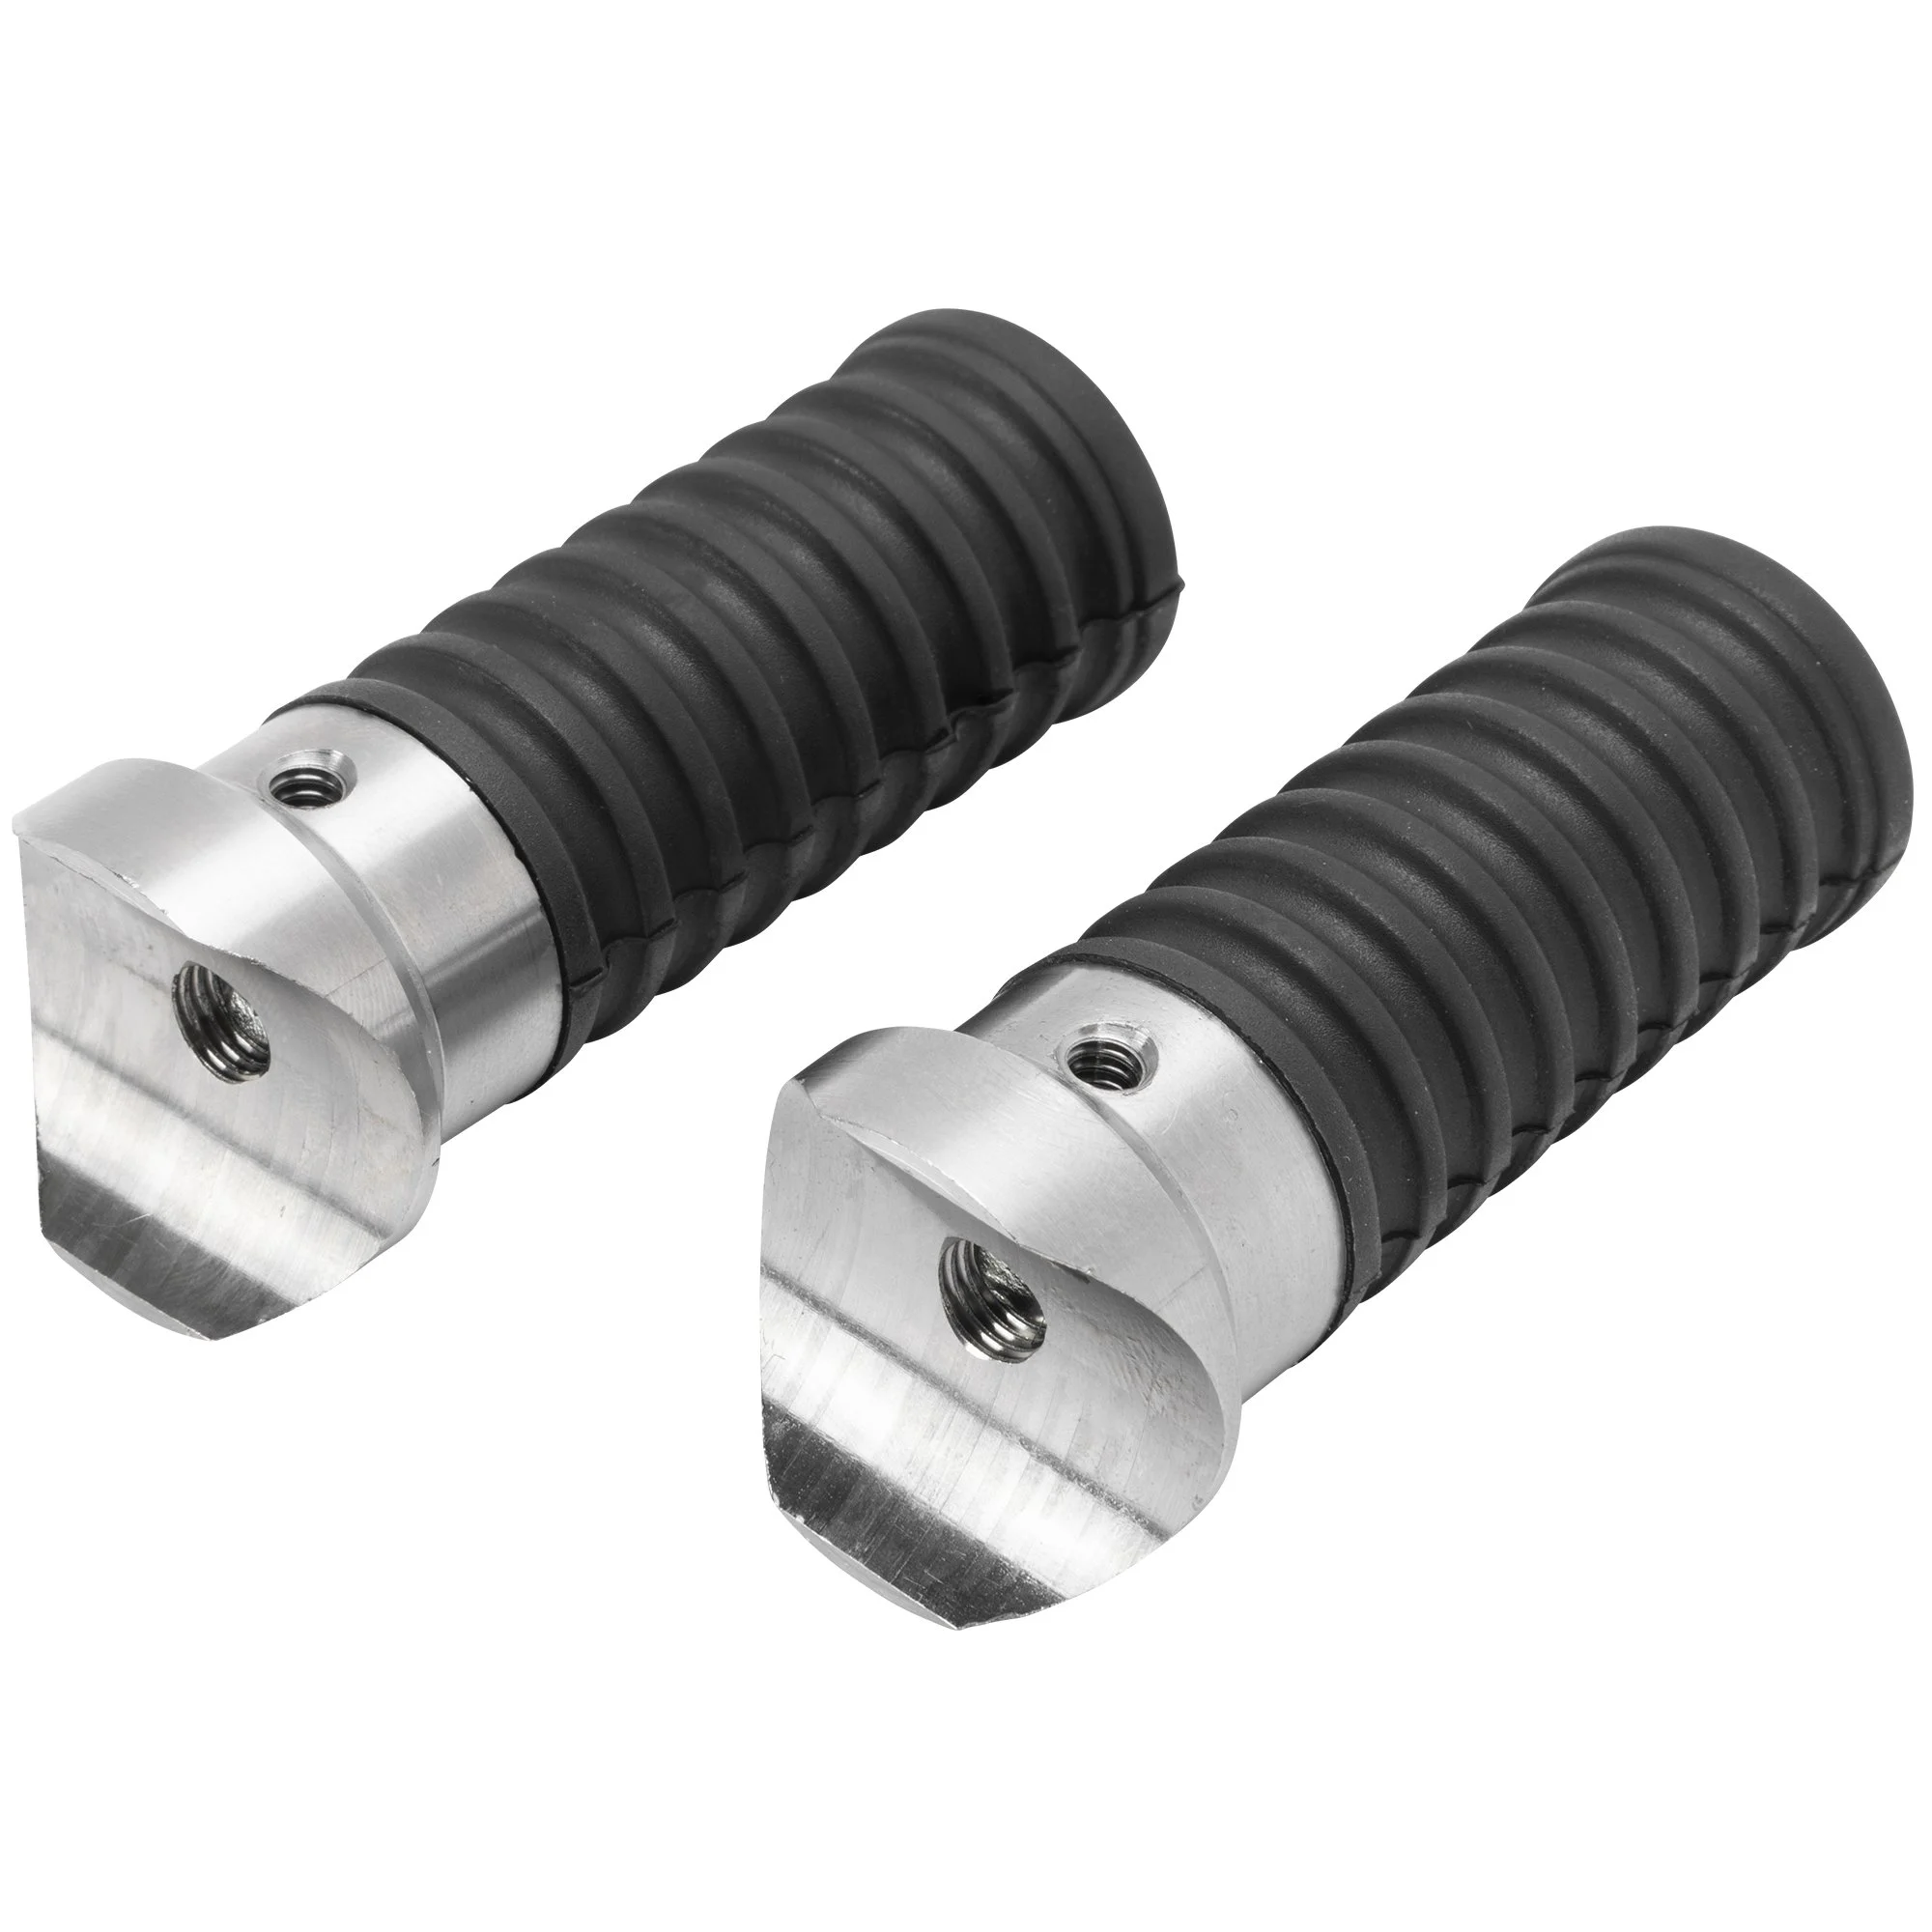 Image 5 of 8
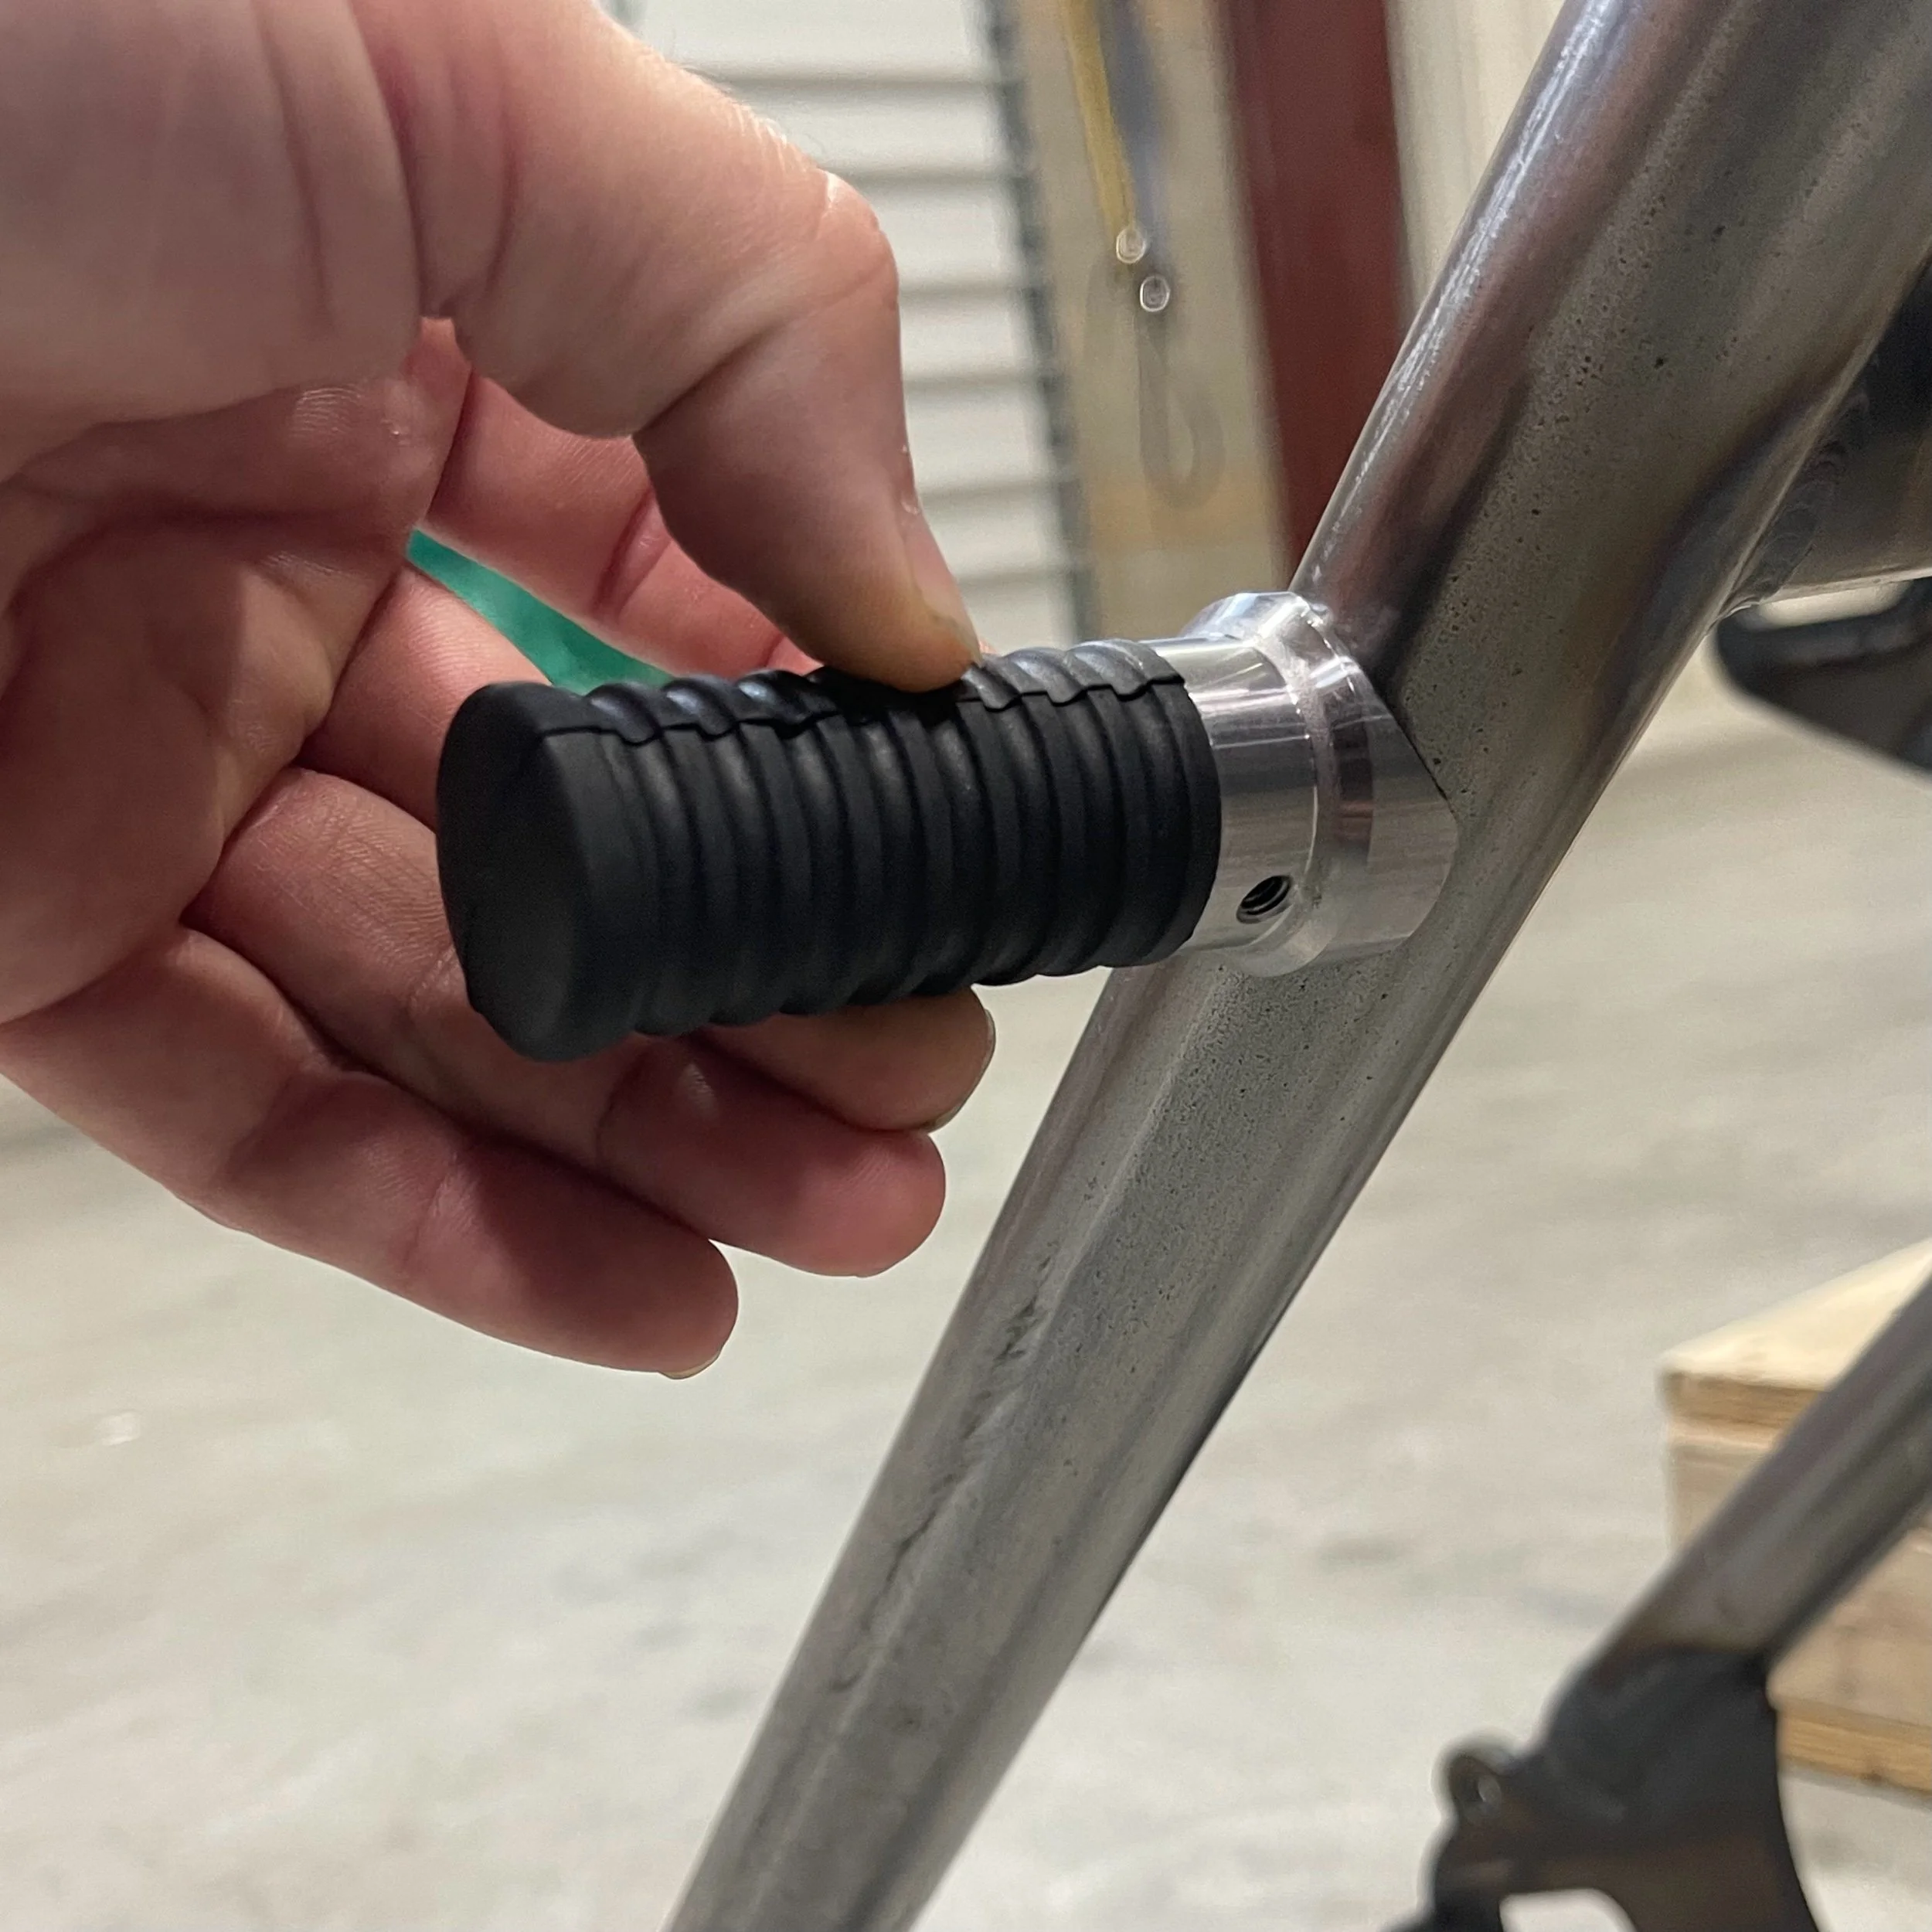 Image 6 of 8
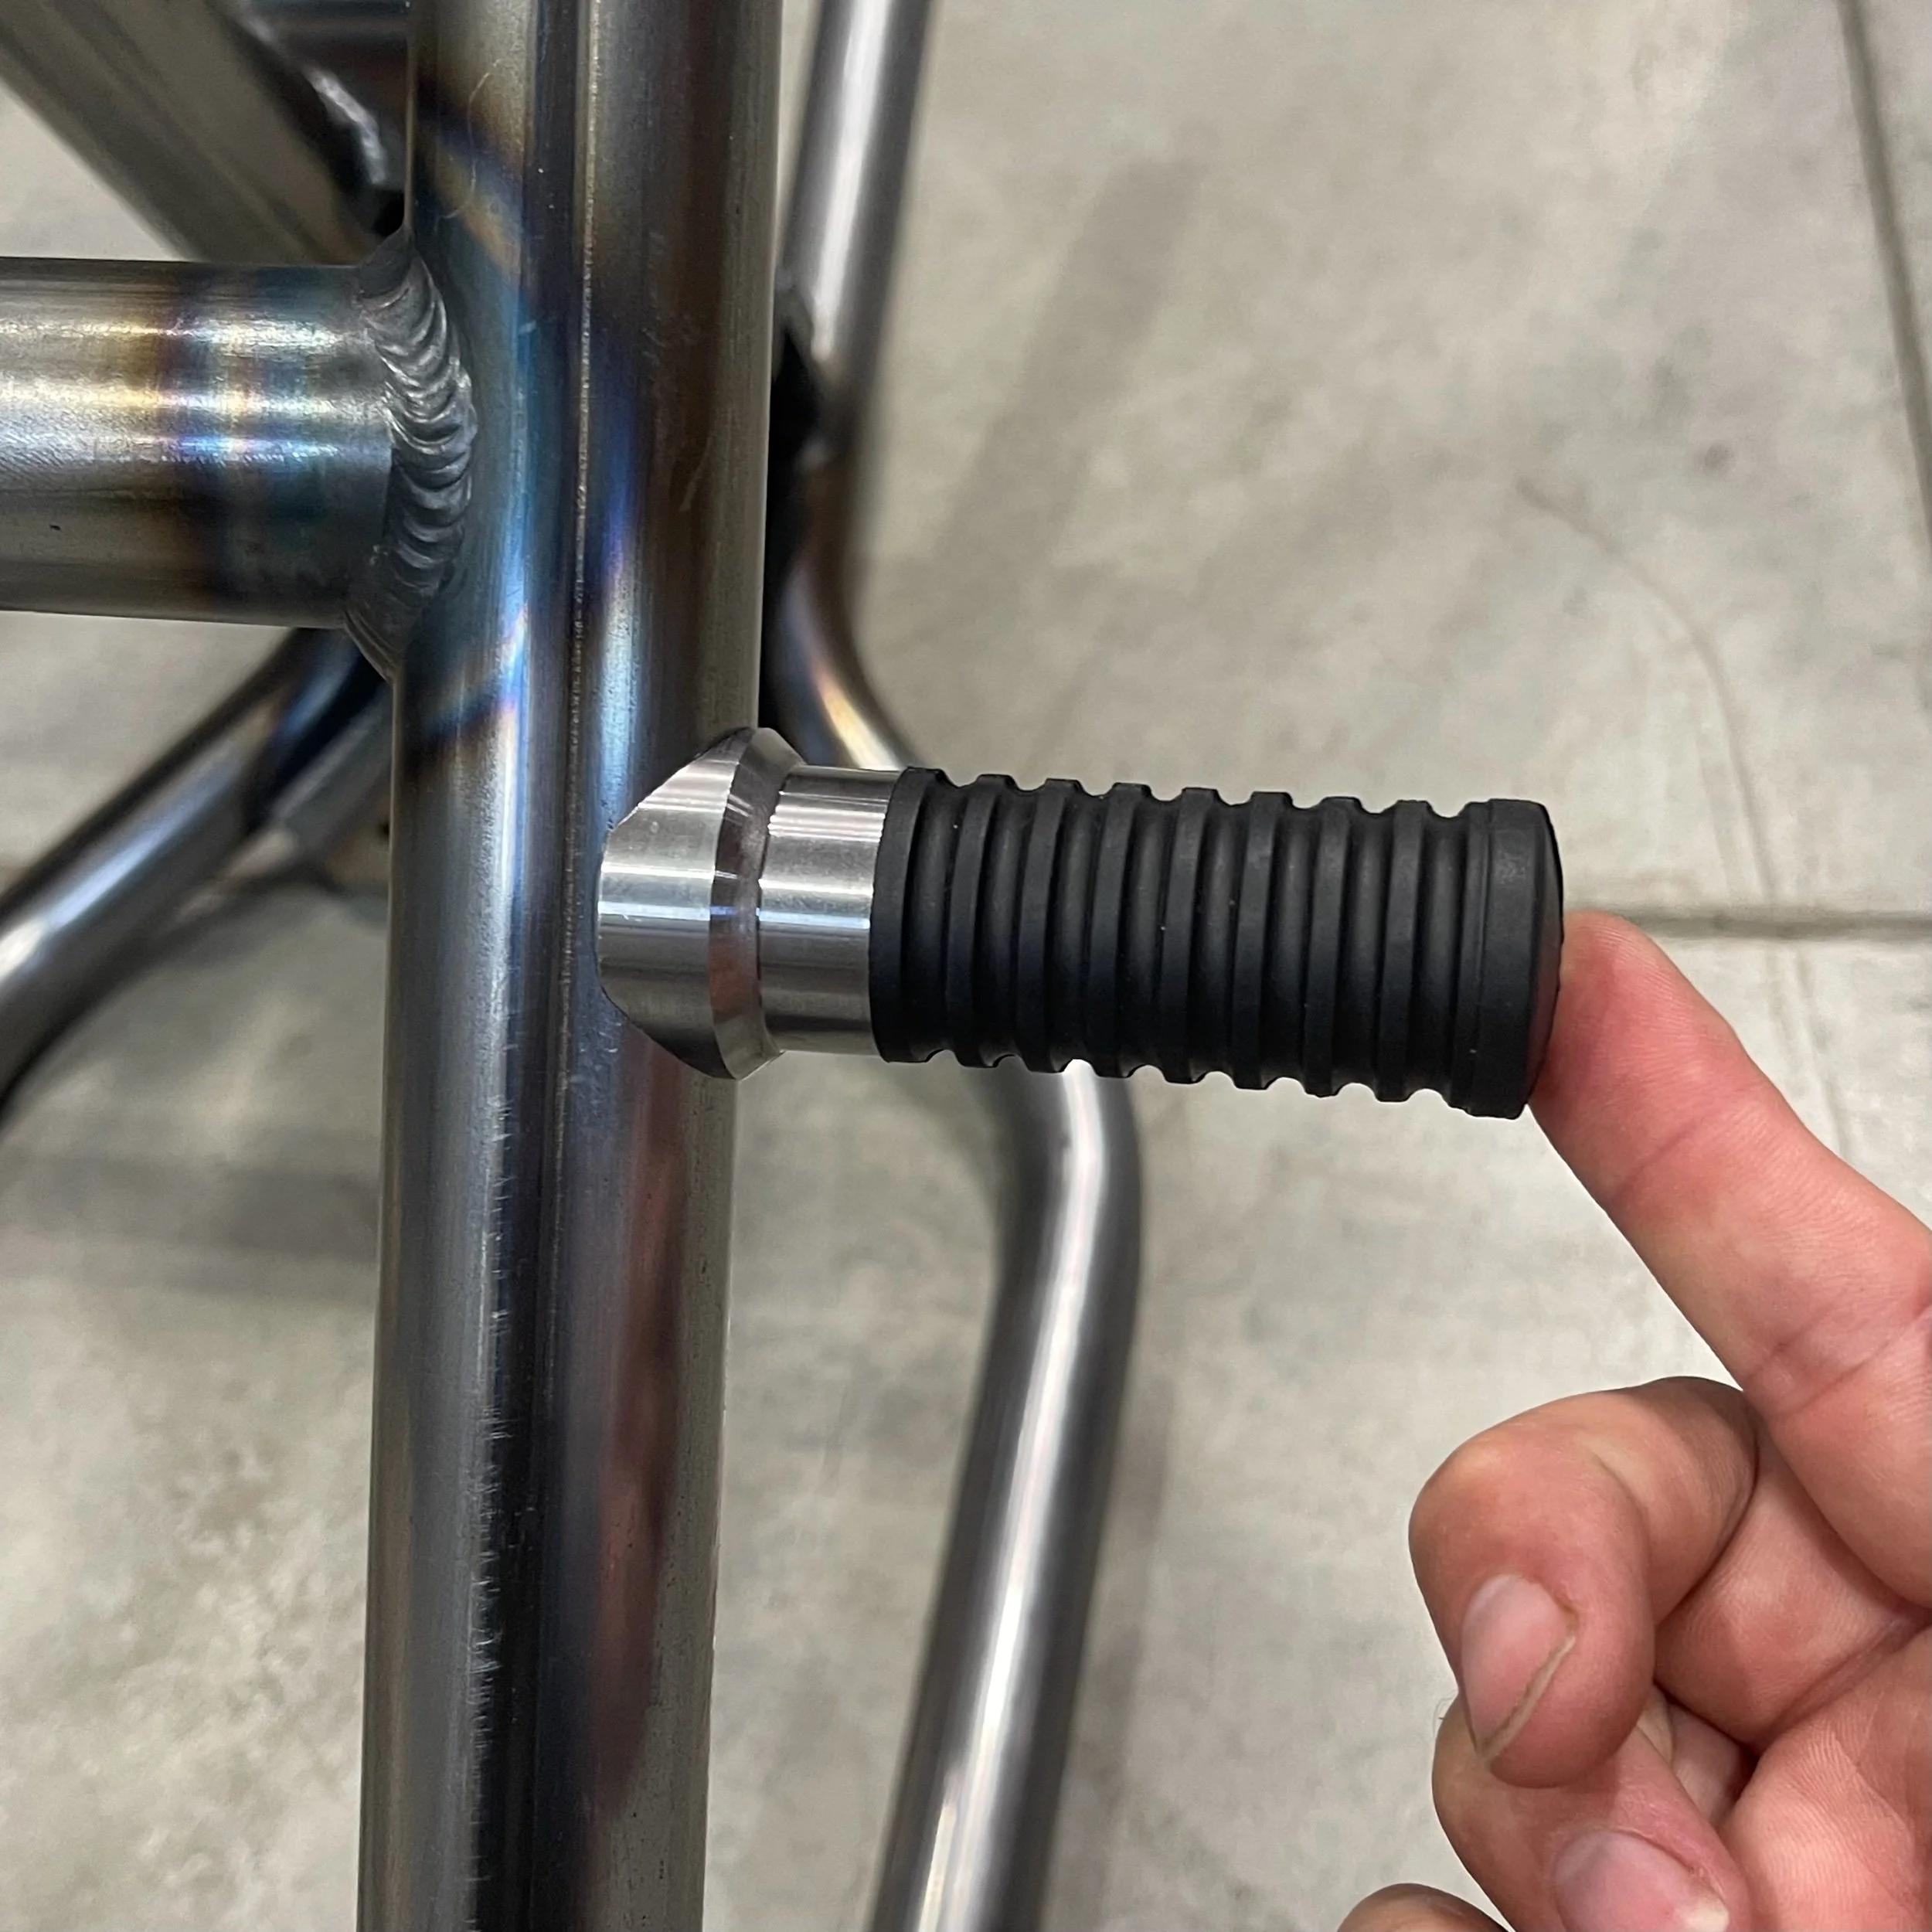 Image 7 of 8
 Image 8 of 8